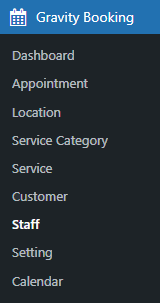
- Navigate to WordPress Admin Dashboard → Gravity Booking → Settings.
- Now you’re on the Settings page.
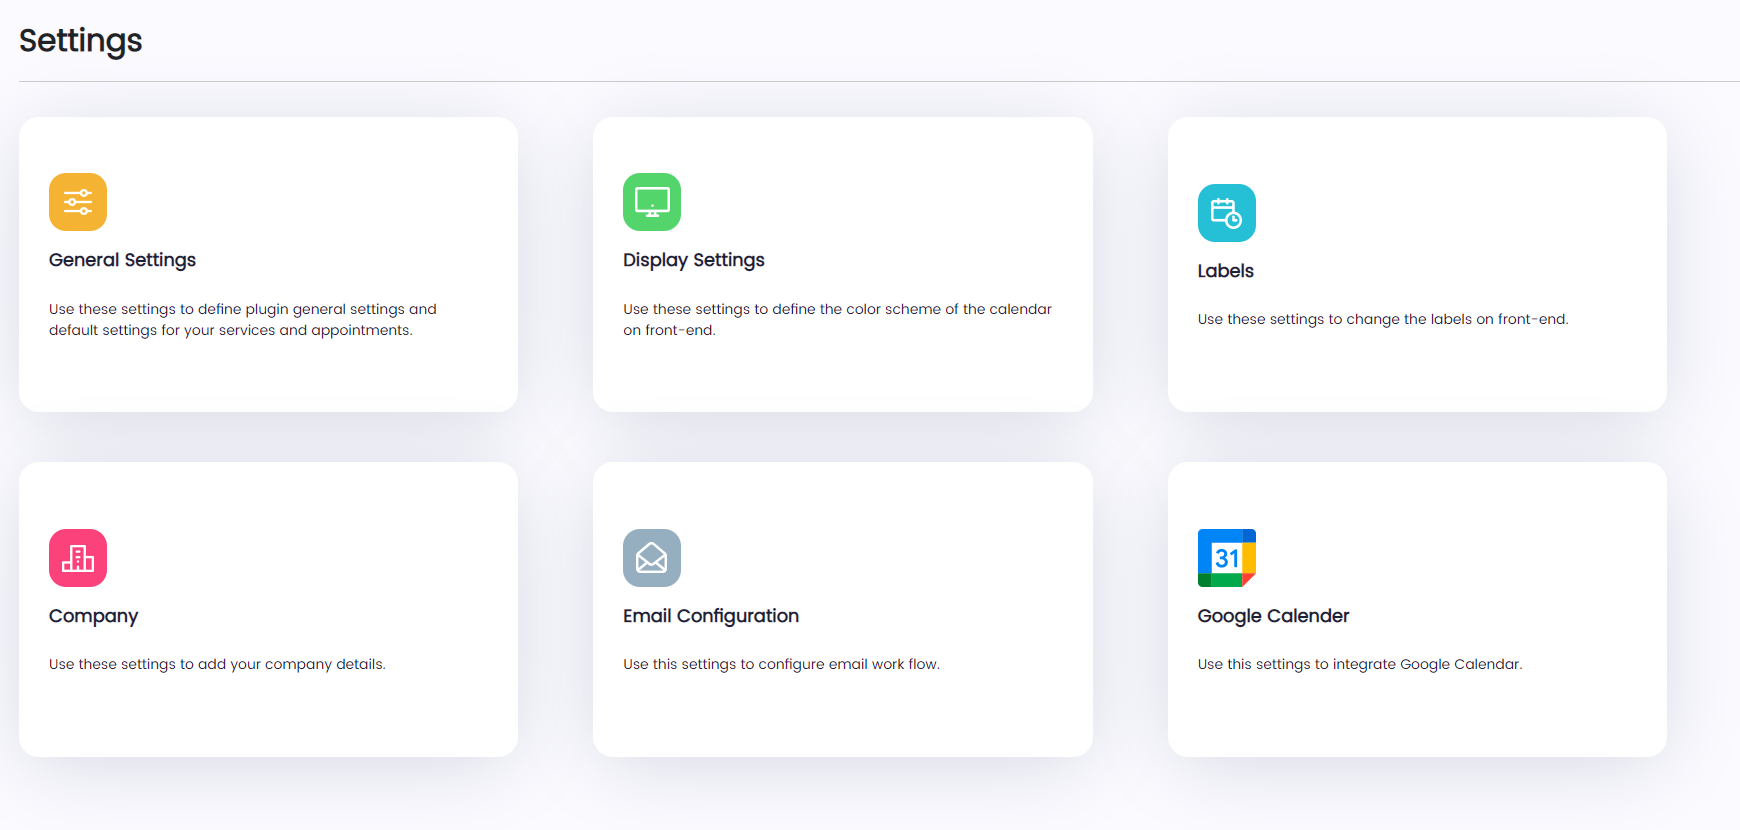
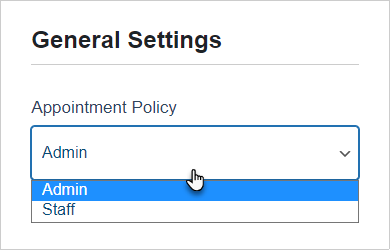
General Settings
- Click on the General Settings tab.
- Once done, a side menu will appear on the right-hand side of the page.
- All the General Settings options will be available in this side menu.
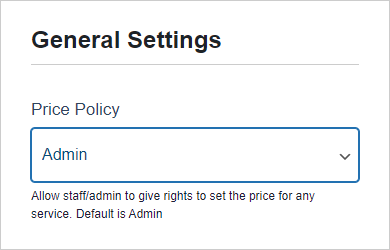
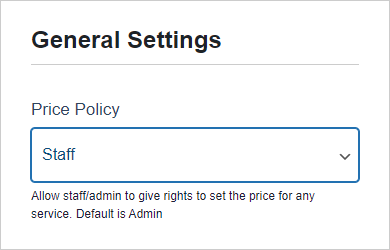
Price Policy
- In the Price Policy option, two suboptions are available in the dropdown menu.
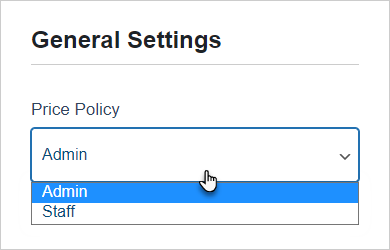
- Only the Administrator can modify the service prices if the Price Policy option is set to Admin.
- The Staff can also modify the service prices via the staff’s dashboard if the Price Policy option is set to Staff.
Back-End Impact on Staff’s Dashboard
- The Staff will log in to the website.
- Once done, the staff will navigate to WordPress Admin Dashboard → Staff.
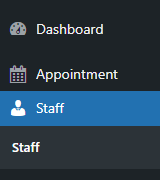
- Now, the staff is on the Staff page.

- Click on the Edit button in the Actions column.

- A popup will appear.
- The staff will navigate to the Services tab.
- Staff Dashboard when the Price Policy option is not set to Staff
- We can see that the staff cannot change the price of the services since they are locked.
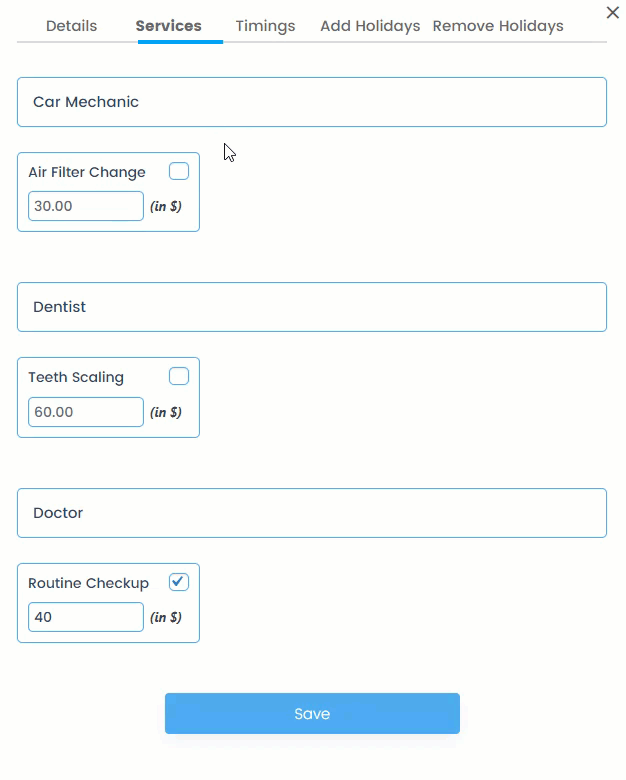
- Staff Dashboard when the Price Policy option is set Staff
- We can see that the staff can now change the price of the services since the field is now editable.

NOTE: When the Price Policy option is set to Staff, that means now the Staff can also modify the service prices via the Staff’s Dashboard. However, the Administrator can always modify the service prices via the Admin’s Dashboard.
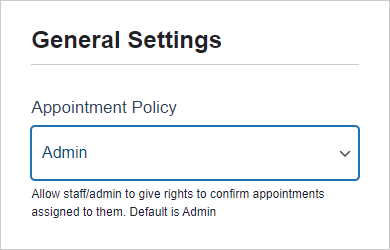
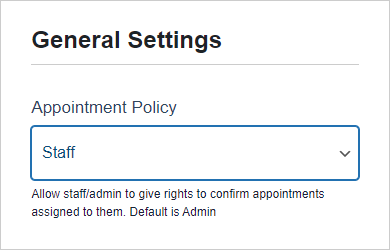
- Appointment Policy
- In the Appointment Policy option, two suboptions are available in the dropdown menu.
- Only the Administrator can change the status of any appointment if the Appointment Policy option is set to Admin.
- The Staff can also change the status of only their appointments via the staff’s dashboard if the Appointment Policy option is set to Staff.
- Back-End Impact on Staff’s Dashboard
- The Staff will log in to the website.
- Once done, navigate to WordPress Admin Dashboard → Appointment.
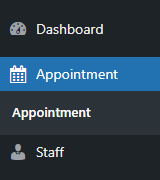
- Now the Staff is on the Appointment page.
- They can only view appointments assigned to them.
- Staff Dashboard when the Appointment Policy option is not set to Staff
- We can see only view the appointments assigned to them and cannot change the status of the appointments since they are locked.
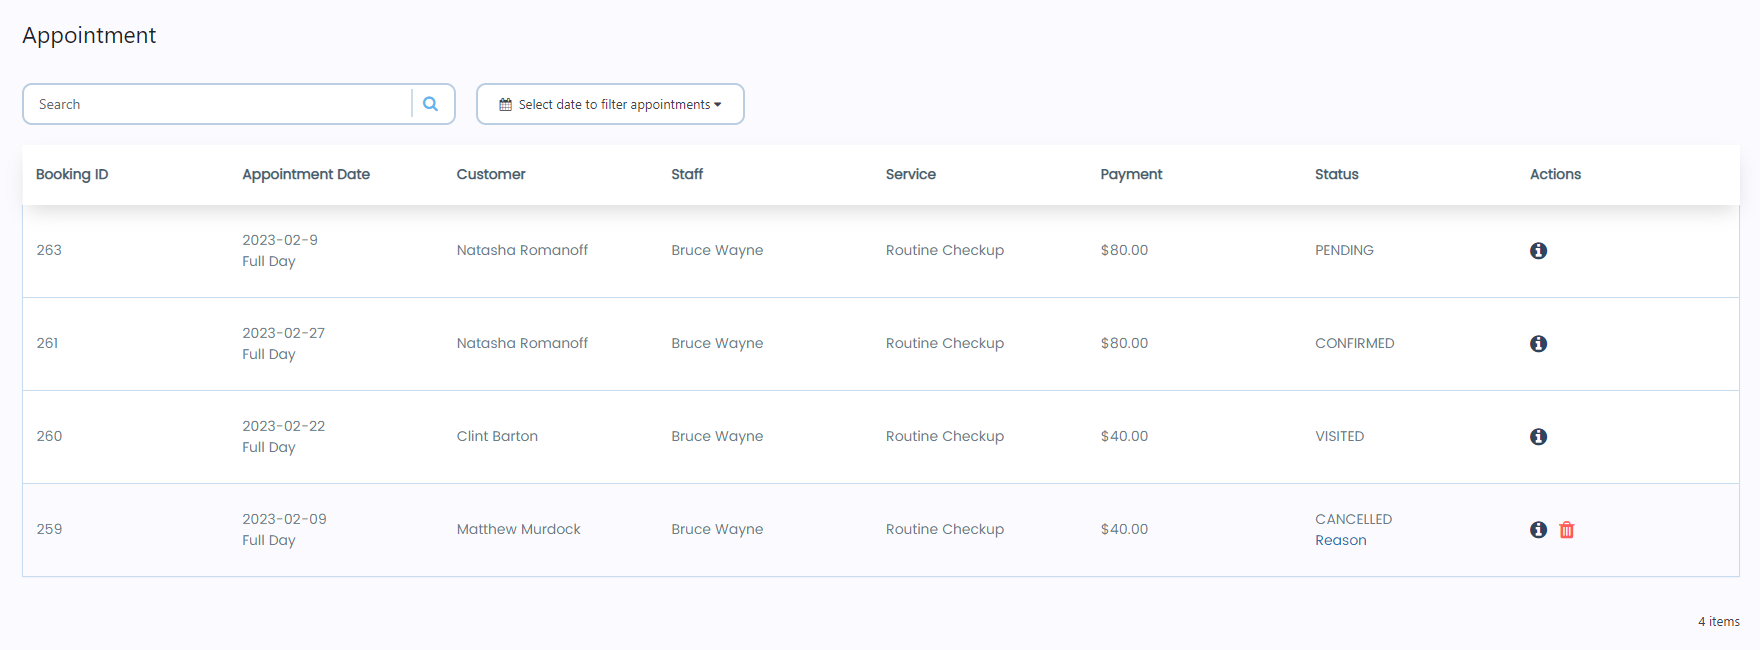
- Staff Dashboard when the Appointment Policy option is set Staff
- We can see that the staff can now change the status of their appointments since the status field will become editable.
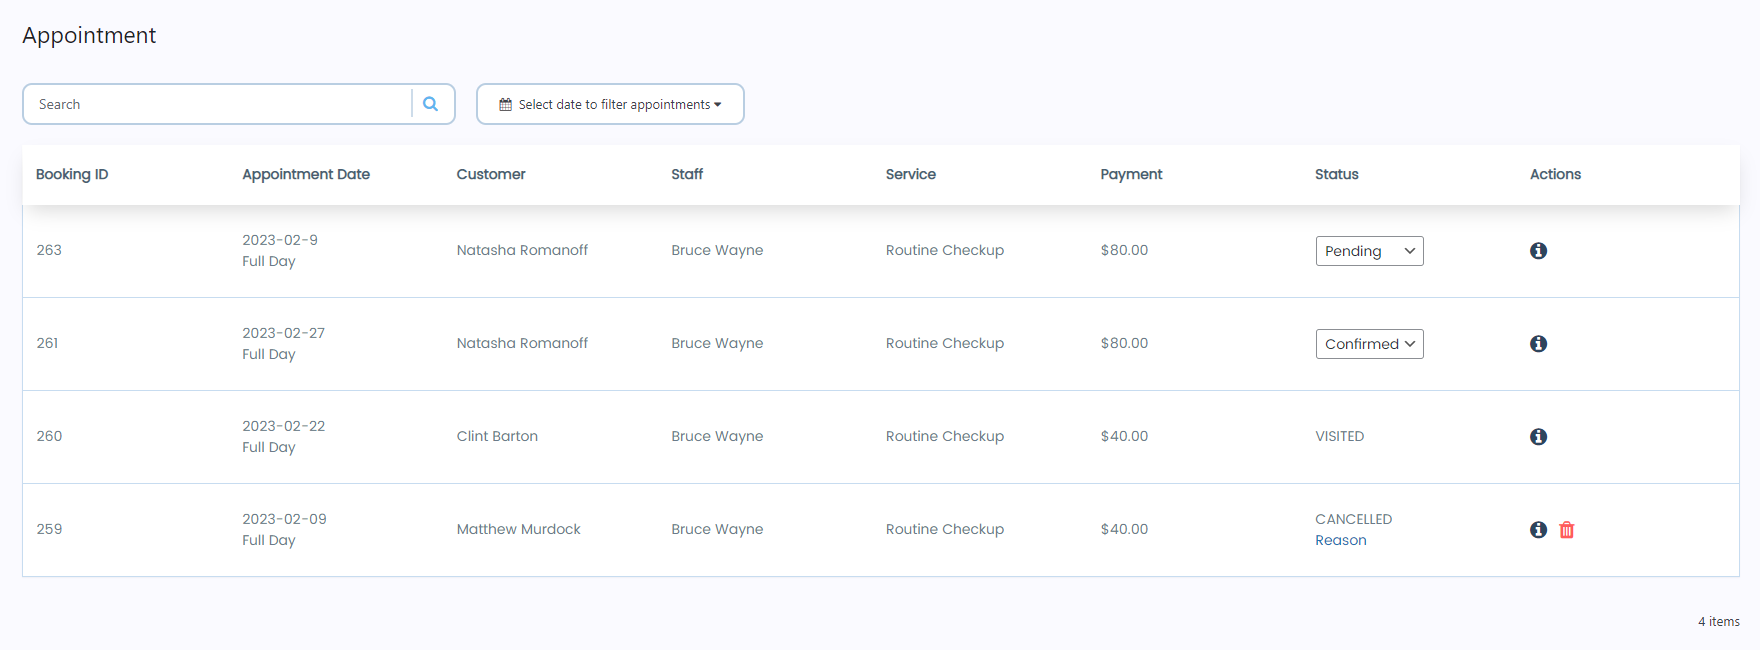
- Click on the dropdown menu to change the status of the appointment.
NOTE: When the Appointment Policy option is set to Staff, that means now the Staff can also change the status of their appointments via the Staff’s Dashboard. However, the Administrator can always change the status of any appointment via the Admin’s Dashboard.
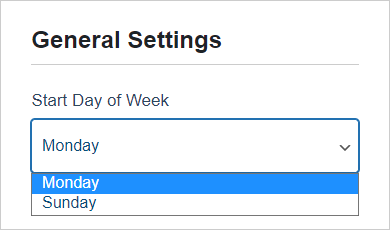
3. Start Day of Week
- In the Start Day of Week option, two suboptions are available in the dropdown menu.
- The Administrator can select the start day of the week as Monday or Sunday, which will appear in the calendar on the Bookings Form page and Admin’s Dashboard.
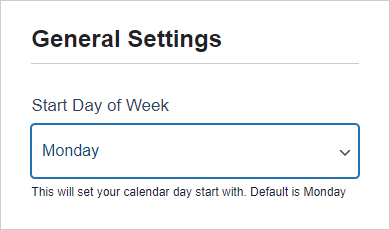
- Start Day of Week – Monday
- Monday will appear as the starting day of the week if the Administrator sets Monday in the Start Day of Week option.
Front-End Impact – Bookings Form page
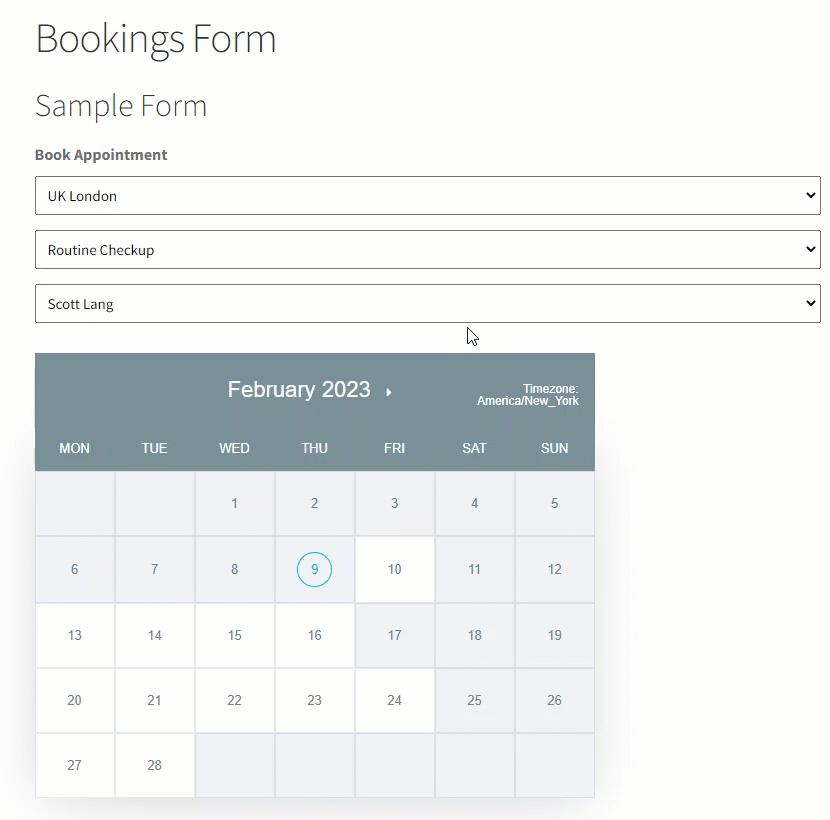
- The customer will navigate to the Bookings Form page on the website.
- The customer will fill out the form according to his requirement, and a calendar will appear.
- We can see that in the calendar, the starting day of the week is Monday.

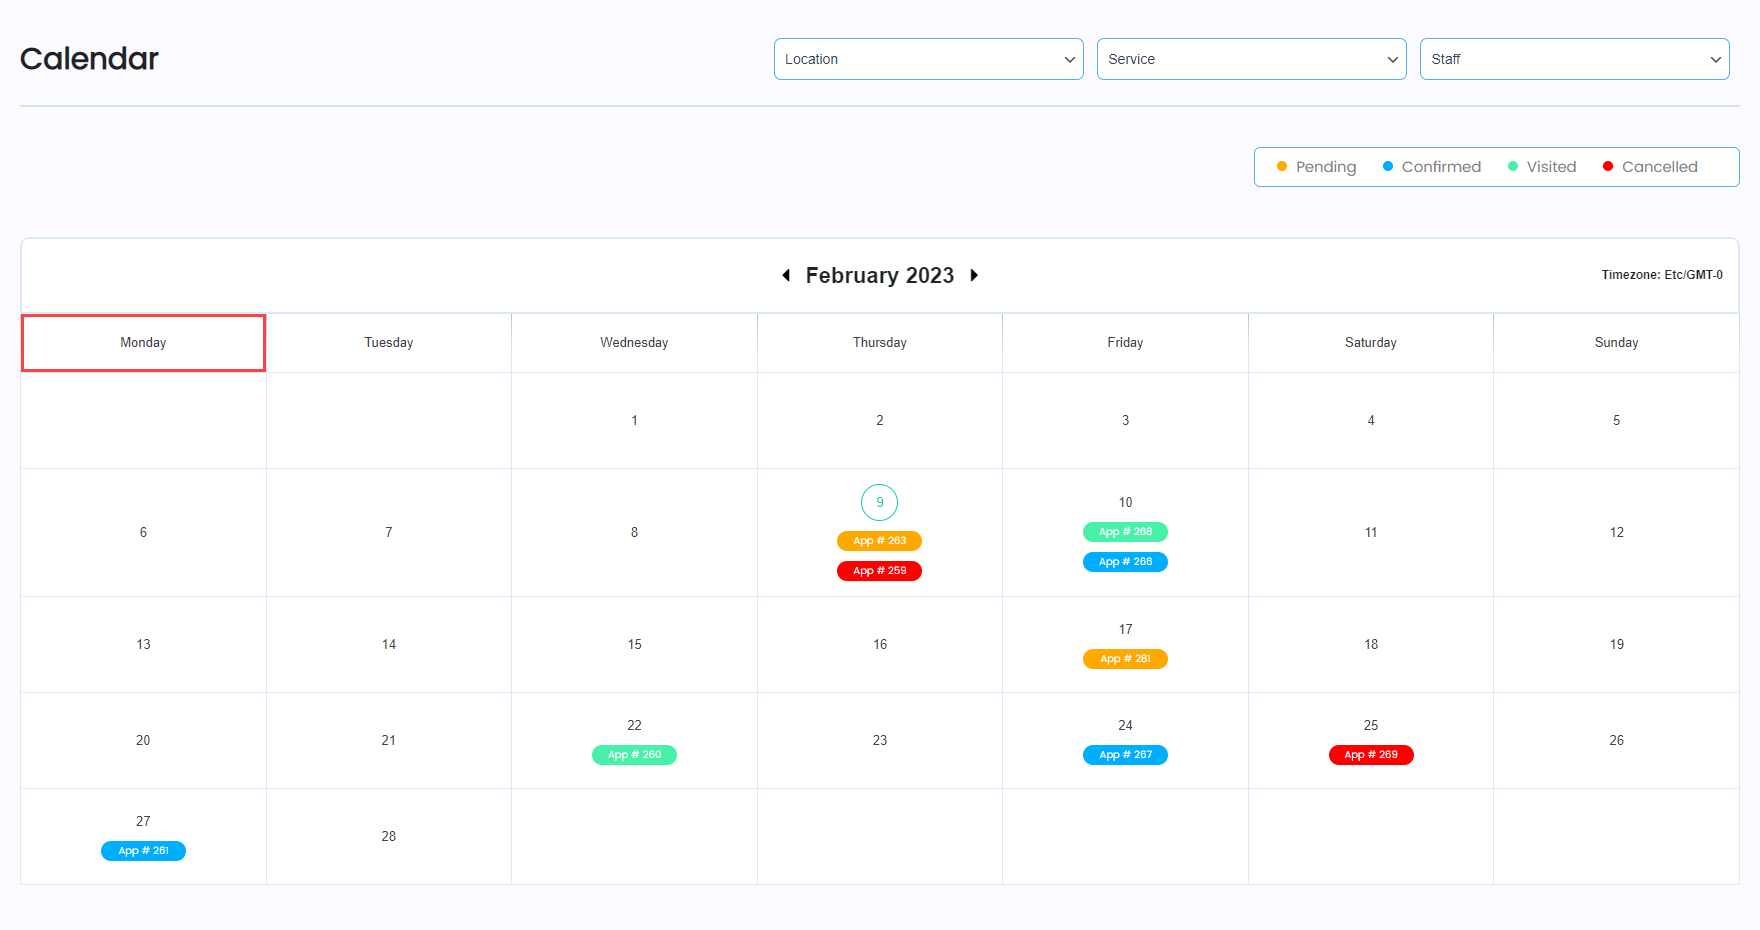
- Back-End Impact – Calender section
- The Admin will navigate to WordPress Admin Dashboard → Gravity Booking → Calendar.
- Now you’re on the Calendar page.
- On the Calendar page, we can see that the starting day of the week is Monday.
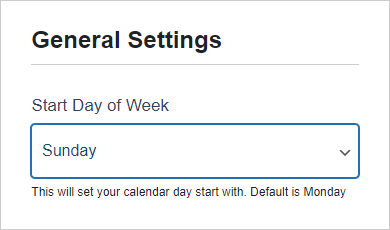
- Start Day of Week – Sunday
- Sunday will appear as the starting day of the week if the Administrator sets Sunday in the Start Day of Week option.
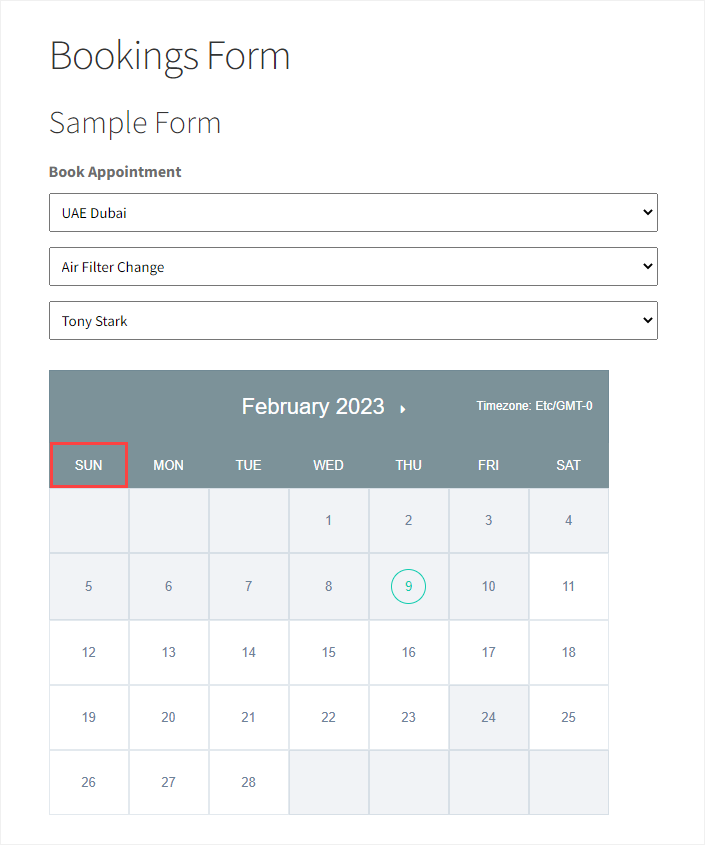
- Front-End Impact – Bookings Form page
- The customer will navigate to the Bookings Form page on the website.
- The customer will fill out the form according to his requirement, and a calendar will appear.
- We can see that in the calendar, the starting day of the week is Sunday.
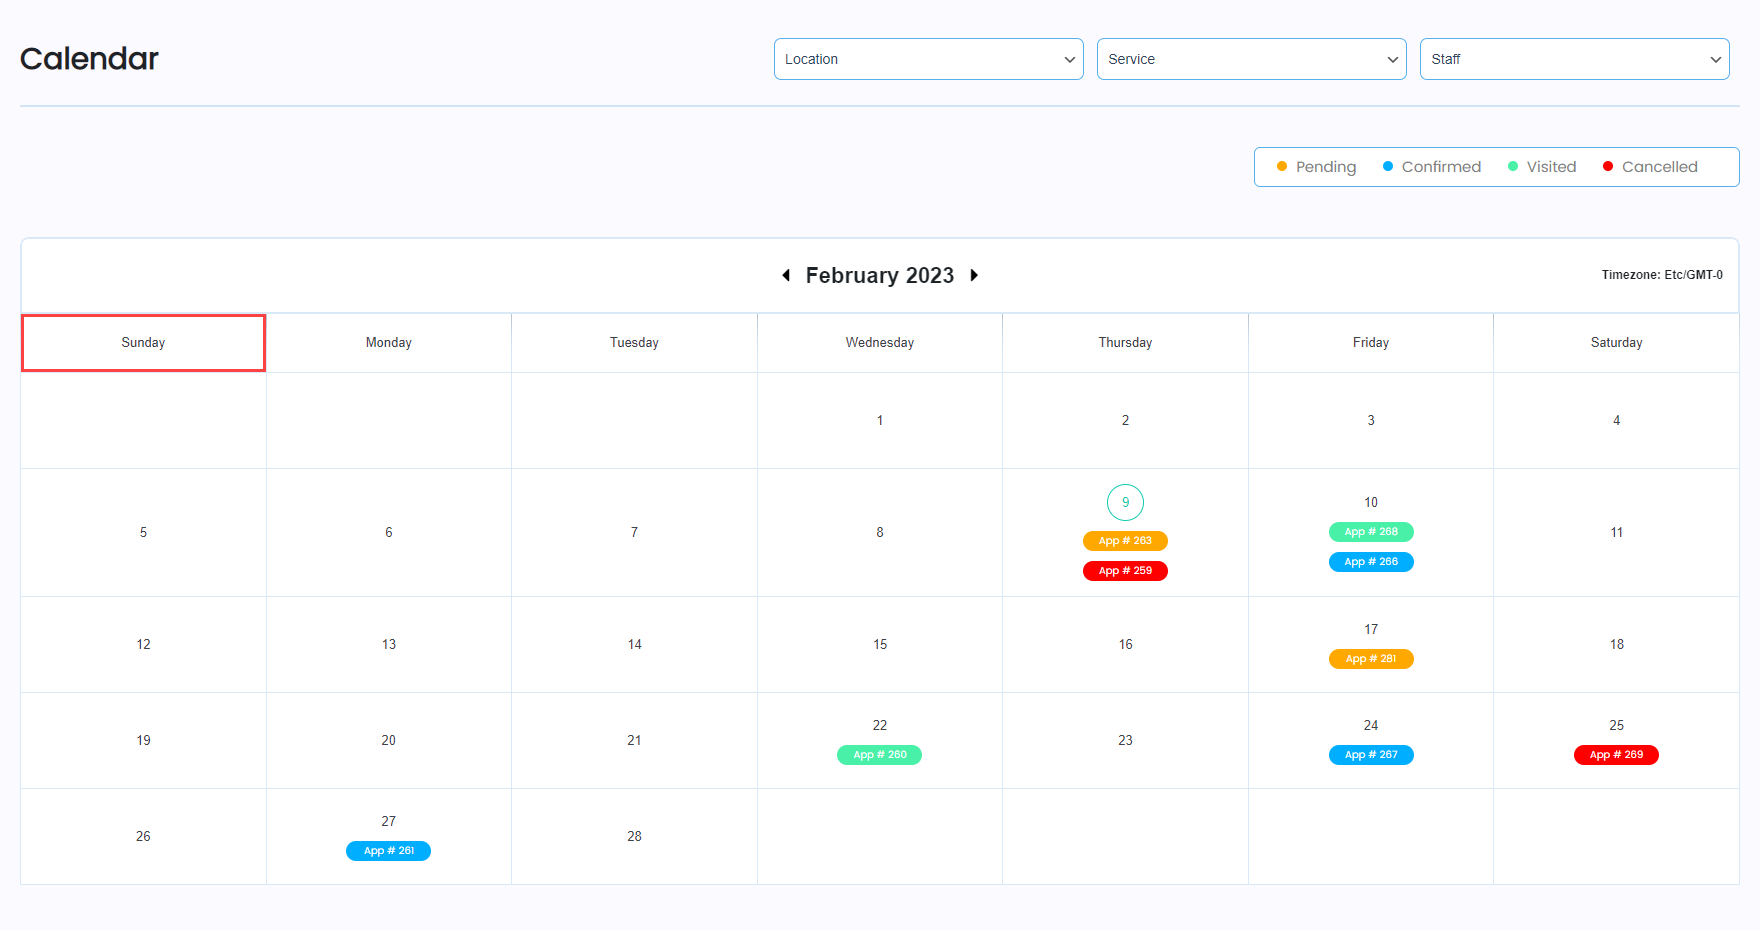
- Back-End Impact – Calender section
- The Admin will navigate to WordPress Admin Dashboard → Gravity Booking → Calendar.
- Now you’re on the Calendar page.
- On the Calendar page, we can see that the starting day of the week is Sunday.
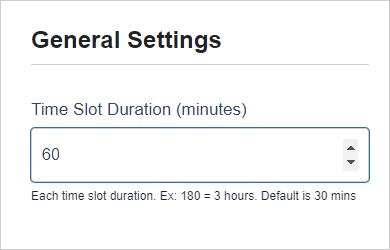
4. Time Slot Duration (minutes)
- In this option, the Administrator can set Time Slots Duration globally for Staff.
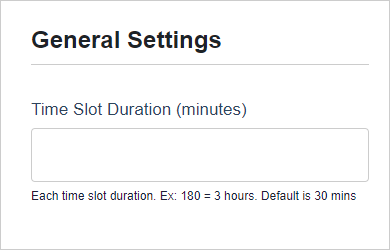
- Enter the Time Slot Duration in minutes.
- For Example: If we enter 180, it would mean 180 Minutes = 3 Hours.
- Click on the Save button.
- Back-End Impact – Calender section
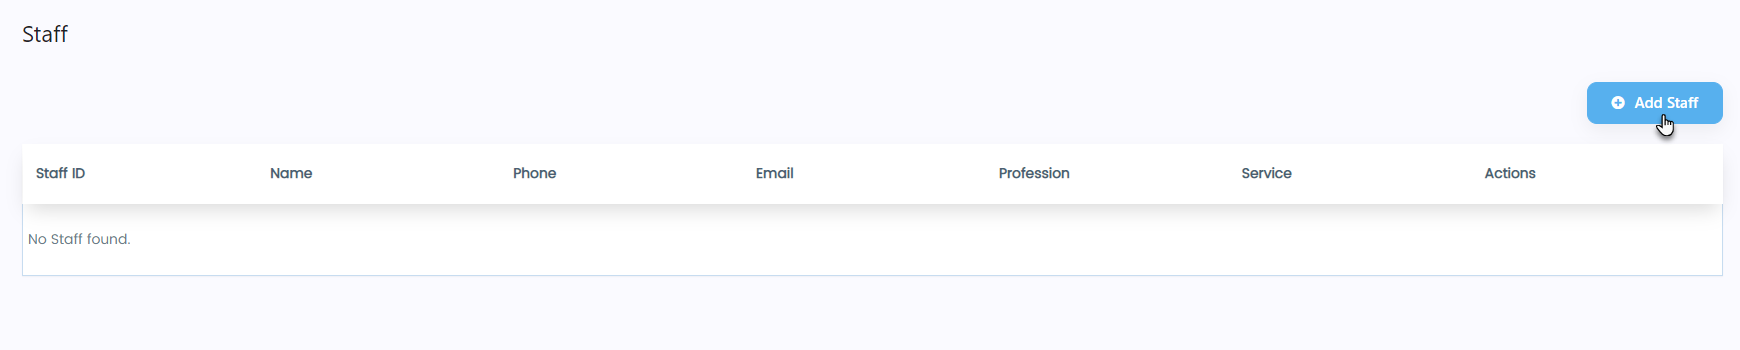
- Navigate to WordPress Admin Dashboard → Gravity Booking → Staff.
- Now you’re on the Staff page.
- Click on the Add Staff button.
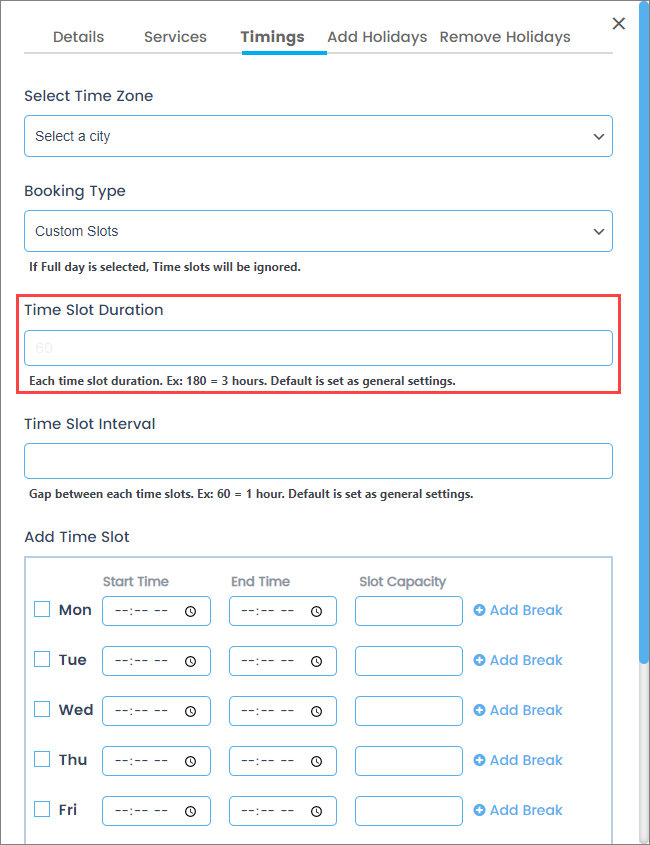
- A popup will appear.
- Navigate to the Timings tab.
- Navigate to the Time Slot Duration option.
- We can see what we entered will now appear in the Time Slot Duration field as default.
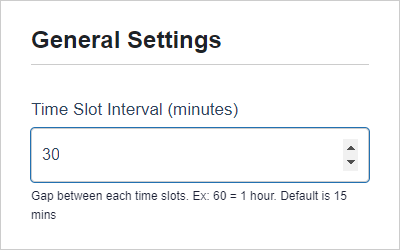
5. Time Slot Interval (minutes)
- In this option, the Administrator can set Time Slots Interval globally for Staff.
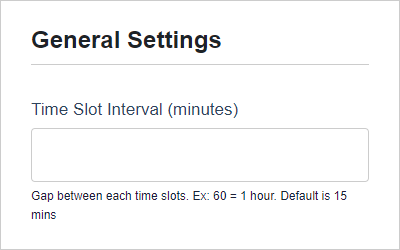
- Enter the Time Slot Interval in minutes.
- For Example: If we enter 60, it would mean 60 Minutes = 1 Hour.
- Click on the Save button.
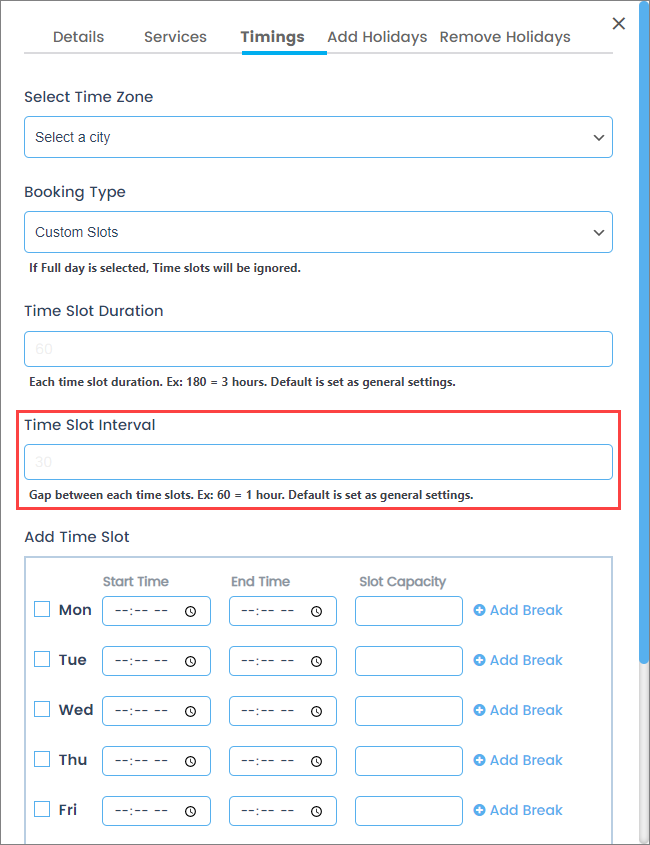
Back-End Impact – Calendar section
- Navigate to WordPress Admin Dashboard → Gravity Booking → Staff.
- Now you’re on the Staff page.
- Click on the Add Staff button.
- A popup will appear.
- Navigate to the Timings tab.
- Navigate to the Time Slot Interval option.
- We can see what we entered will now appear in the Time Slot Interval field as default.
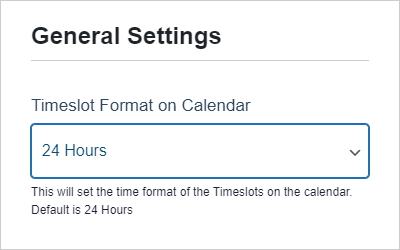
6. Timeslots on Calendar
- In the Timeslots Format on Calendar option, two suboptions are available in the dropdown menu.
- The Administrator can select the time format of the timeslots (12 Hours or 24 Hours) on the calendar of the Bookings Form page.
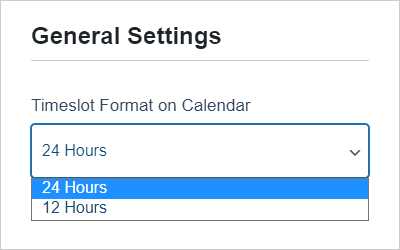
Timeslots Format on Calendar – 24 Hours
- The timeslots format will appear in 24 Hours on the calendar if the Administrator sets 24 Hours in the Timeslots Format on Calendar option.
Front-End Impact – Bookings Form page
- The customer will navigate to the Bookings Form page on the website.
- The customer will fill out the form according to his requirement, and a calendar will appear.
- Select the date on the calendar.
- The timeslots format will now appear in the 24 Hours format in the calendar.
Timeslots Format on Calendar – 12 Hours
- The timeslots format will appear in 12 Hours on the calendar if the Administrator sets 12 Hours in the Timeslots Format on Calendar option.
Front-End Impact – Bookings Form page
- The customer will navigate to the Bookings Form page on the website.
- The customer will fill out the form according to his requirement, and a calendar will appear.
- Select the date on the calendar.
- The timeslots format will now appear in the 12 Hours format in the calendar.
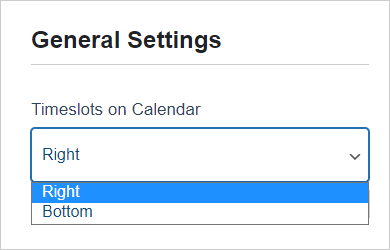
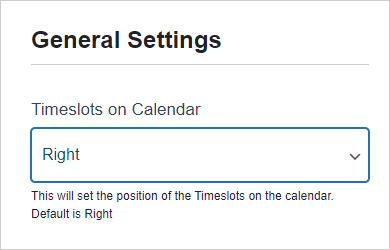
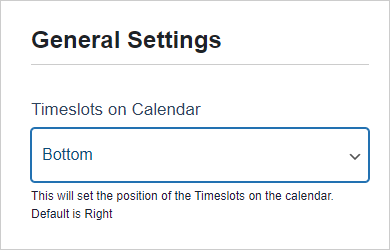
7. Timeslots on Calendar
- In the Timeslots on Calendar option, two suboptions are available in the dropdown menu.
- The Administrator can select the position of the timeslots on the calendar of the Bookings Form page.
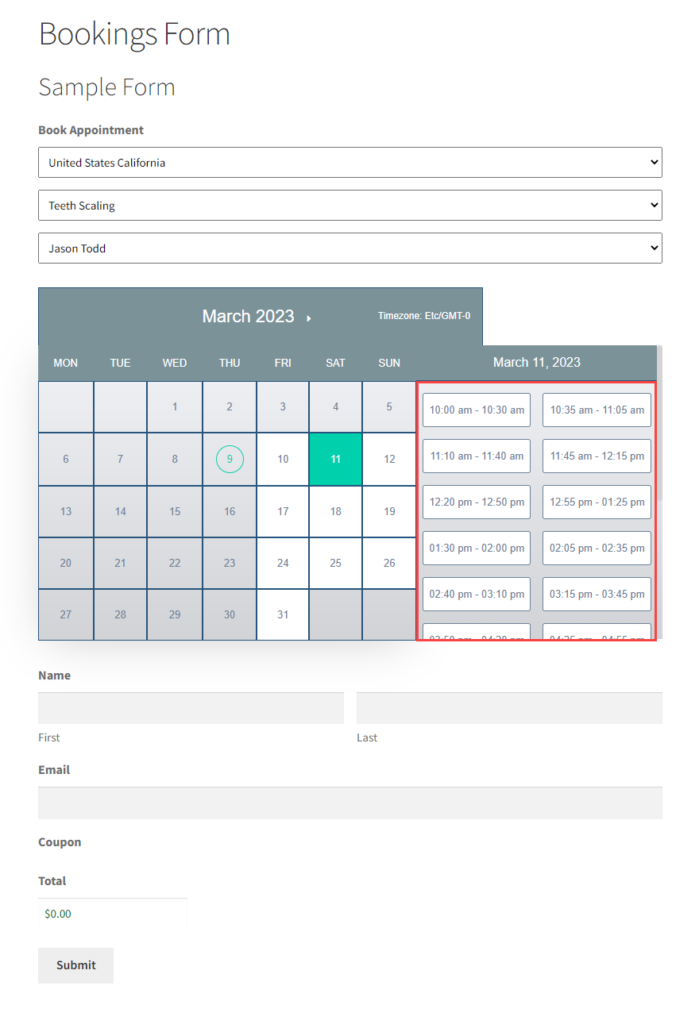
Timeslots on Calendar – Right
- The timeslots will appear on the right side of the calendar if the Administrator sets Right in the Timeslots on Calendar option.
Front-End Impact – Bookings Form page
- The customer will navigate to the Bookings Form page on the website.
- The customer will fill out the form according to his requirement, and a calendar will appear.
- Select the date on the calendar.
- The timeslots will now appear on the Right side of the calendar.
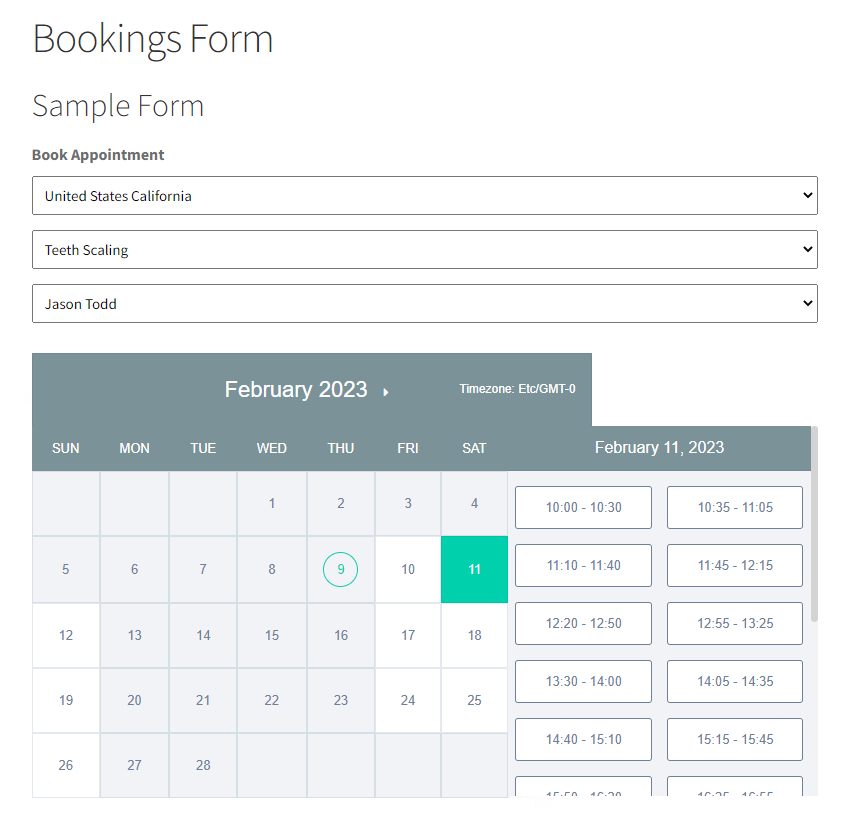
Timeslots on Calendar – Bottom
- The timeslots will appear at the bottom of the calendar if the Administrator sets Bottom in the Timeslots on Calendar option.
Front-End Impact – Bookings Form page
- The customer will navigate to the Bookings Form page on the website.
- The customer will fill out the form according to his requirement, and a calendar will appear.
- Select the date on the calendar.
- The timeslots will now appear at the Bottom of the calendar.

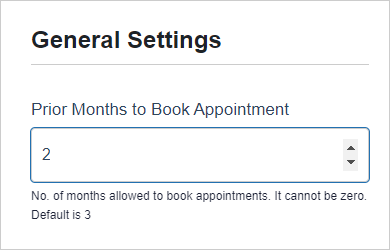
7. Prior Months to Book Appointment
- In the Prior Months to Book Appointment option, the administrator will set the no. of months allowed to book the appointments on the Booking Forms page.
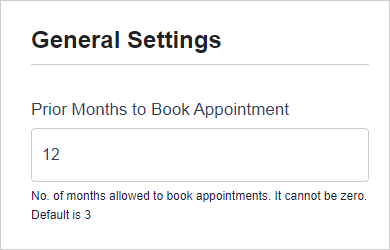
- Set the no. of months according to your requirement.
Front-End Impact
- The customer will navigate to the Bookings Form page on the website.
- The customer will fill out the form according to his requirement, and a calendar will appear.
- Now, we can click on the arrow keys present with the month’s section.
- Click on the arrow keys to move forward or backward.