


Gravity Forms is a popular WordPress plugin that lets you create online forms easily. It captures submissions like contact forms, quiz answers, job applications, etc. If you get a lot of form submissions, you may want an automated way to export the Gravity Forms entries to a spreadsheet. Exporting gravity forms entries lets you save them, analyze the data, and do other useful things.
You can also configure Gravity Forms to attach submitted gravity form entries to email notifications automatically. This saves and shares entries with other team members or departments.
In this post, we will learn two methods for exporting Gravity Forms entries from Gravity Forms:
Benefits of Exporting Gravity Forms Entries

Exporting gravity forms entries from Gravity Forms has several benefits:
Answering key business questions
Exports allow analyzing gravity forms entries in spreadsheets to uncover insights. For example, sales lead over time, most selected quiz answers, common job application locations, etc. Exporting to a spreadsheet makes data analysis much easier.
Saving and backing up submissions
Instead of submissions just being saved in the WordPress database, exports create persistent spreadsheets stored in the cloud (Google Drive, Dropbox, or similar). So you have a backup if something happens to your site.
Sharing entries across teams
Automated exports can email submissions to other people or teams (sales, accounting, HR, etc.) for further processing. No need to manually create exports and attachments.
Easy compliance with data regulations
Exporting gravity form entries allows for proper management and storage of data for legal compliance. For example, GDPR is in Europe, or CCPA is in California.
Overall, exporting Gravity Forms entries solves many real business needs – analysis, backup, sharing, and compliance. Next, I’ll explain how to set up automated exports.
Automatically Exporting Entries To Google Sheets
One easy way to export Gravity Forms entries from Gravity Forms is to use Google SpreadSheet In Gravity Forms or Google Sheets addon. This creates a live Google Sheet that updates automatically as people submit your forms.
Here are the key steps to configure automated Google Sheet exports:
Configuring Gravity Forms Google Sheets add-on
First, install the “Gravity Forms Google Sheets Add-On” from the official WordPress directory or your Gravity Forms account. After activating:
- Go to Forms > Settings > Google Sheets addon.
- Click Authentication and login with Google.
- Select which Google account to allow access. This will be where your exported sheets are created.
Once connected, the addon can export entries automatically.
Setting up automated exports
When editing any Gravity Form, go to Settings > Google Sheets:
- Turn on “Enable Google Sheets Integration.”
- Select a Google Sheet or create a new one.
- Configure Form field value and column names. Map each Gravity Form field to a Google Sheet column.
- Set Update Options to “Append to sheet” and turn on auto-updating.
- Save settings and submit a test entry – it will export automatically!
The live Google Sheet will update with a new row on each form submission.
Filtering and formatting exported entries
Inside the Google Sheet itself, you can now:
- Sort, filter, and analyze the exported gravity forms entries using all of Sheets’ functionality
- Format cells, column sizes, text formatting, etc.
- Create pivot tables and charts summarizing your form submissions
- Share the Google Sheet with colleagues for further processing and collaboration
So, the Google Sheets addon provides an automated, real-time export from Gravity Forms with endless analysis potential!
Attaching Entry Exports To Email Notifications
Another great automation is auto-attaching Gravity Forms entries to Gravity Forms email notifications. This emails each submission as an attached spreadsheet file to one or more people. Here’s how to set it up:
Adding entry exports to emails
Still, in the Notification settings, turn on this option:
Attach CSV file with field data
Every time the notification is sent, this attaches the submission as a CSV (Excel) file.
Note that CSV has more technical field names than the user-friendly Google Sheets exports. However, the attached exports contain all submitted data. If you are using Import Entries In Gravity Forms o export CSV files, you can do so in the following manner:
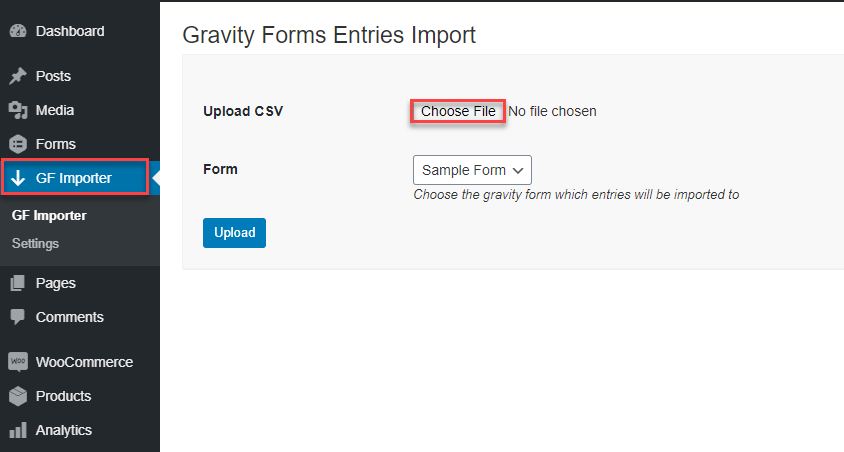
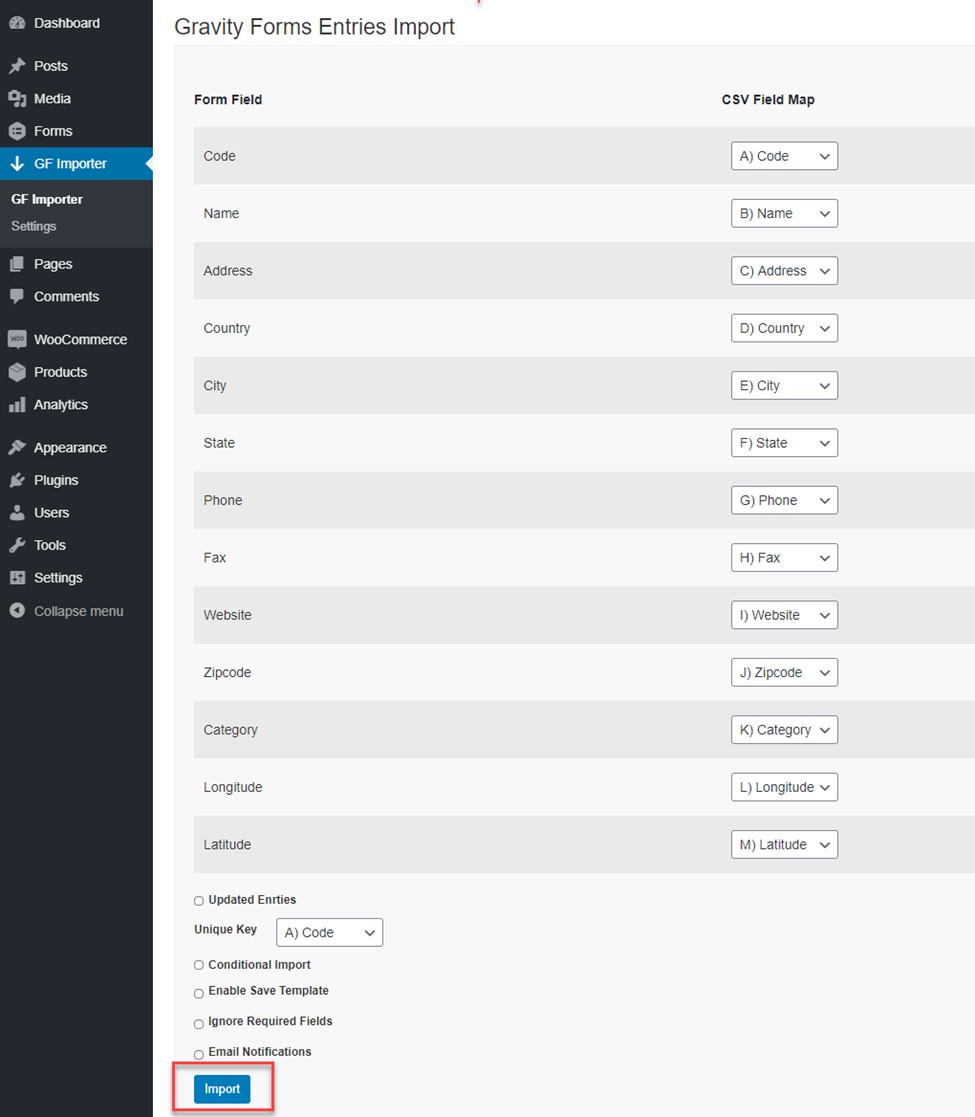
- Go to your WordPress admin dashboard.
- Go to the “GF Importer” main and select “GF Importer” option.
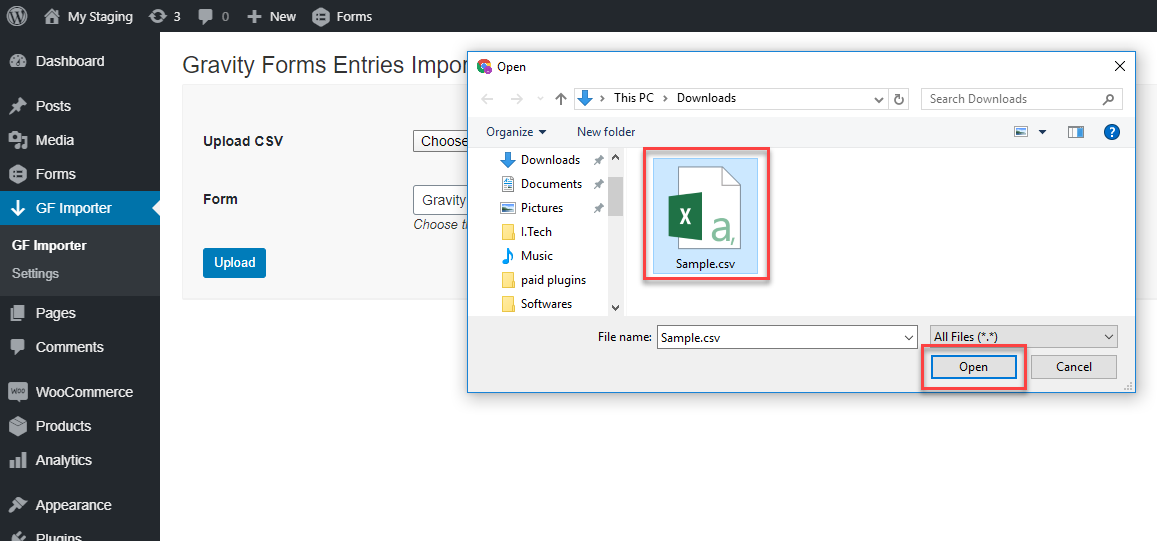
- Click on the “Choose File” button to select the file you want to import.
Click “Open”
Select “Form” and click “Upload”
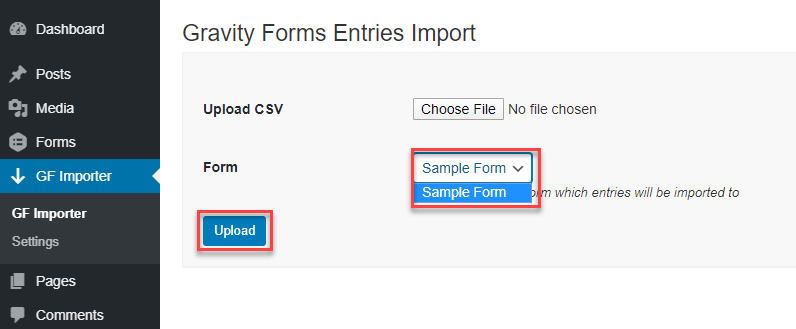
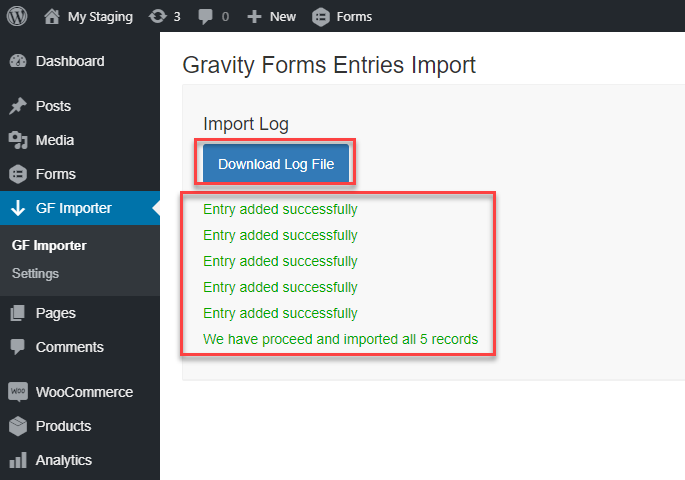
Click “Import” and successfully download all the CSV files
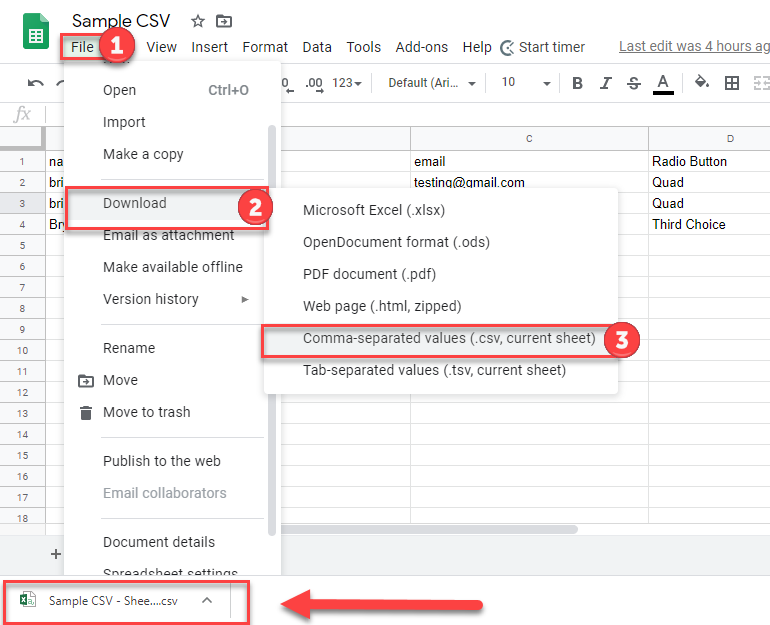
Exporting a CSV File From Google Sheets:
Customizing attached exports:
You can control what gets exported and formatted in the attached CSV file:
- Enable/disable specific fields
- Reorder fields
- Format values like date formatting
- Set column header names.
Access these options in Form Settings > Export Entries. Make sure “Enable Entries Export” is on.
When customized, email notifications will have your newly formatted export file containing selected fields attached automatically.
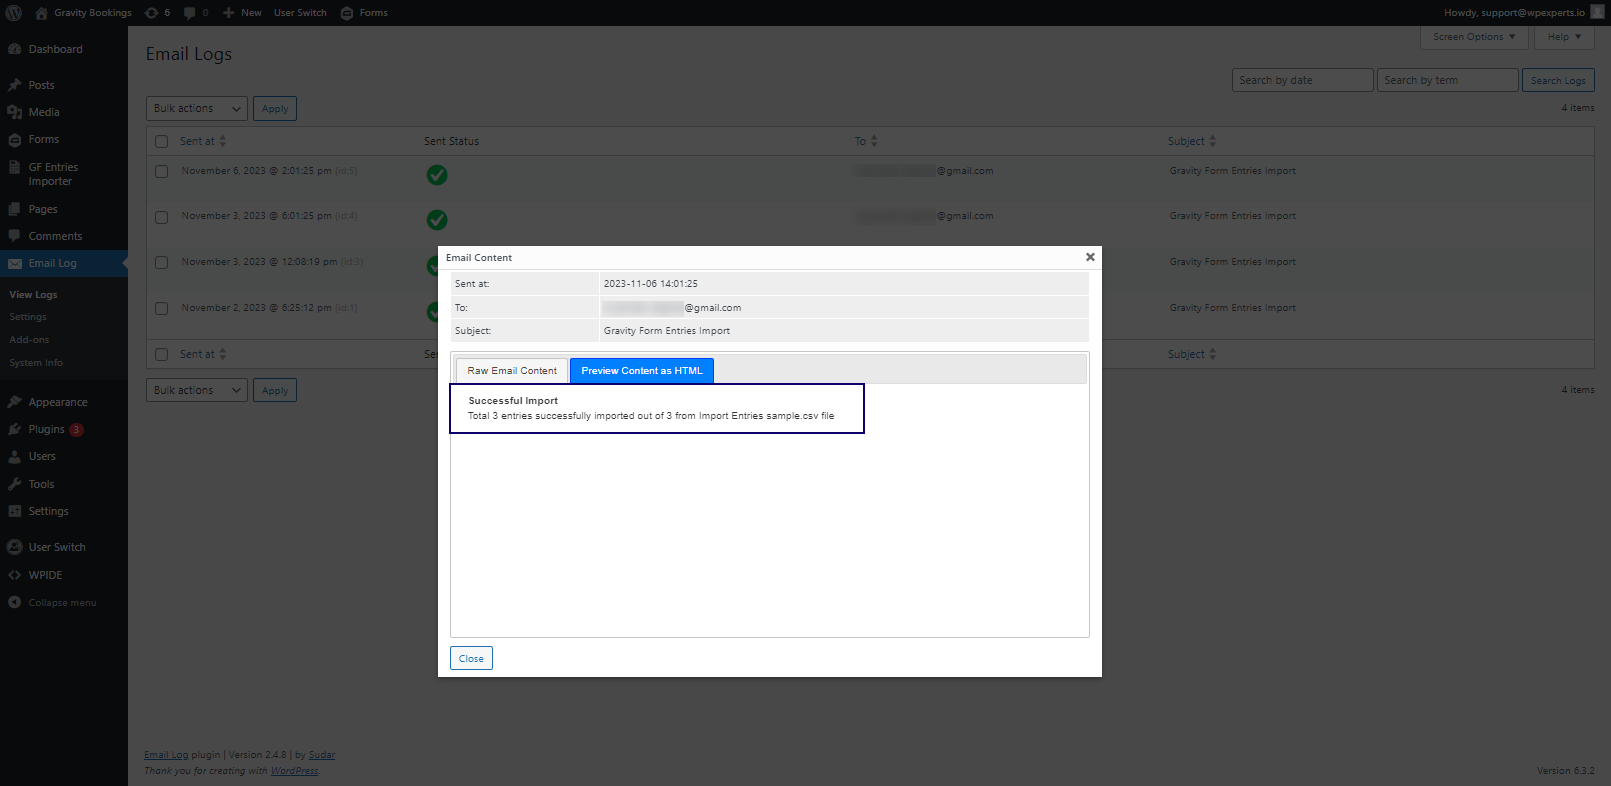
Enabling email notifications
After adding a CSV file the admin can be notified through an email.
Summary of key benefits
Exporting Gravity Forms gravity forms entries has many benefits:
- Analyze data more easily through automated Google Sheets
- Backup and share submissions across teams
- Comply with data laws requiring limited, secure data access
- More flexibility in sending email notifications
The two methods allow automating exports through Google Sheets add-on or email notification attachments.
Setting up automated Gravity Form exports takes a bit of work upfront but saves tons of time. You get ongoing analysis and legally compliant data backups through integrations like Google Sheets. (We highly recommend exploring Gravity Forms Import Entries for your business needs as they have many benefits).
Putting It All Together
Implementing automated Gravity Forms exports takes a few steps but is worth the effort. Here is a recap of the process:
To export entries to Google Sheets:
- Install and connect the “Gravity Forms Google Sheets Add-On”
- Create or select the destination Google Sheet
- Map form fields to sheet columns
- Enable auto update on submission
To attach exported entries to emails:
- Turn on notifications for your Gravity Form
- Check the box to “Attach CSV file”
- Customize exported fields and format (optional)
Once set up, submitted Gravity Forms entries will flow automatically to Google Sheets for live analysis. Emails will also have entry attachments for sharing and processing. The exports will happen instantly in the background without any manual work required.
Final Words
Adding this Gravity Form automation will solve many headaches – no more manual exports, lost data, or missed insights from submissions! Automated entry exports in Google Sheets and email notifications are recommended based on your business needs.


