Importing entries to your Gravity Forms is one of those tasks that are both necessary and time-consuming. What if there was a way to save time and energy by bulk importing entries to our form?

Introducing Gravity Forms Import Entries – the perfect solution to updating existing entries, importing digital signatures, coupons or promo details, survey information, and anything that includes entry data.
What is Gravity Form Import Entries Add-on?
Gravity Forms Import Entries is an extension of Gravity Forms that easily allows you to mass import entries to your Gravity Form, making the entire process of importing your CSV files into the Gravity Forms entries section simple and smooth.
The admin can update existing entries by mapping the fields from the CSV file that matches the Entry ID. Using Gravity Forms Import Entries, users can efficiently Import new entries and upgrade the previous entries.
You can also easily import digital signatures, coupon or promo details, and survey information collected through your Gravity Forms. Users can map the fields and display entries in the specified entries section.
Features of Gravity Form Import Entries
There are following are some of the essential features of Gravity Forms Import Entries extension:
- Users can export entries from the gravity forms plugin using CSV file and then import them to the Gravity Forms Entries add-on.
- Users can manually create a CSV file that meets the requirements of Gravity Forms.
- Users can choose to import entries from either a CSV file or a Gravity Form.
- Updates the present entries by matching the chosen field from CSV with the Entry ID.
- Admin can import the types of posts and the selected posts implemented to the post type list.
- Admin can build filters of the conditional logic that enables admin or user to import entries accordingly and adjust conditions for the entries that meet the particular criteria.
- Admin has the option to save the form to map and conditional logic as a reusable template.
- The systematic processing of filters can extract the record’s errors to a new CSV file to make it simple to correct such records.
- Admin has the option to authenticate rules on gravity forms, and the user can apply gravity form validation to import entries
- Gets instant notification via emails
- Users can enable or limit any particular field from being easily imported
- Display the imported rows in the uploaded CSV file
- Users can view the number of imported rows in the uploaded CSV file.
How to Export CSV File?
The following steps describe the entire procedure of exporting CSV from Microsoft Excel.
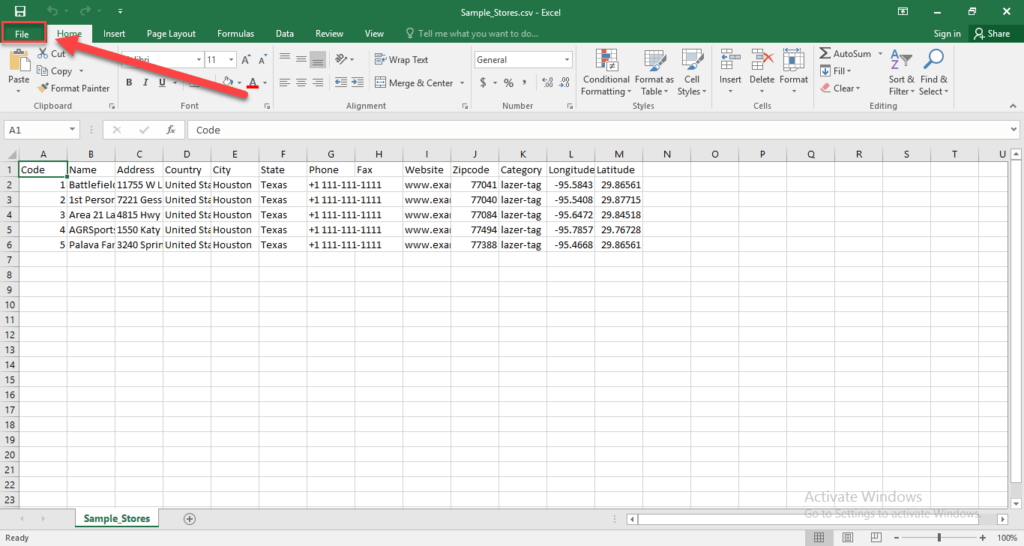
Step 1:
Using MS Excel, navigate to the top left side, and select the “File” option from the main menu.
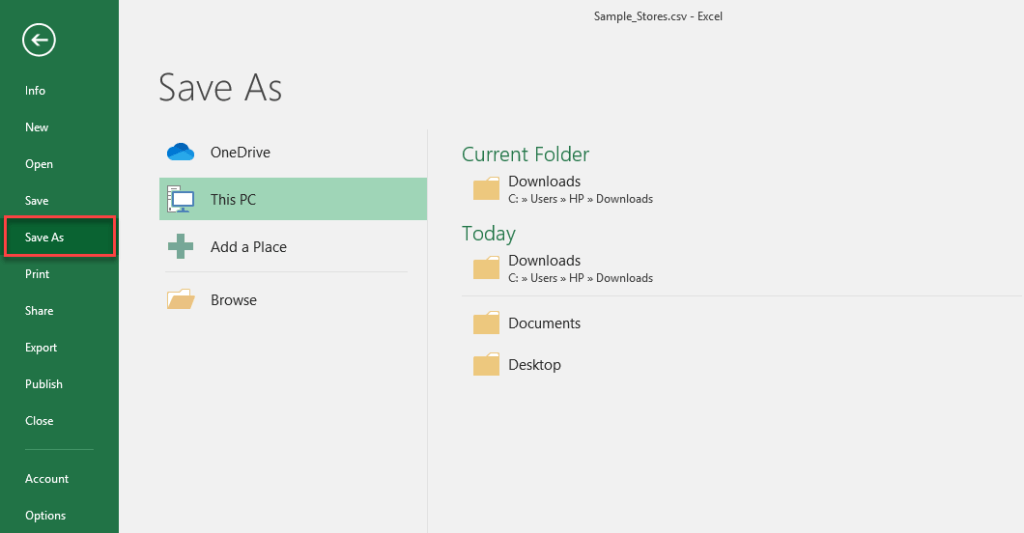
Step 2:
After clicking on the ‘file’ option, then click on the ‘save as’ option from the left sidebar, and choose your file location or directory where you want to save the .CSV file.
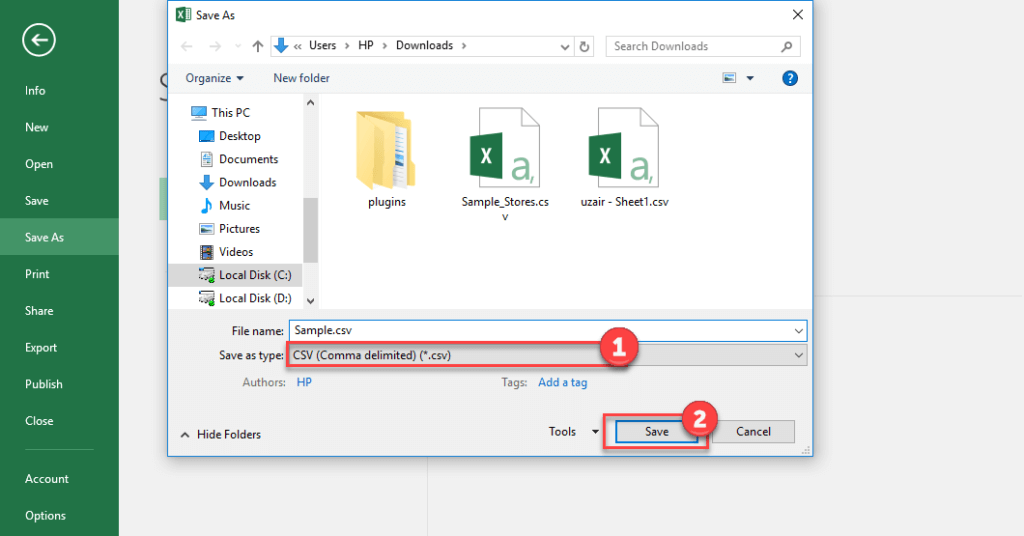
Step 3:
The user selects the “CSV (Comma Delimited)” option from the “save as type” drop-down menubar, then click on the “Save” button.

How to Import CSV file to the extension?
The following steps are required to import the CSV file to the add-on:
Step 1:
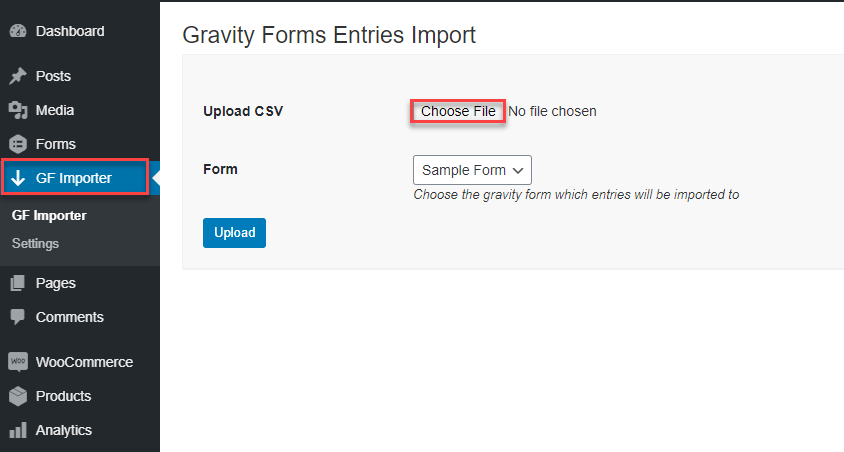
Navigate to your WordPress Admin Dashboard, then click on “GF importer” on the drop-down menu and select the “GF Importer” option, then click on the “Choose File” button to select your desired file that you want to import.
Step 2:
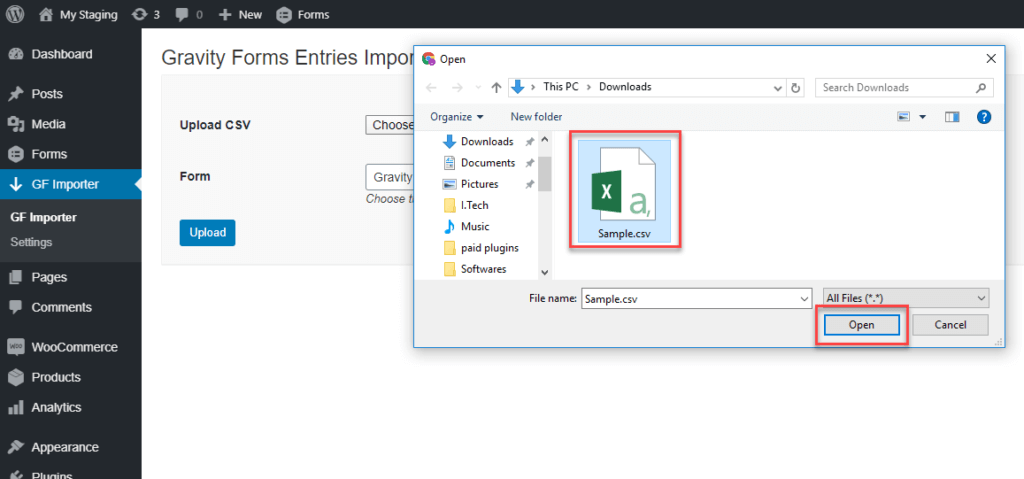
Choose the file and click on the ‘open’ button
Step 3:
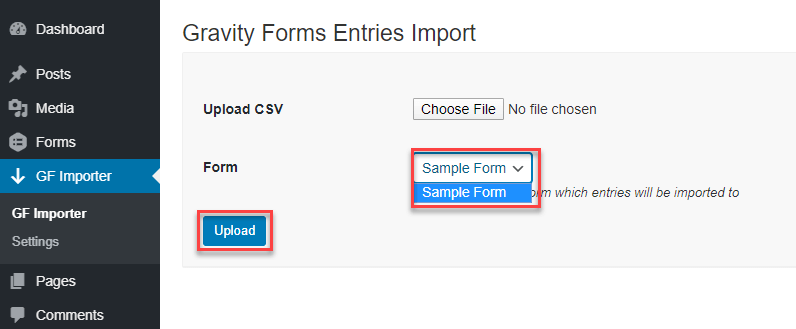
Users can select a form by navigating from the “Form” drop-down menu and click on the “upload” button.
Step 4:
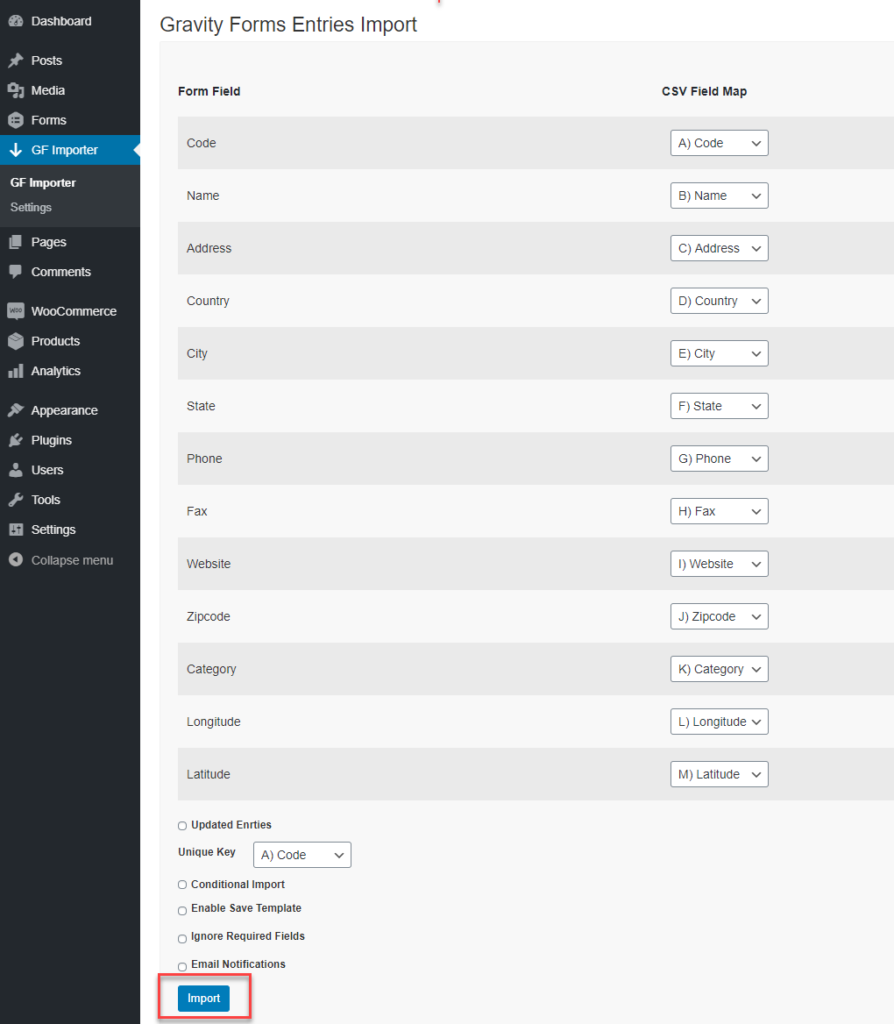
The user maps the form field with the CSV fields and then clicks on the ‘import’ button.
Step 5:
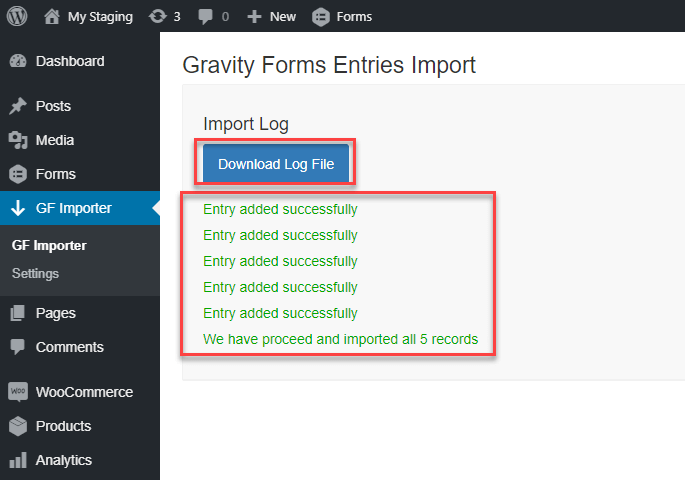
After clicking on the import button, the entries get imported, then the user can then download the import logs by clicking on the “Download Log File” button.
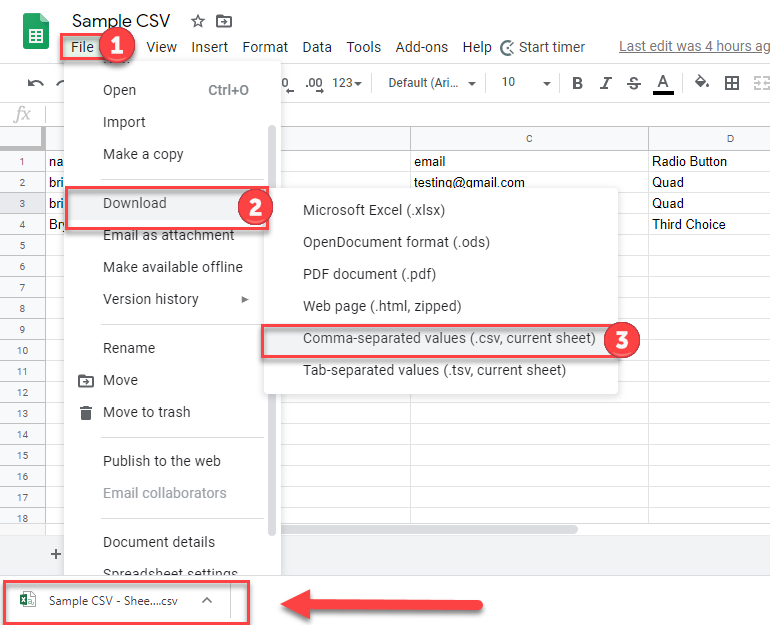
How to Import CSV from the Google-Sheets?
Google Sheets is the spreadsheet software that is pre-included in the Google Docs Suite. If you want to export multiple entries from the Google Sheets and import them into Gravity Forms, then the following steps can be useful for you:
Step 1:
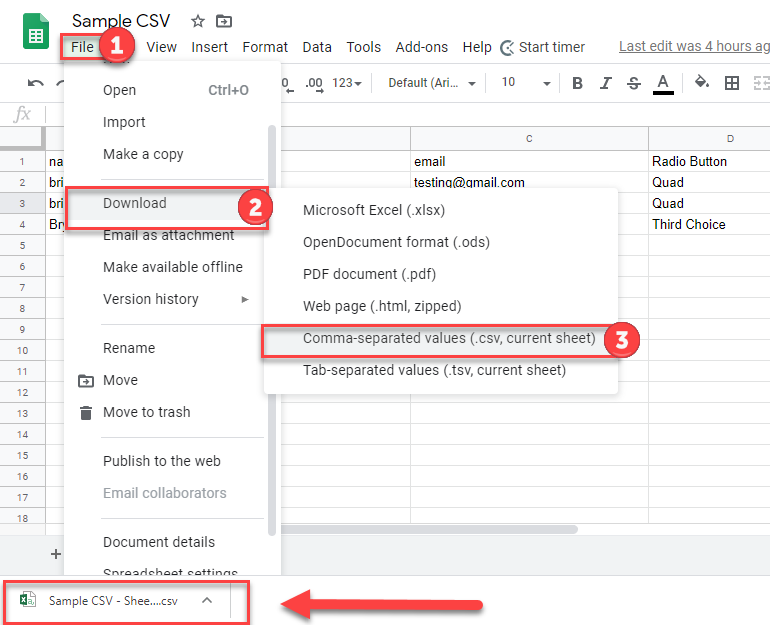
Select the ‘File’ option from the main menu, then navigate to the ‘download’ option and click on ‘Comma-separated values (.csv, current sheet)”.
How to Import a CSV from Apple Numbers?
Apple Numbers is a spreadsheet program built by Apple, pre-installed in every OS X installed version, and if you are looking to export entries from the Apple Numbers in a CSV file format.
Step 1:
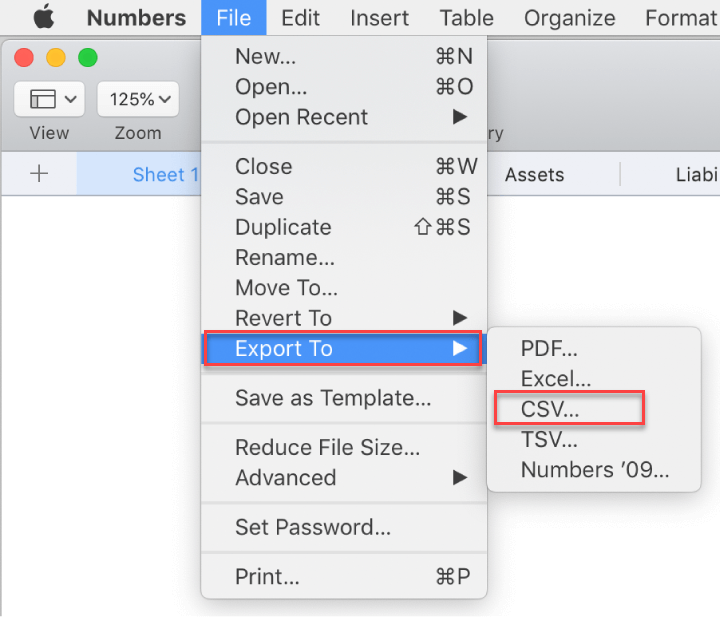
Click on the “File” option on the main menu, then scroll down and click on the “export to” option, and then click on the “CSV” file open.
Step 2:
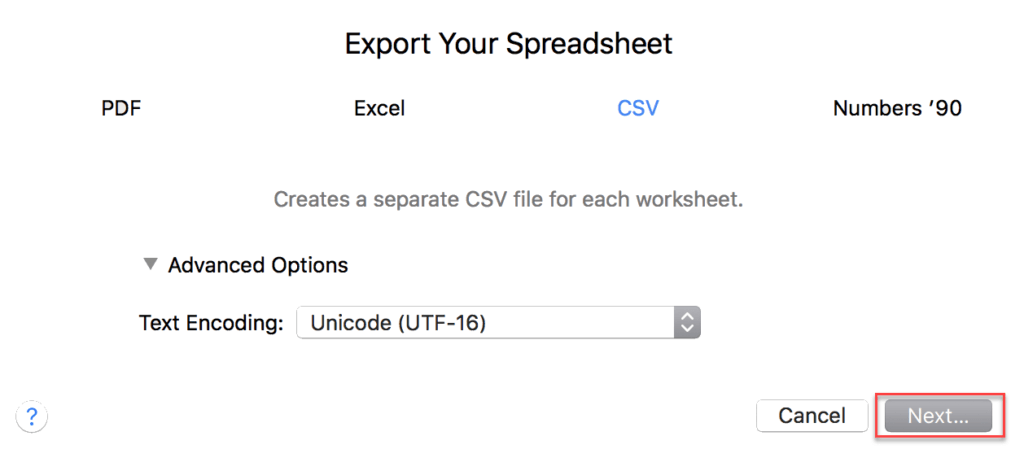
- Click on the ‘Next’ button to save your file.
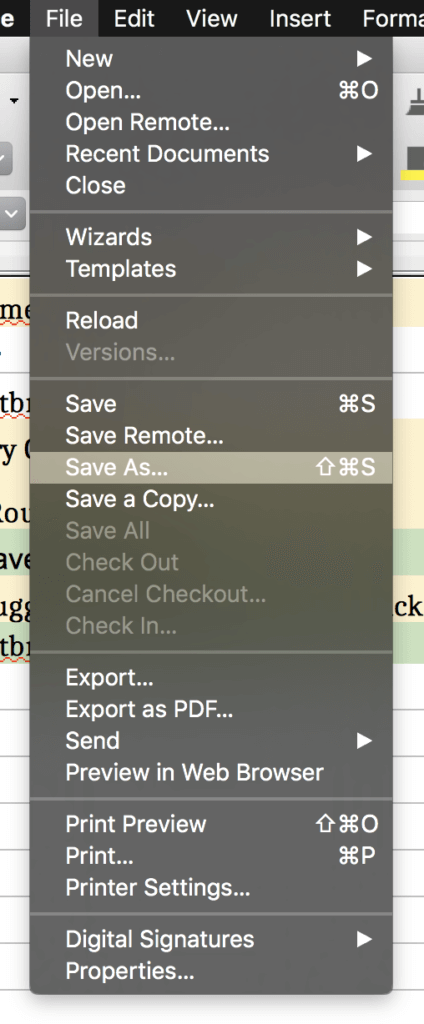
How to Export a CSV from LibreOffice?
LibreOffice is an intuitive, open-source, and freemium office suite. The steps below must be kept into consideration to export your entries from LibreOffice into Gravity Forms.
Step 1:
- Navigate to the “File” option on the main menu, and select “Save As.”
Step 2:
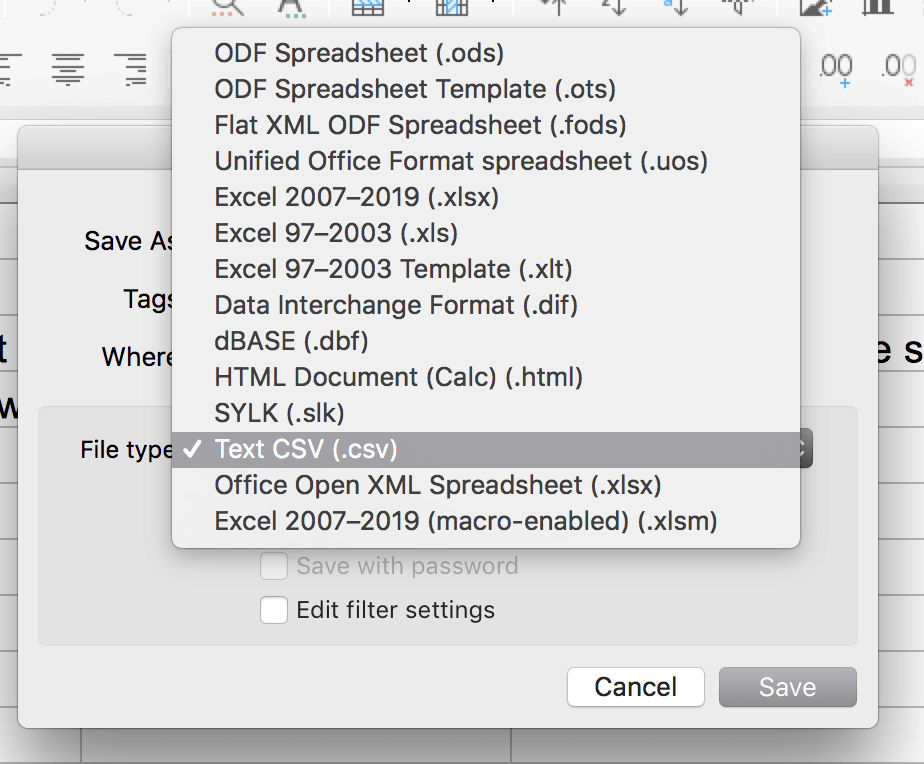
- The next step is to select the “Text CSV” option from the drop-down menu bar.
Step 3:
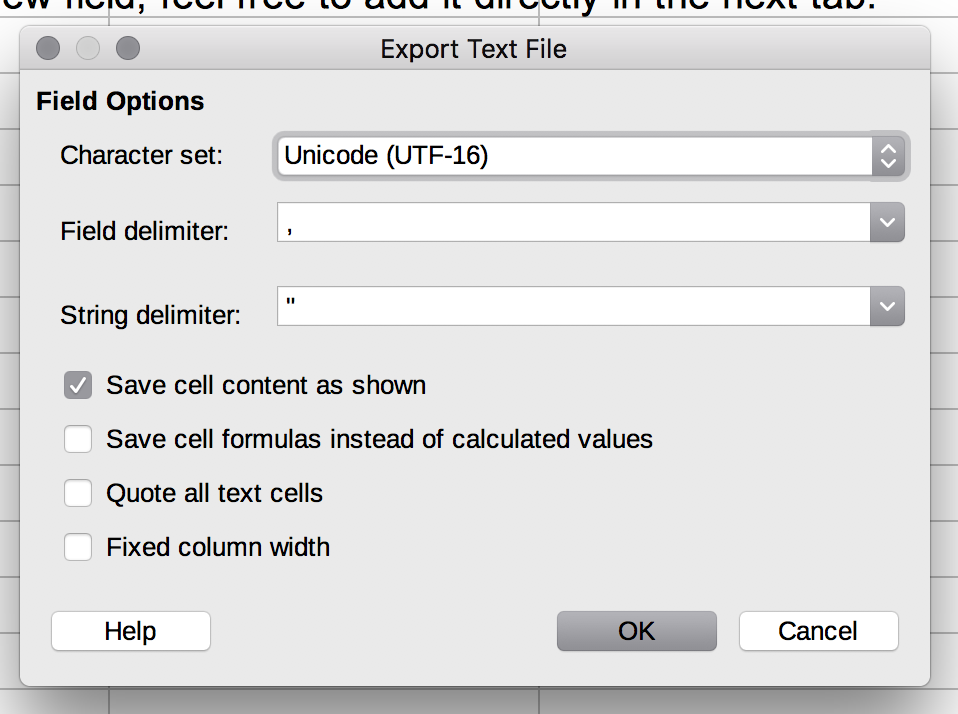
- Navigate to the settings page, select the “UTF-16” field for the “Character Set,” and then click on the “Ok” Button.
Step 4:
- After successfully following the above steps, the user can export the CSV file.
Final Words
To sum up, collecting information from various sources is a critical task, and it requires a large number of effort to collect large chunks of data to import and export entries. Hence, Gravity Forms Import Entries Add-on is a great resource to import/export entries that eradicate extra effort and instinctive database management to import and export large data entries.
For Further Information: Read the technical documentation here


