

1.Installation Guide
- Login to your WordPress Admin panel
- Navigate to the WordPress Admin Dashboard → Plugins → Add New.
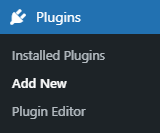
- Click on the Upload Plugin button on the top left corner of your screen.
- Next, click the Choose file button in the box that appears below.
- Select the zip file that you have downloaded and upload it.
- Click on the Activate Plugin button.
2.Getting Started
- Navigate to WordPress Admin Dashboard → GF Entries Importer.
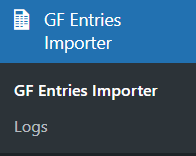
- Gravity Form Entries Importer page will appear.
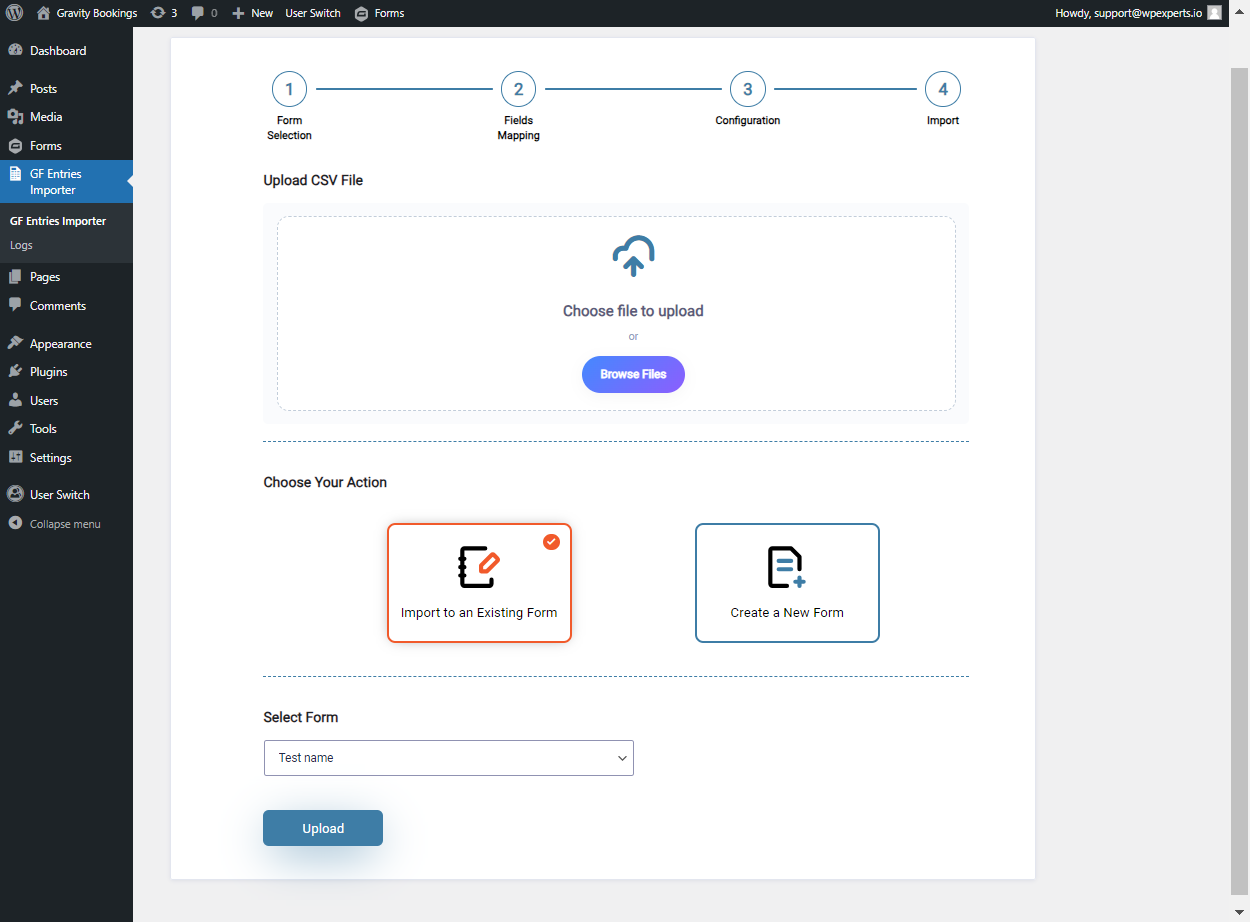
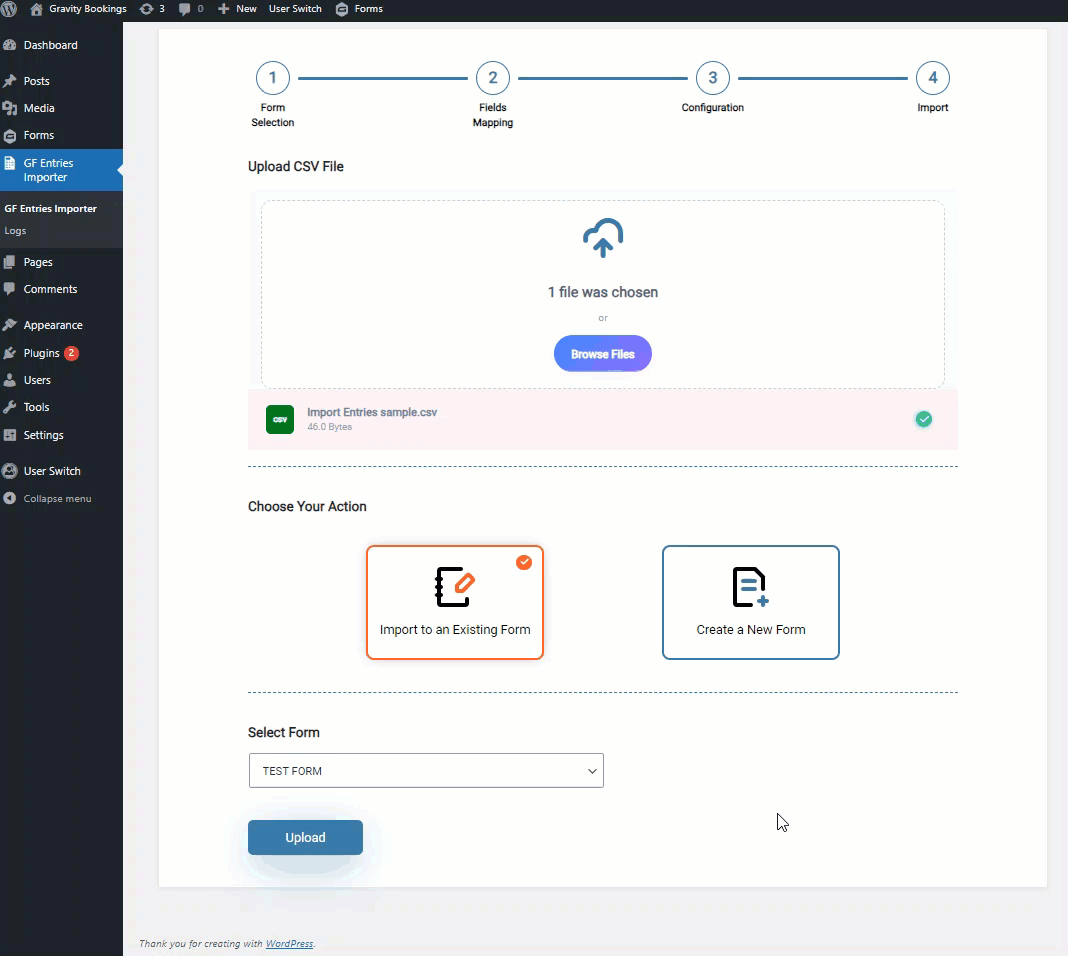
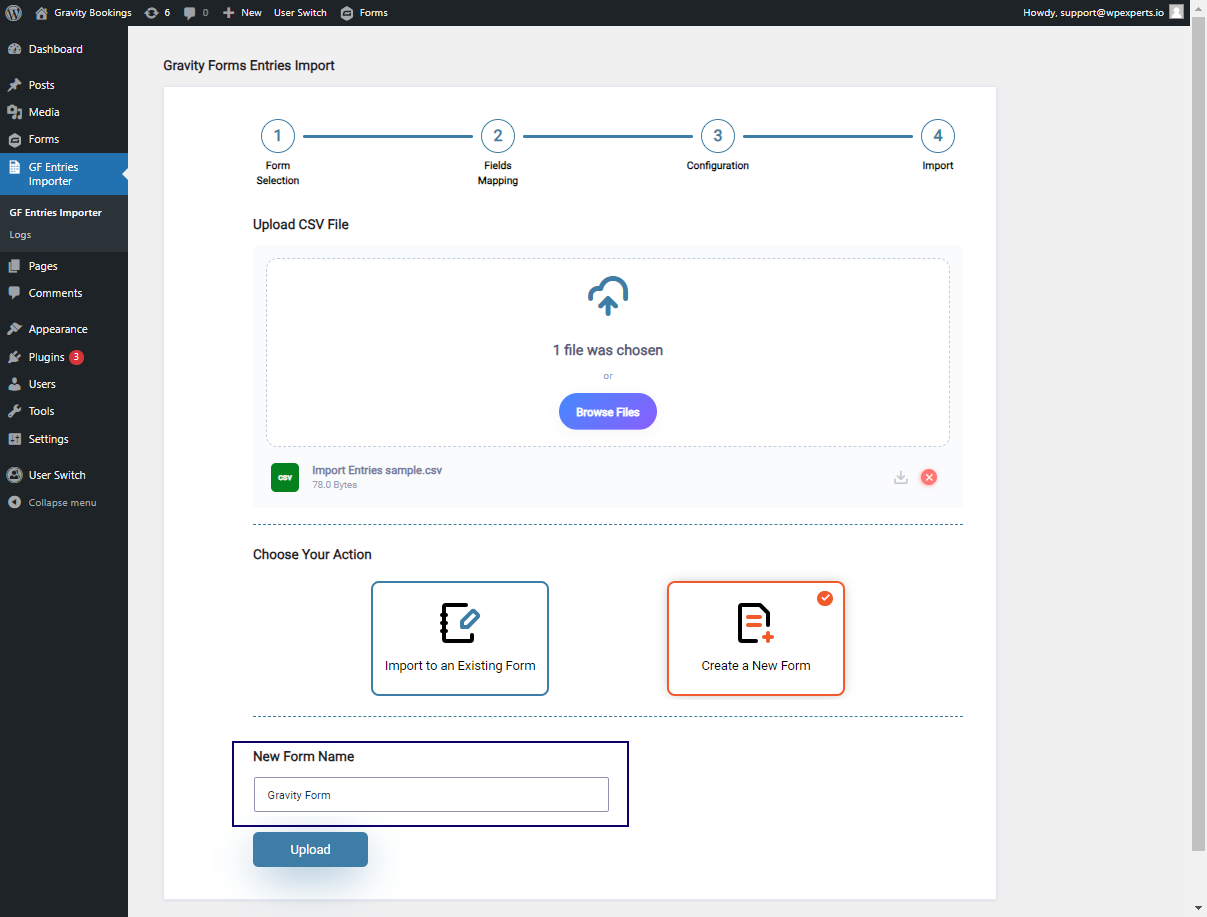
3.Form Selection
3.1.Upload CSV File
- Here admin can click the Browse Files button.
- Choose the file containing your data by clicking the Browse Files button.
- Once Uploaded users can view the uploaded CSV Name on the page.
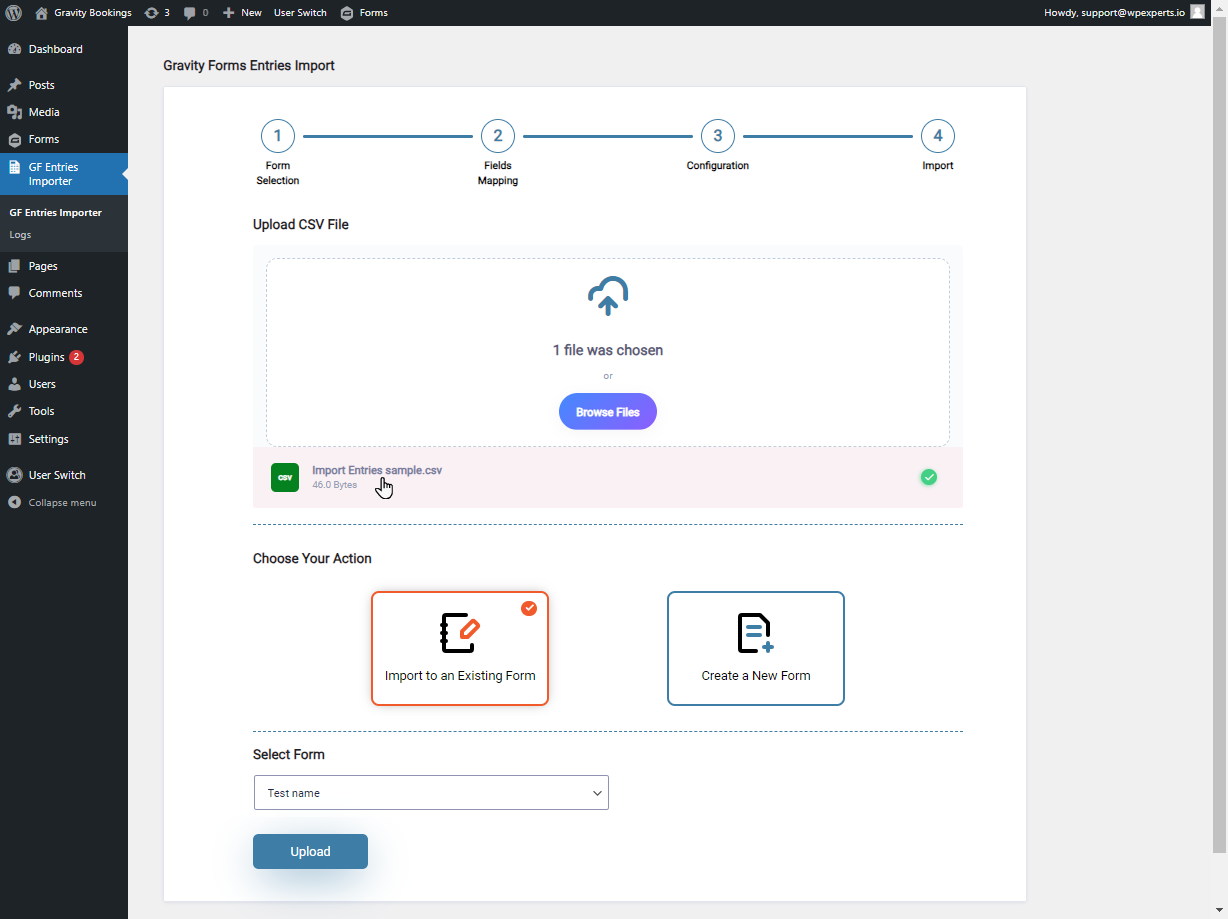
- Admin can remove the selected file by clicking
 button.

- Admin can import to an Existing Form or Create a New Form.
3.2.Import to Existing Form
- To import through an existing form choose the Import to an Existing Form icon.
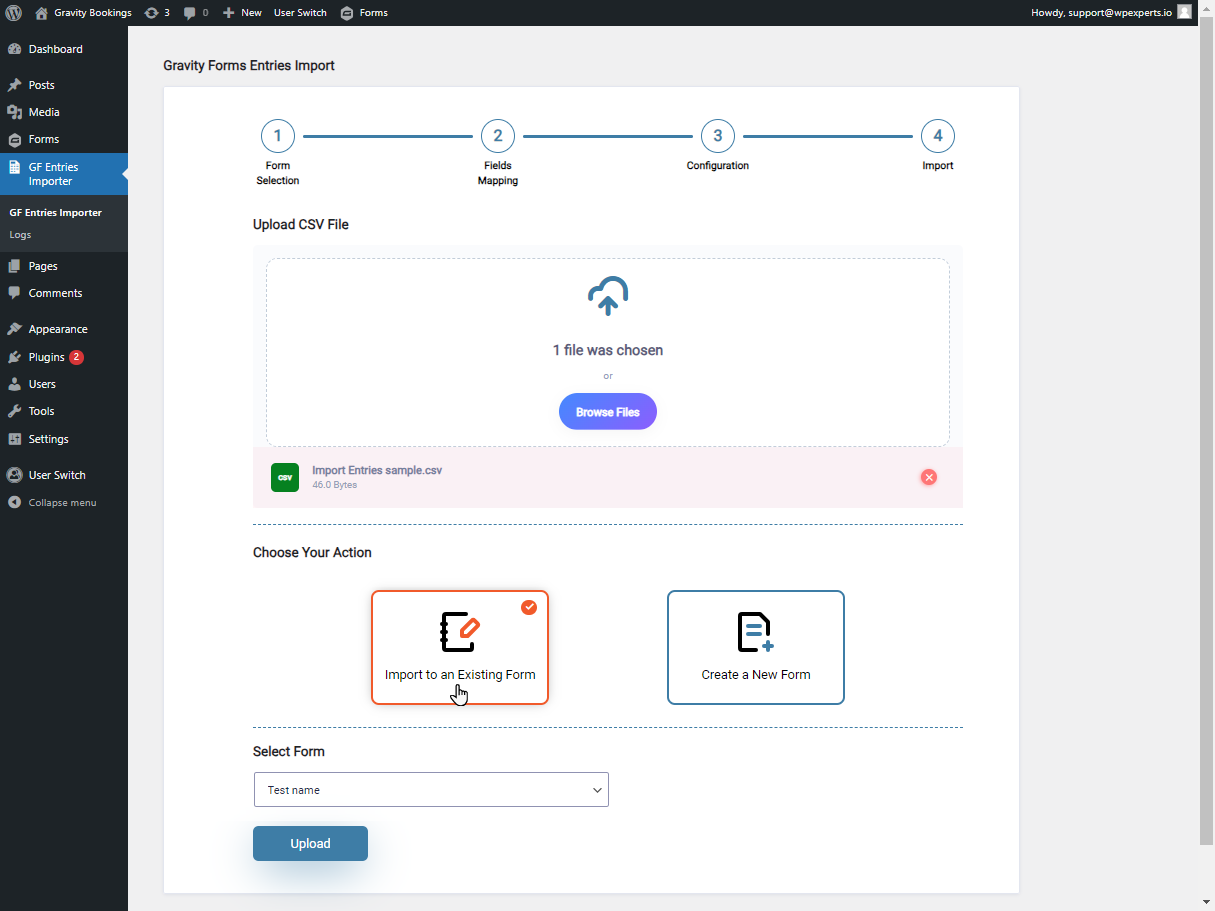
- Choose the predefined Forms in which the admin needs to import the data.
- After choosing the predefined forms click the Upload button.
3.3.Create a New Form
- Admin can also create a new form by clicking the Create a New Form Icon.

- Once clicked a New Input Field will appear labeled New Form Name.
- Enter the Form Name and click the Upload Button.
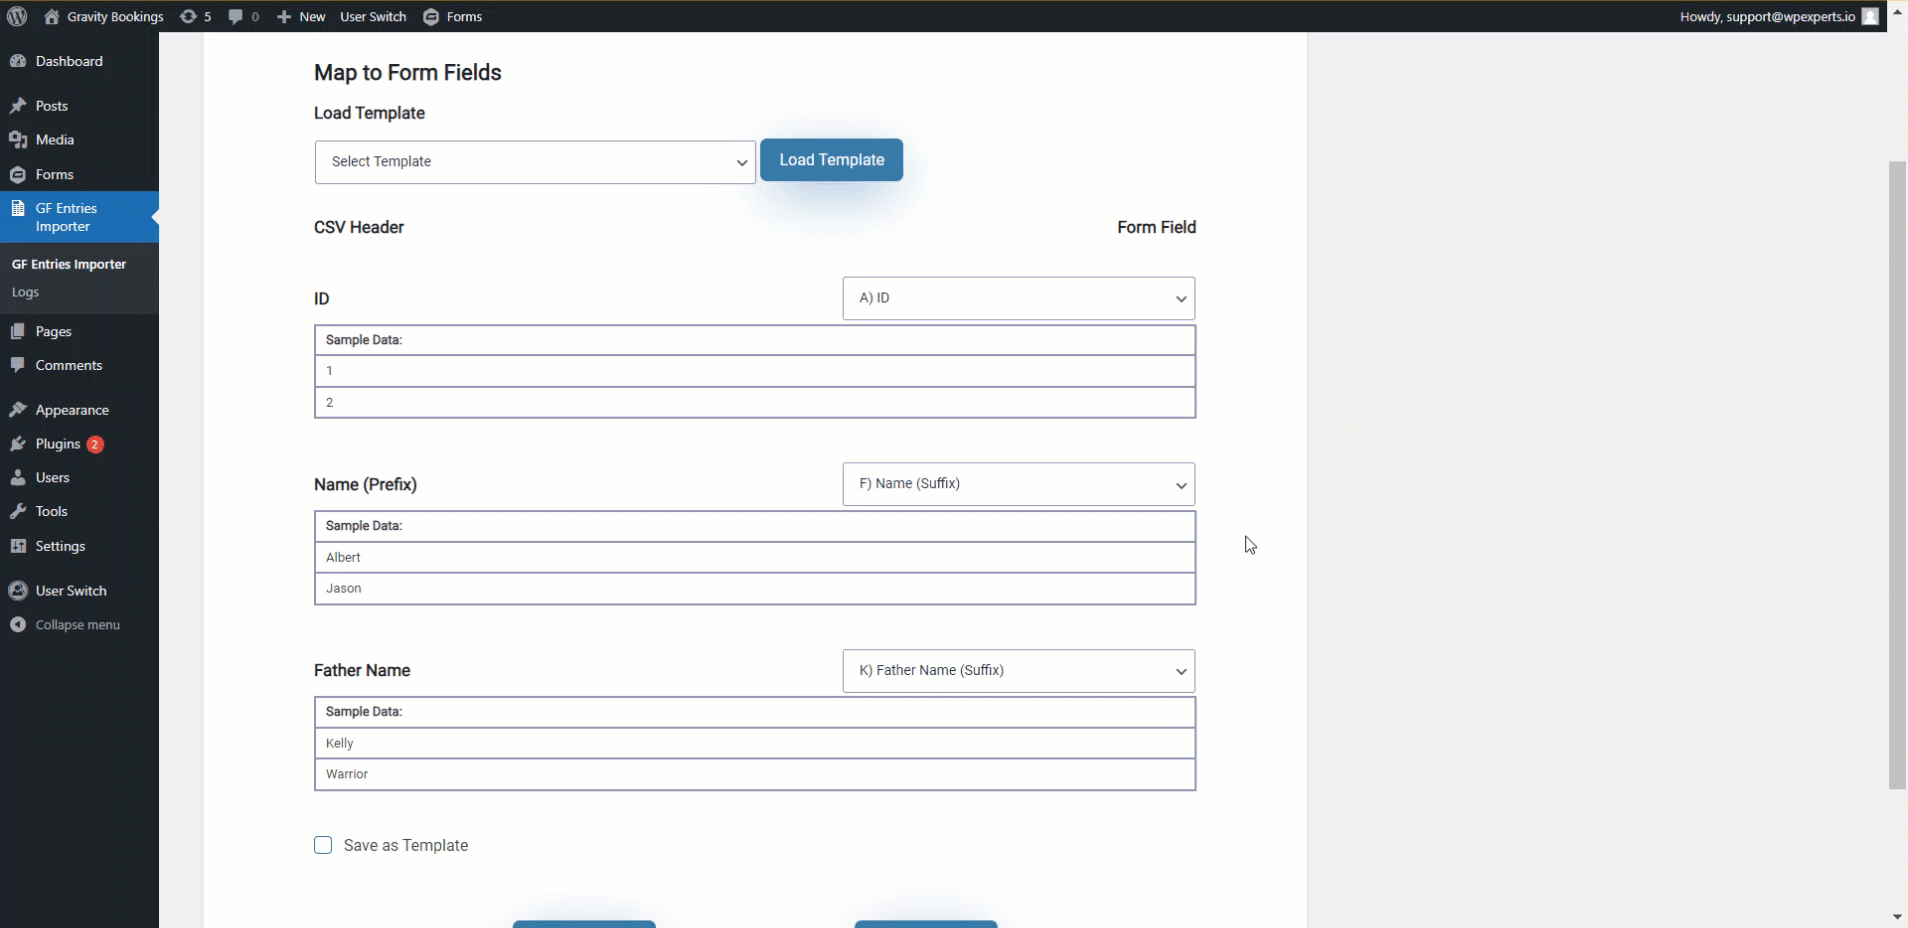
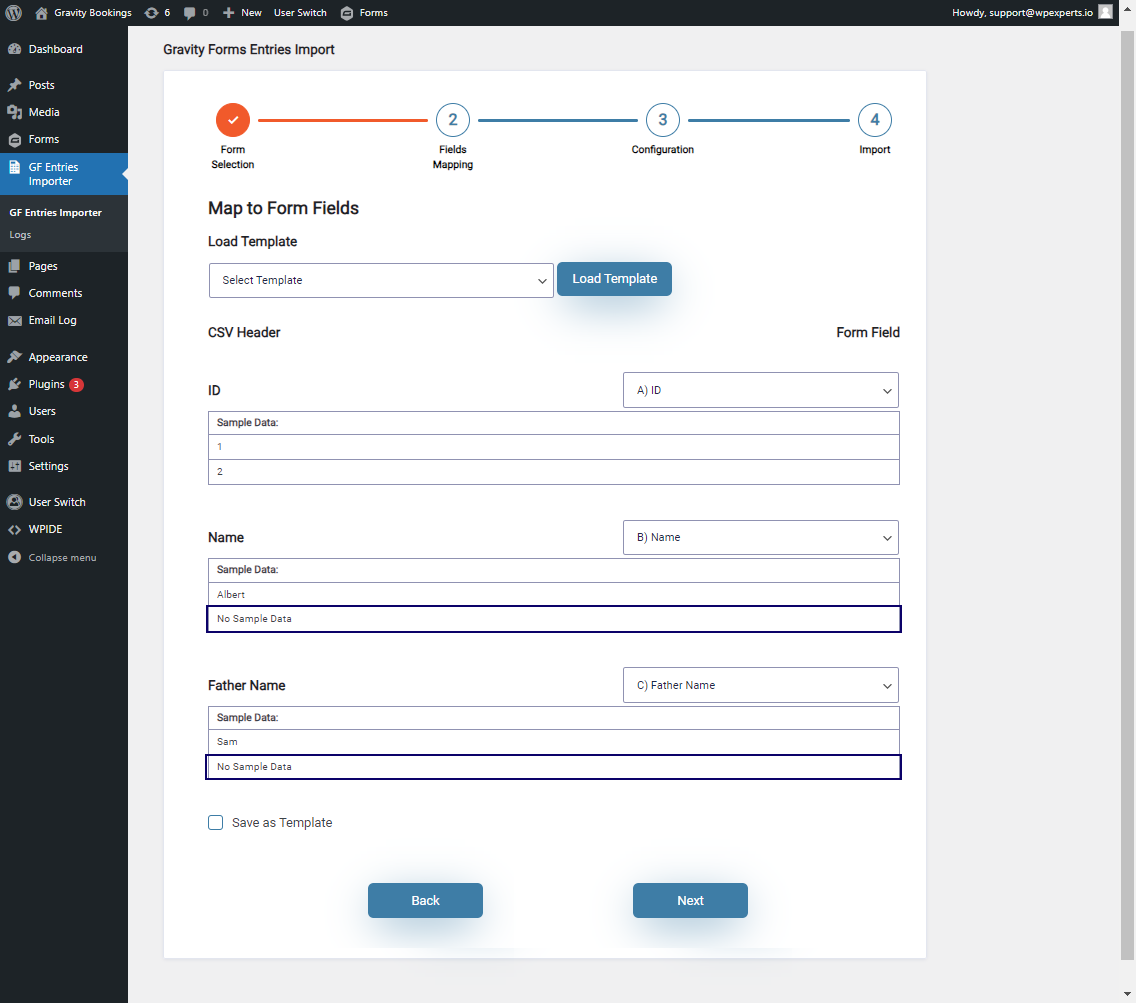
4.Fields Mapping
4.1.Existing Form
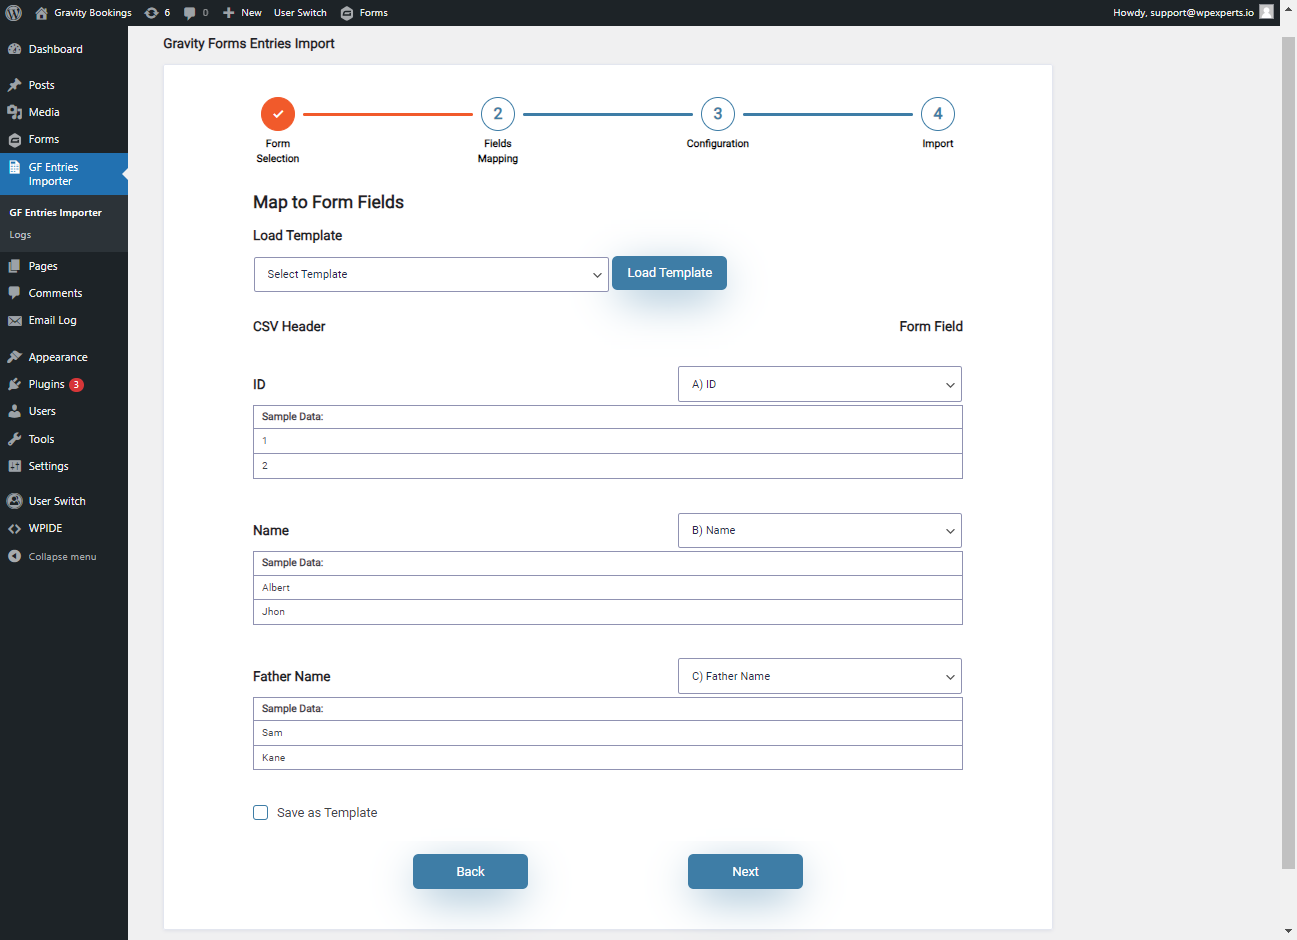
- A new page will appear where the admin can map the field according to the data defined in the data set.
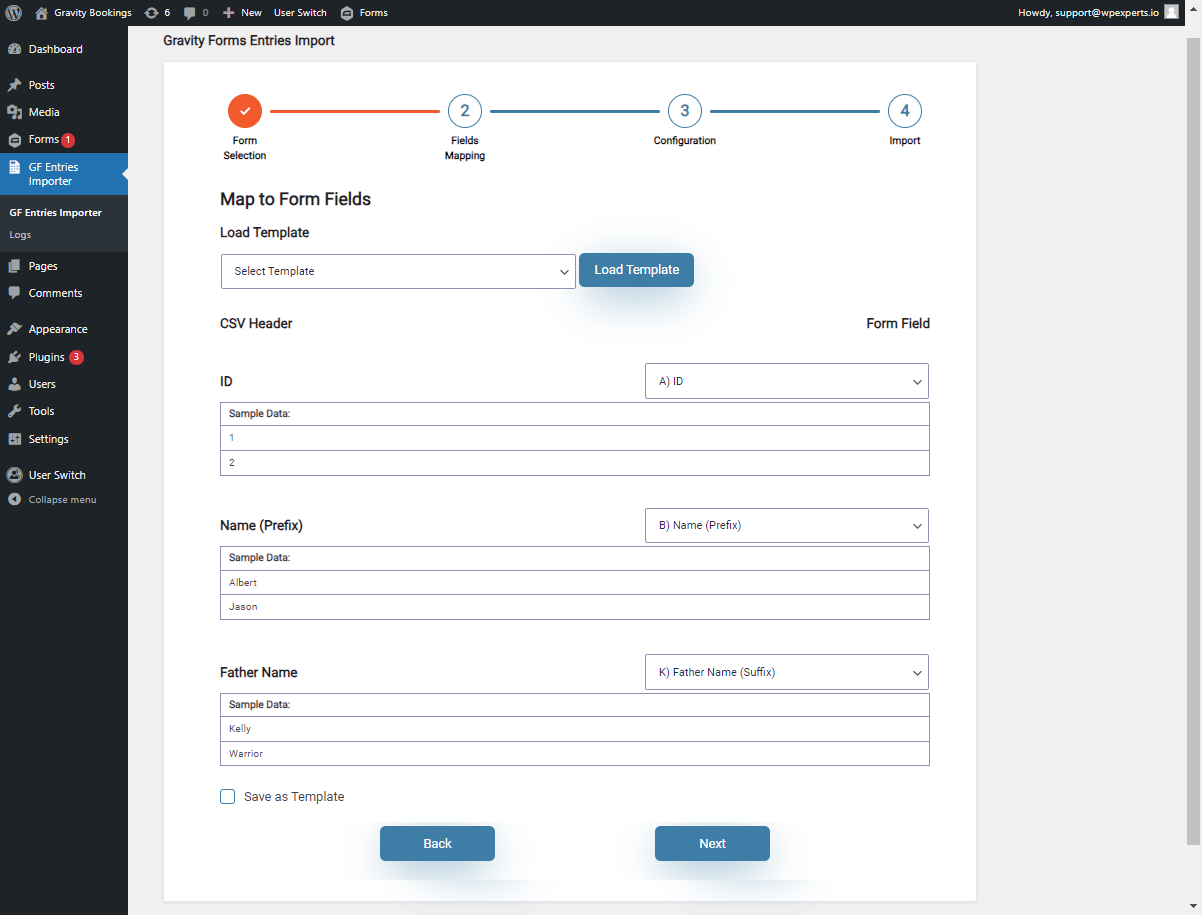
- Admin can view the CSV data and Form Field mapped to the respective CSV Header.
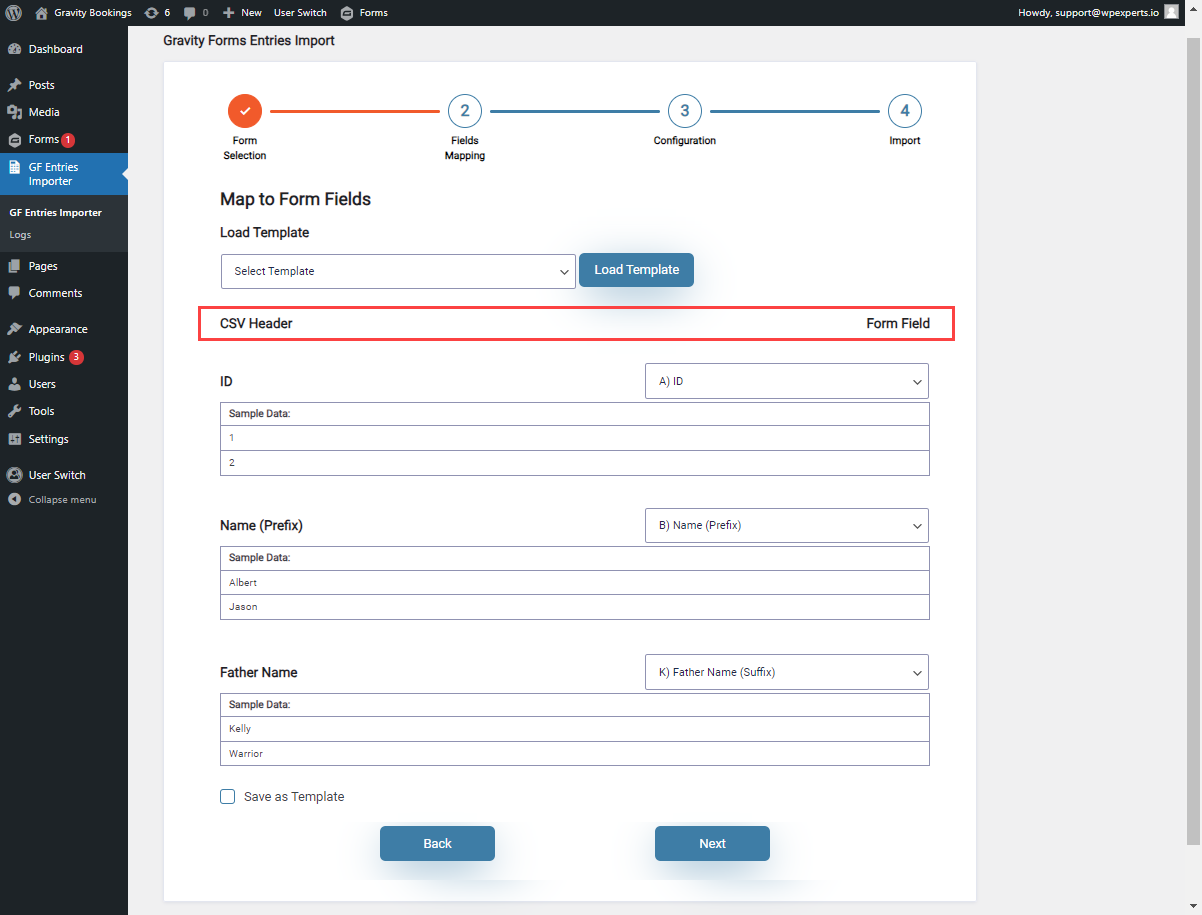
- Admin can update the CSV Header on the other Form Field by selecting the fields from the dropdown.
Note: It is essential to include fields defined in the Gravity Form; otherwise, the data will not be visible in the entries.
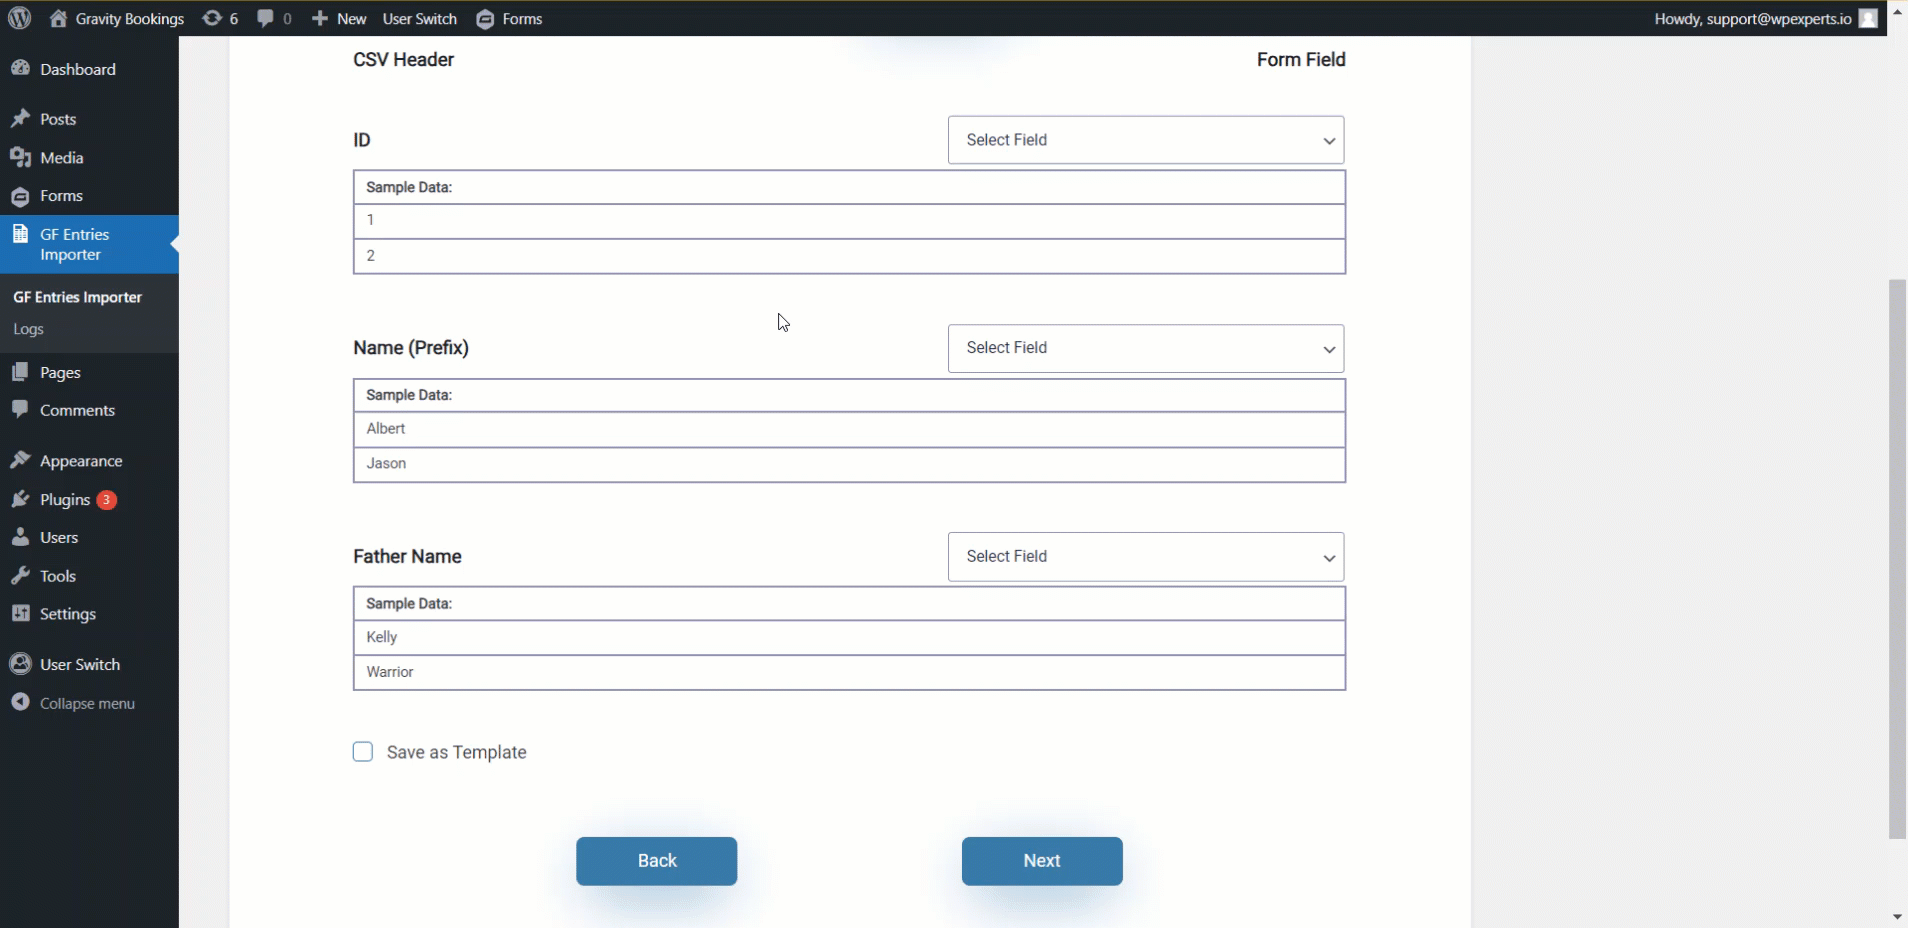
4.2.Create a New Form
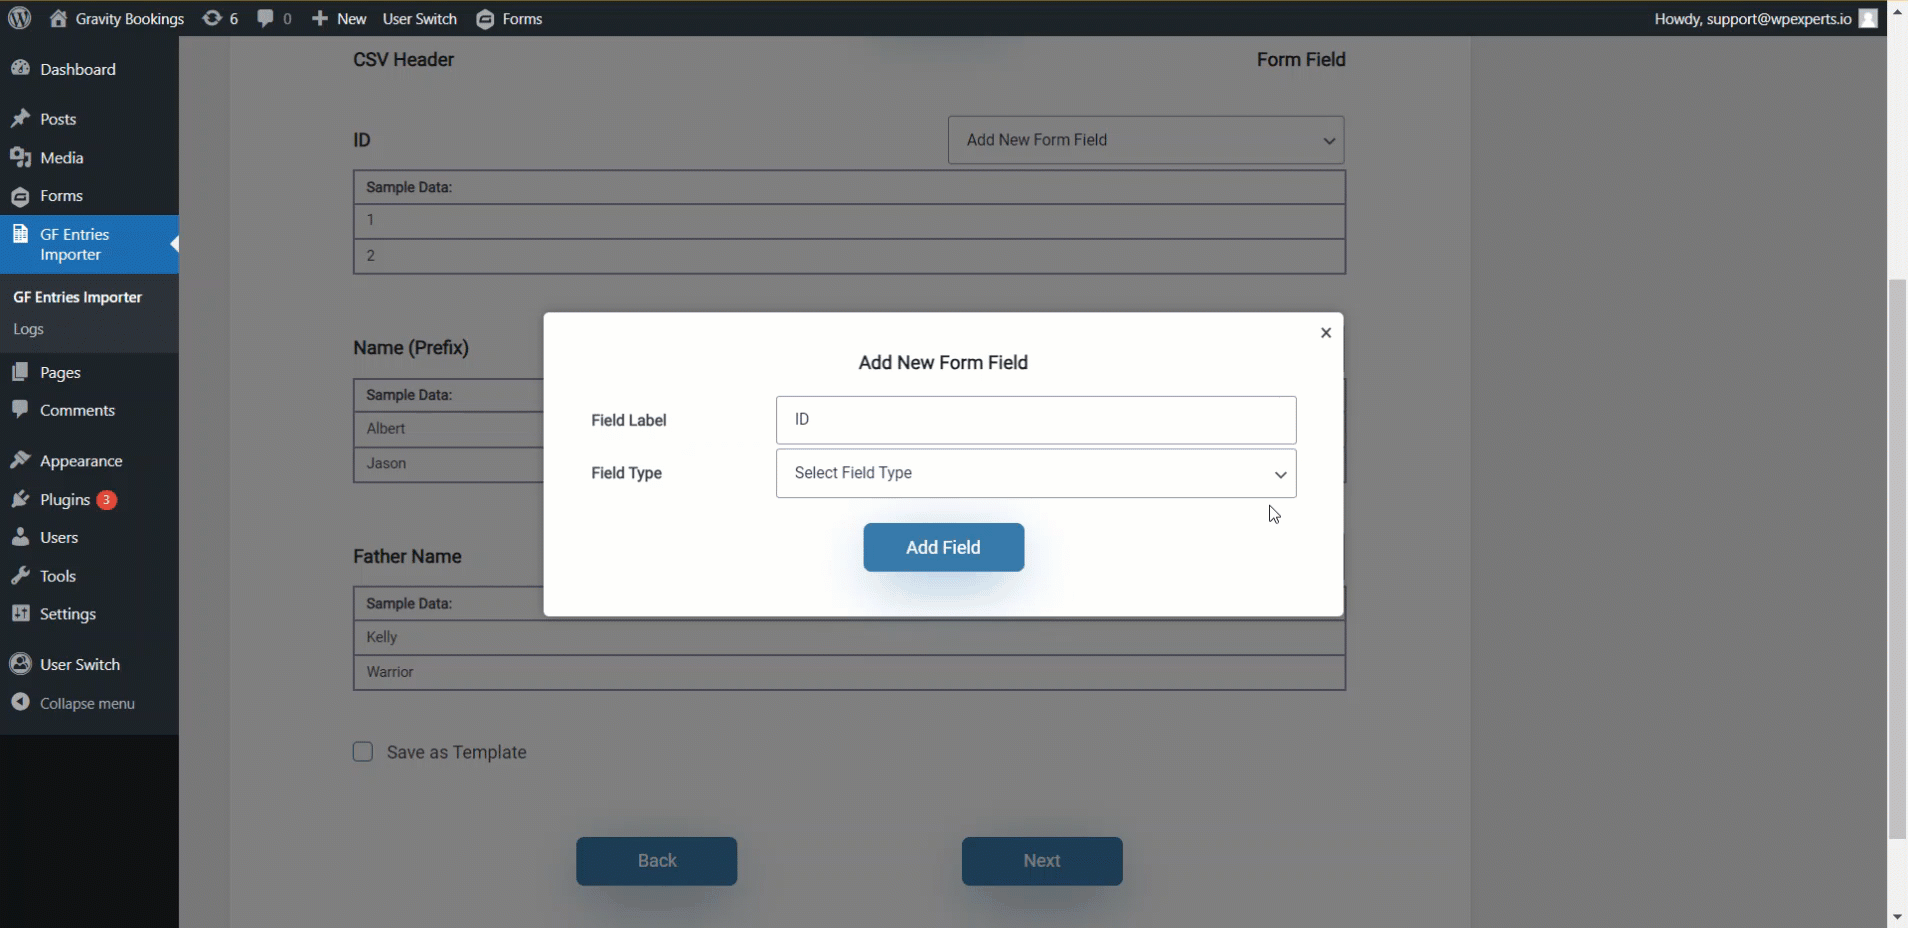
- Admin can also add a new field by selecting Add New Form Field from the dropdown.
Note: The admin can also Add the New Form Field in the existing form as well.
- A popup will appear now the admin can add the Field Label and Select the Field Type from the dropdown.
- After that click Add Field Button.
- Once done admin can also click the checkbox Save as Template.
- Once clicked Admin can enter the Template Name.
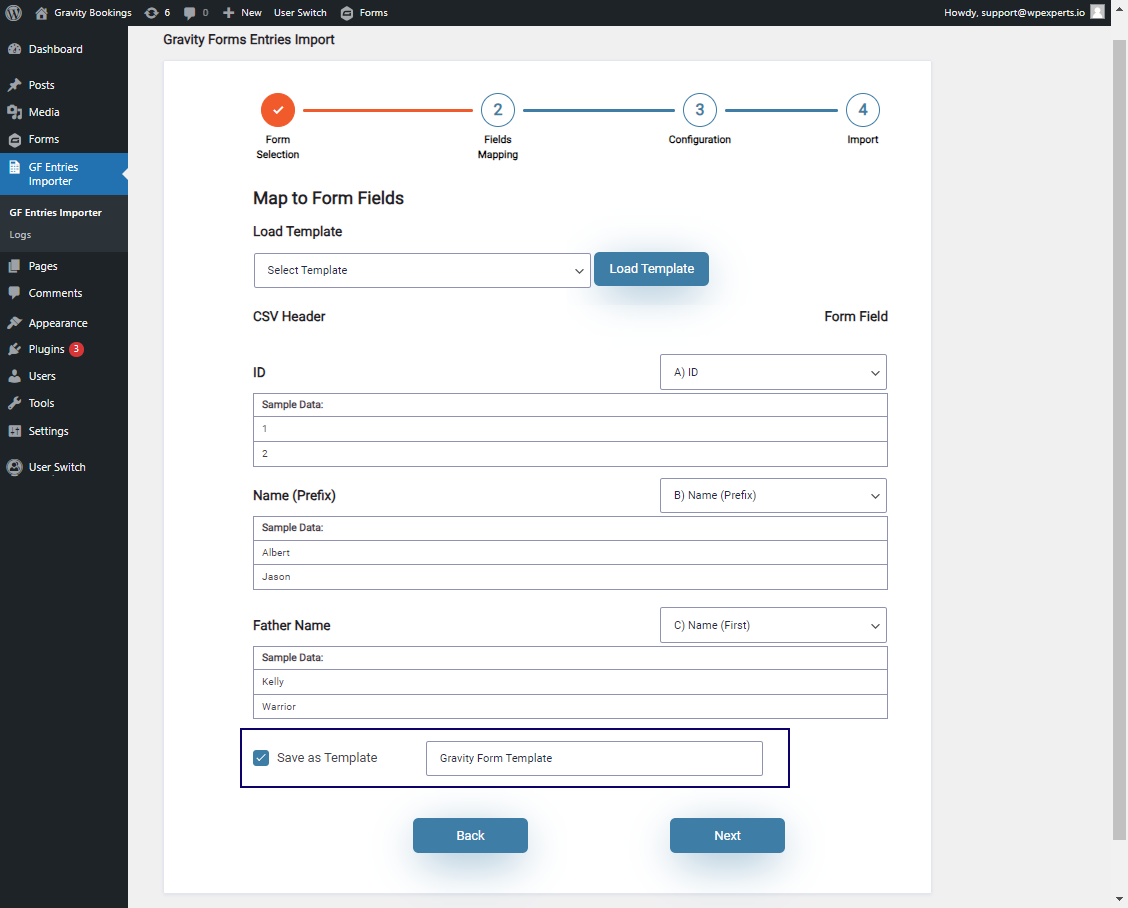
Note: After the form is Imported, it will appear in the Load Template dropdown.
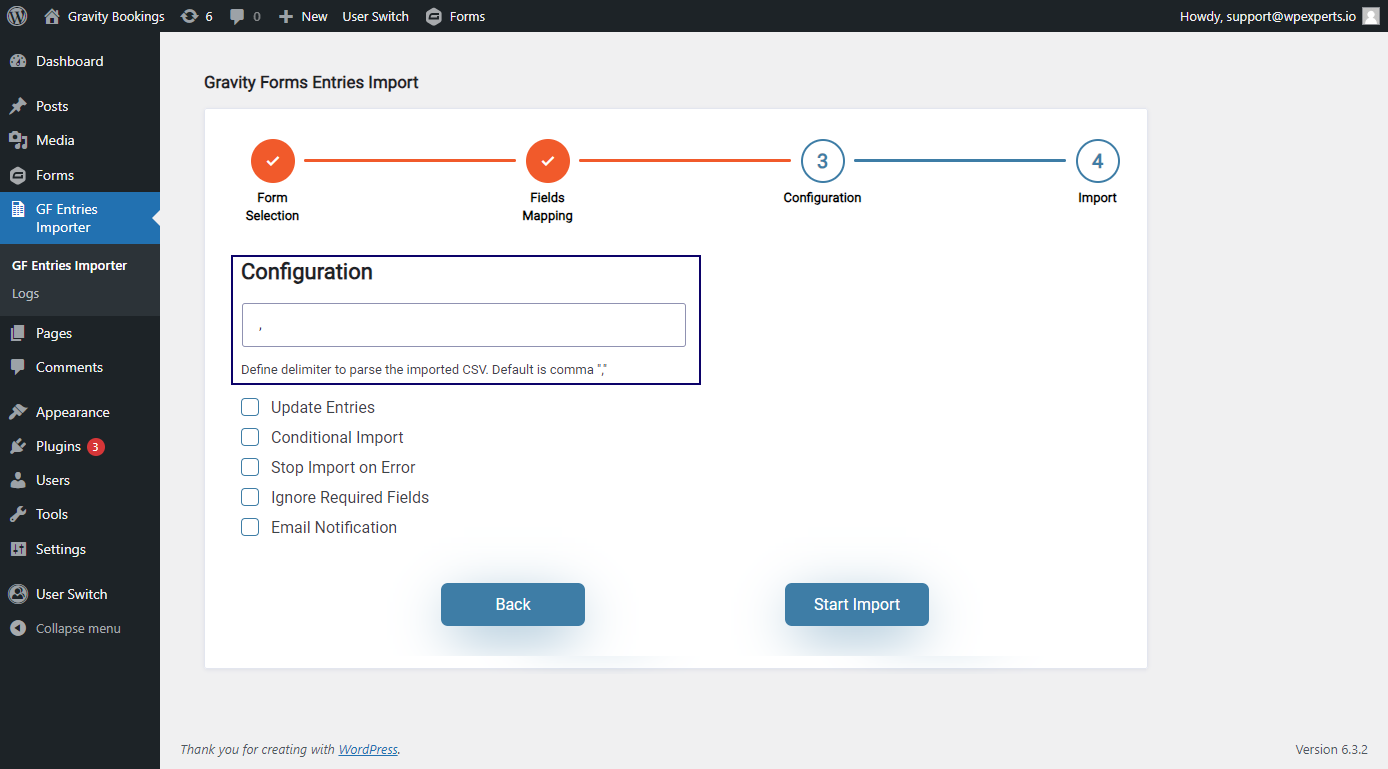
- Once done click Next, and Admin will be redirected to the Configuration page.
- On the Configuration page, click the Start Import button.

- A process bar will appear and there will be buttons to view the Download Import log, View Imported Entries, Change Field Mapping, and Back to Importer.

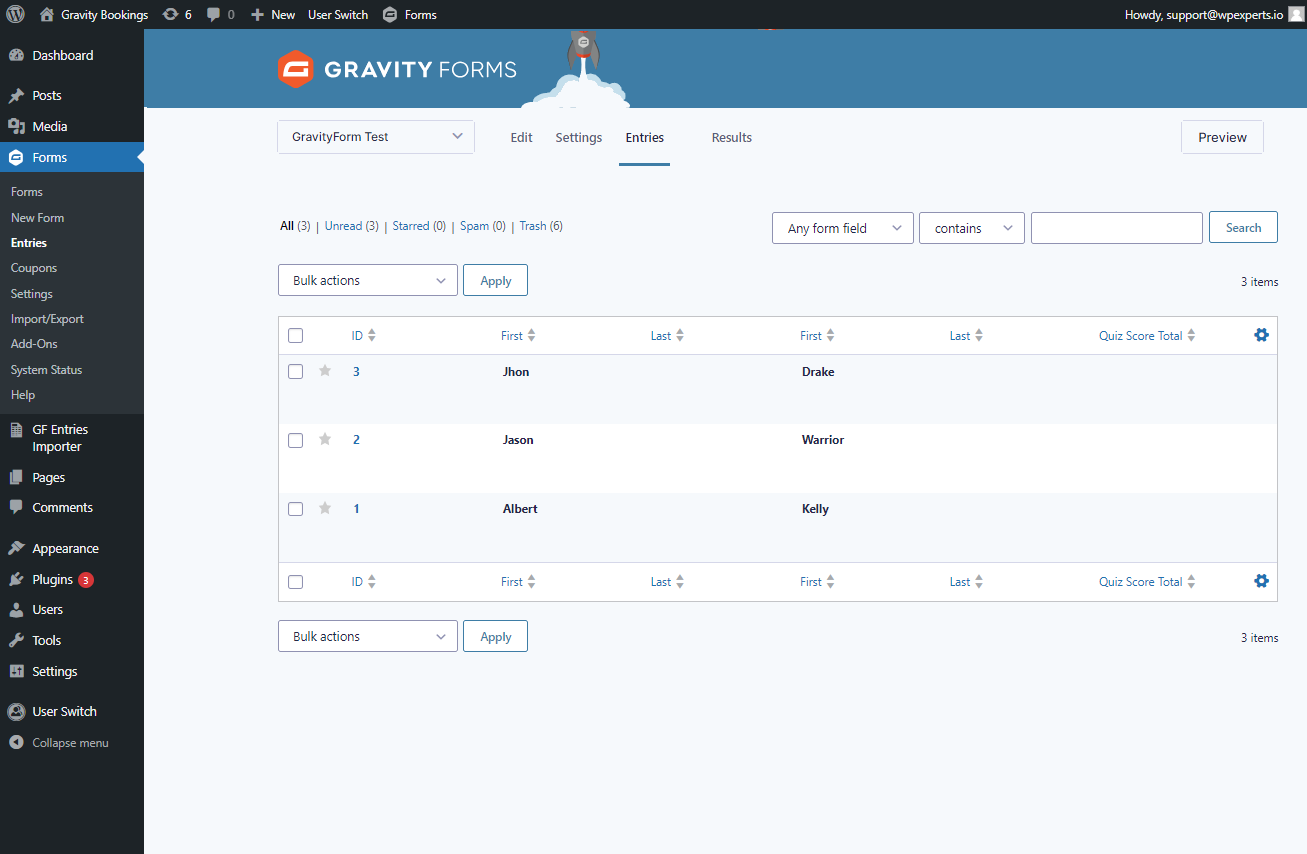
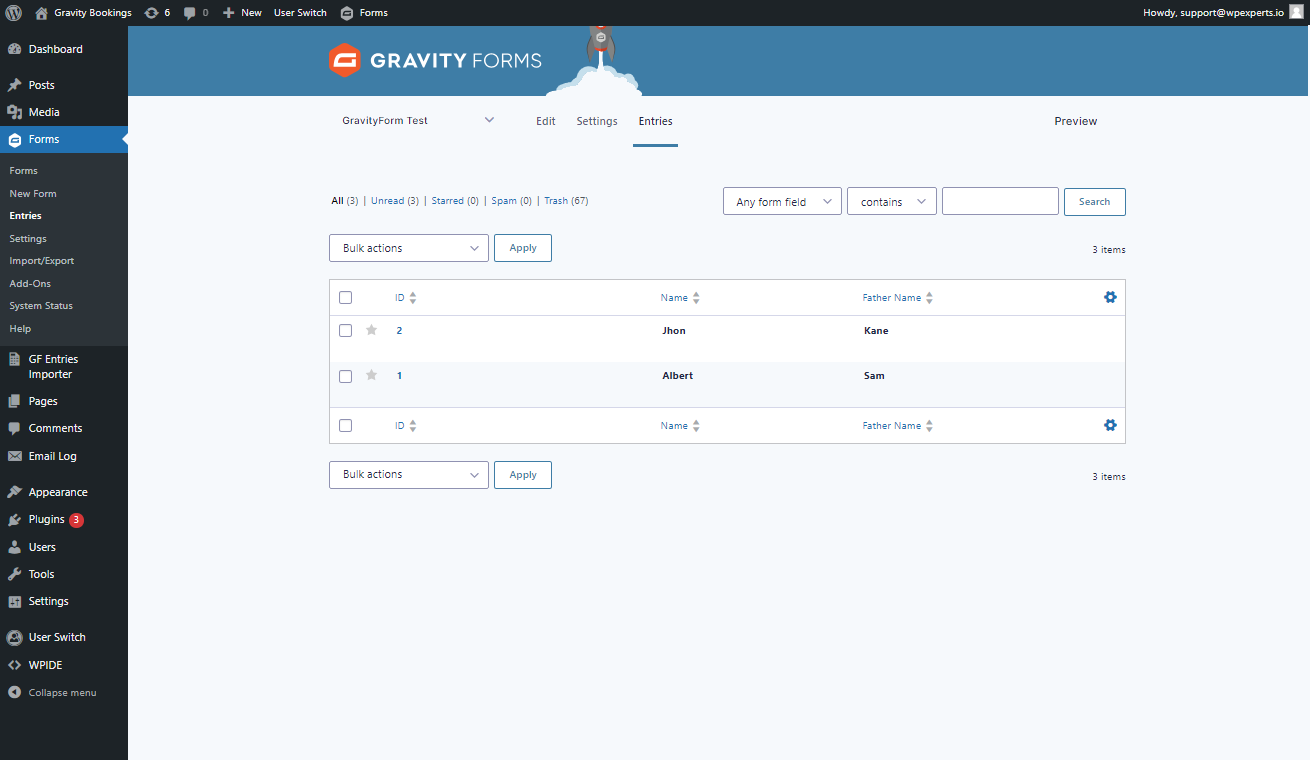
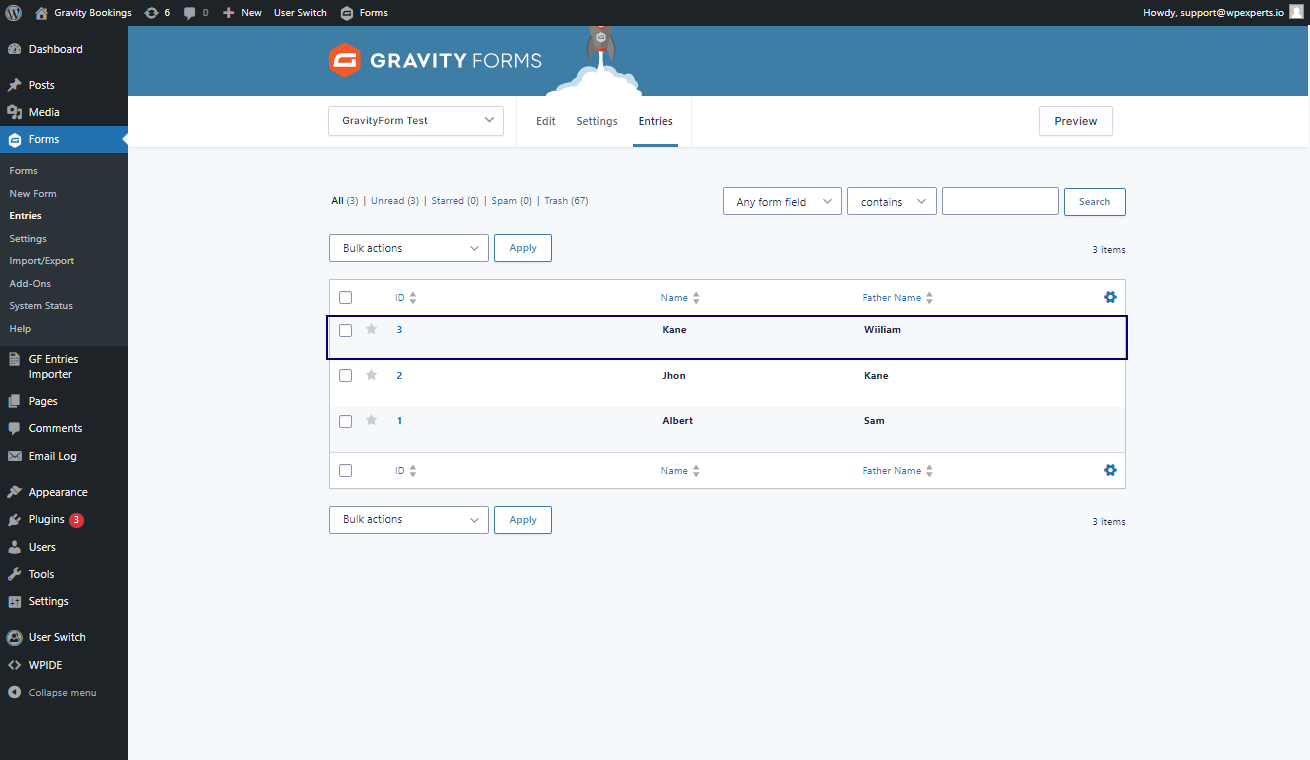
- Click the View Imported Entries button.

Frontend Impact
- Once the admin clicks View Imported Entries he will be redirected to the Gravity forms →Entries and the imported data can be viewed.

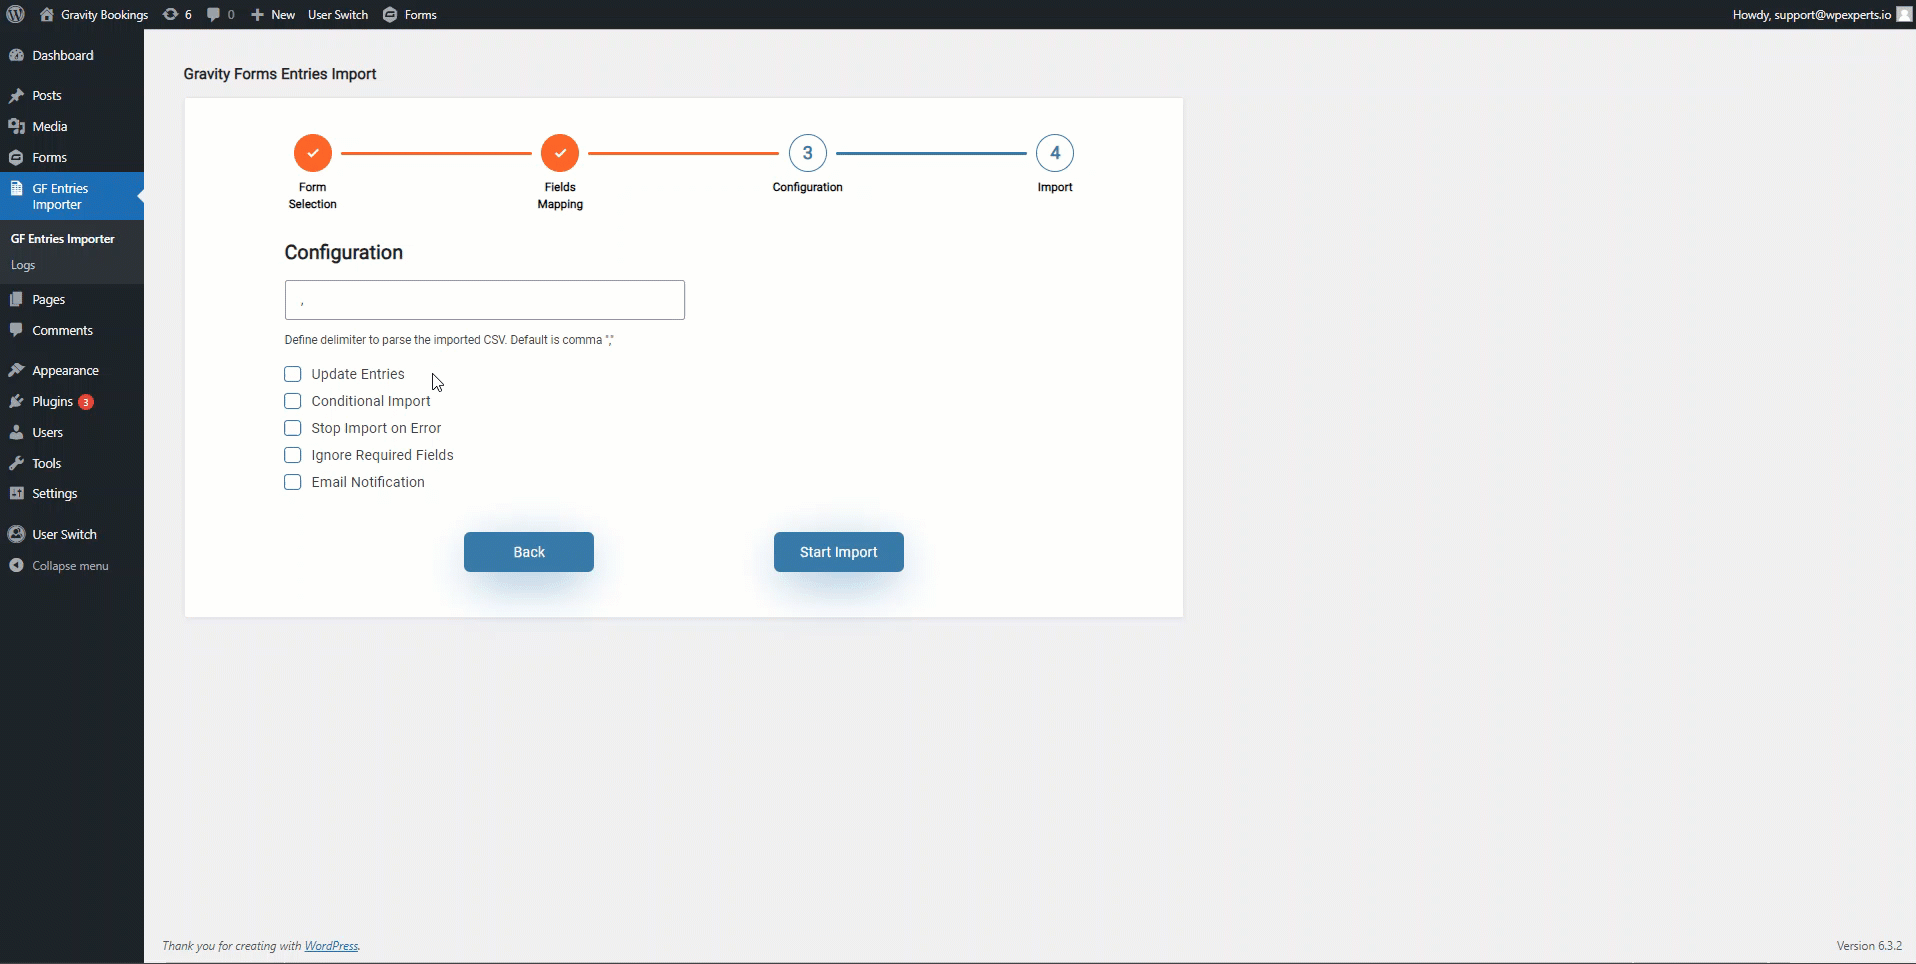
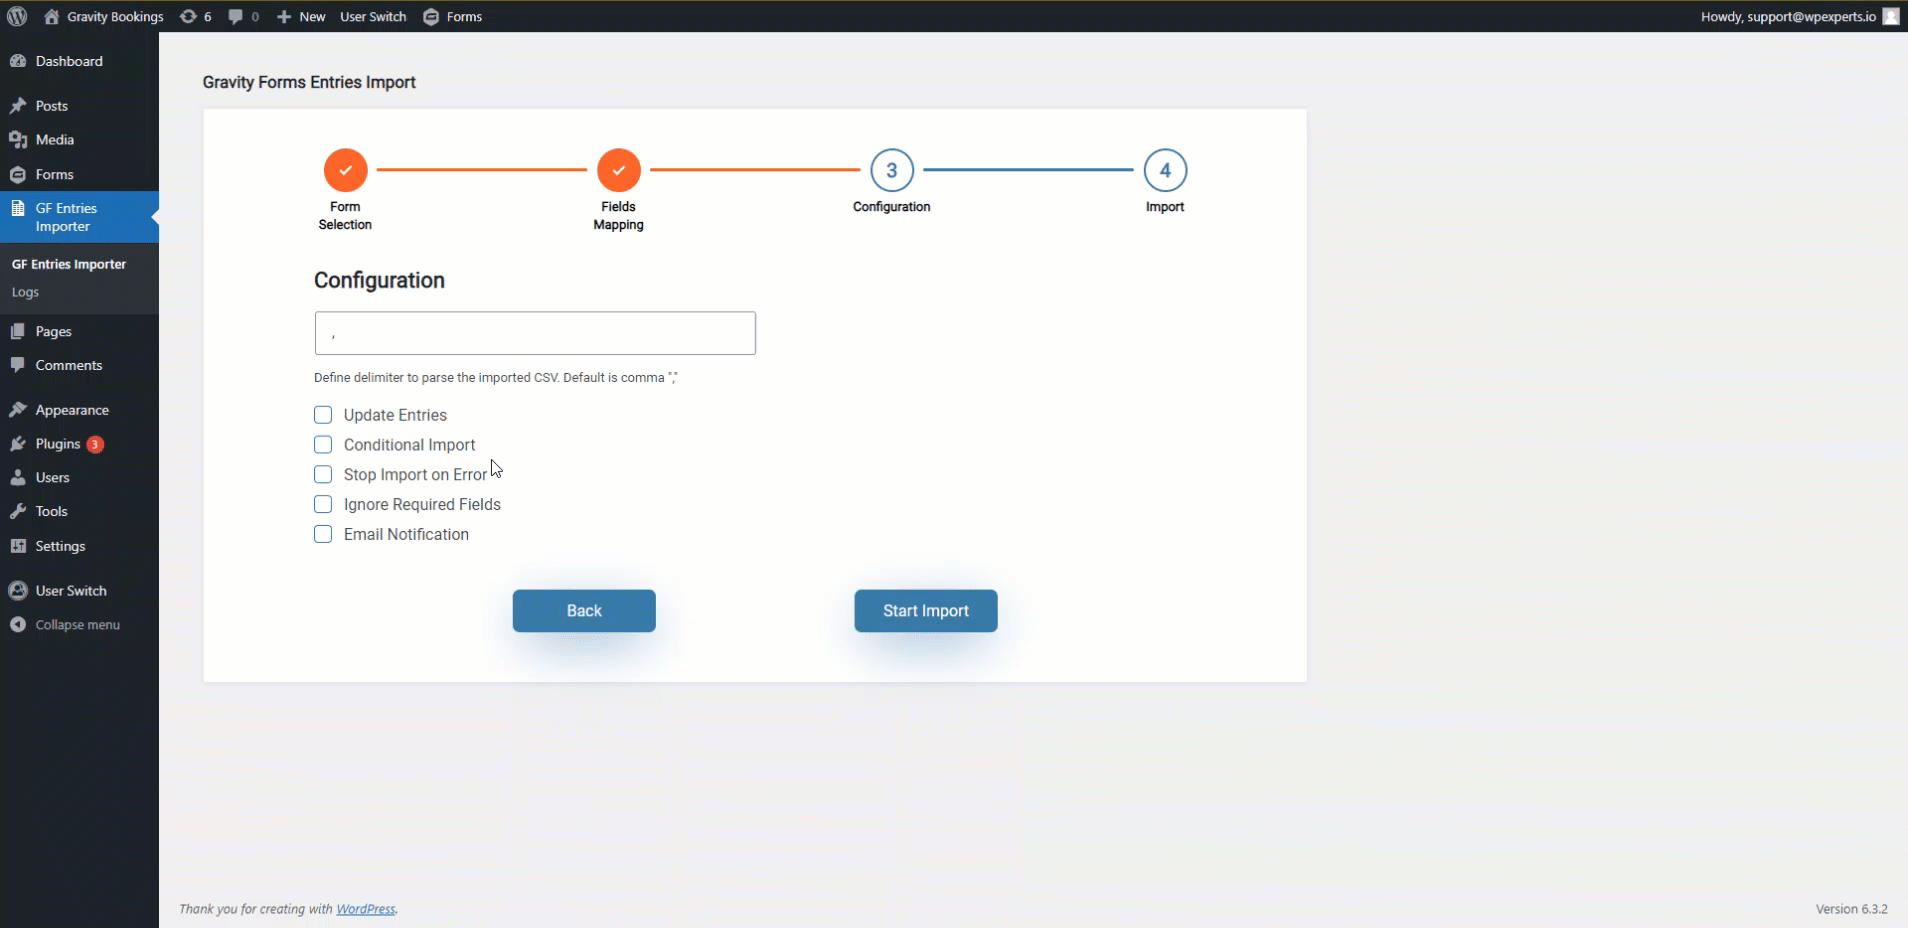
5.Configuration
- On the Configuration page, the Admin has multiple checkboxes as well
5.1.Delimiter
- When working with Gravity Forms imports, the system utilizes a predefined method to specify and analyze the CSV file being imported. By default, the system assumes that the separator used in the CSV file is a comma.
5.2.Update Entries
To update entries, the admin needs to follow these steps:
- Check the Update Entries checkbox.
- When the admin selects update entries, a dropdown box labeled as Column key will appear.
- This will contain all the form field headers.
- This is used to update the rows with respect to particular columns.
- Select the desired column and click Start Import Button.
Note: If no column key is selected then it will match the entry ID and if it matches, only then it will update the entry row.
Frontend Impact
Before
After

5.3.Conditional Import
To use Conditional Import, the admin needs to follow these steps:
- Check the Conditional Import checkbox.
- Select All/Any from the dropdown to match the Import entries
- Admin can define multiple Import entries matching all/any of the conditional logic by clicking the Add button.
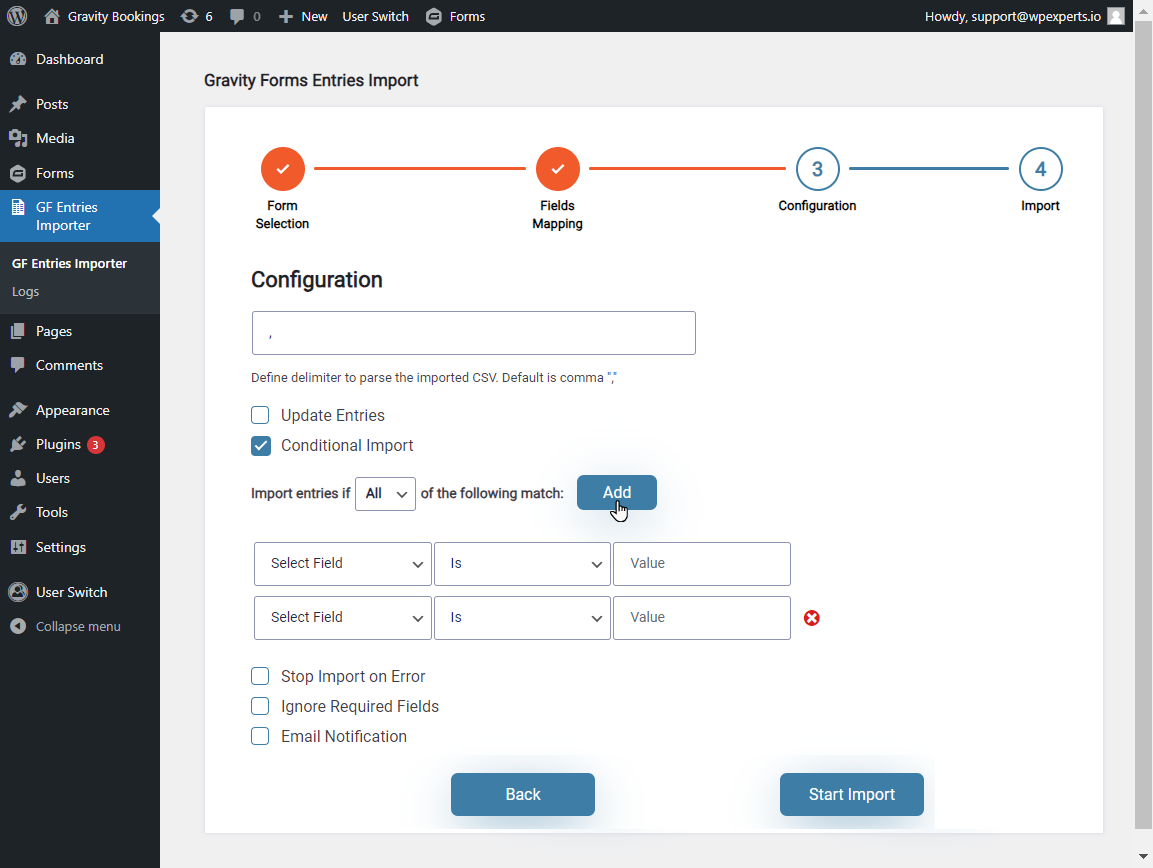
- From the dropdown list, the Admin should select the name of the Form Field for which he wants to set up a conditional import.
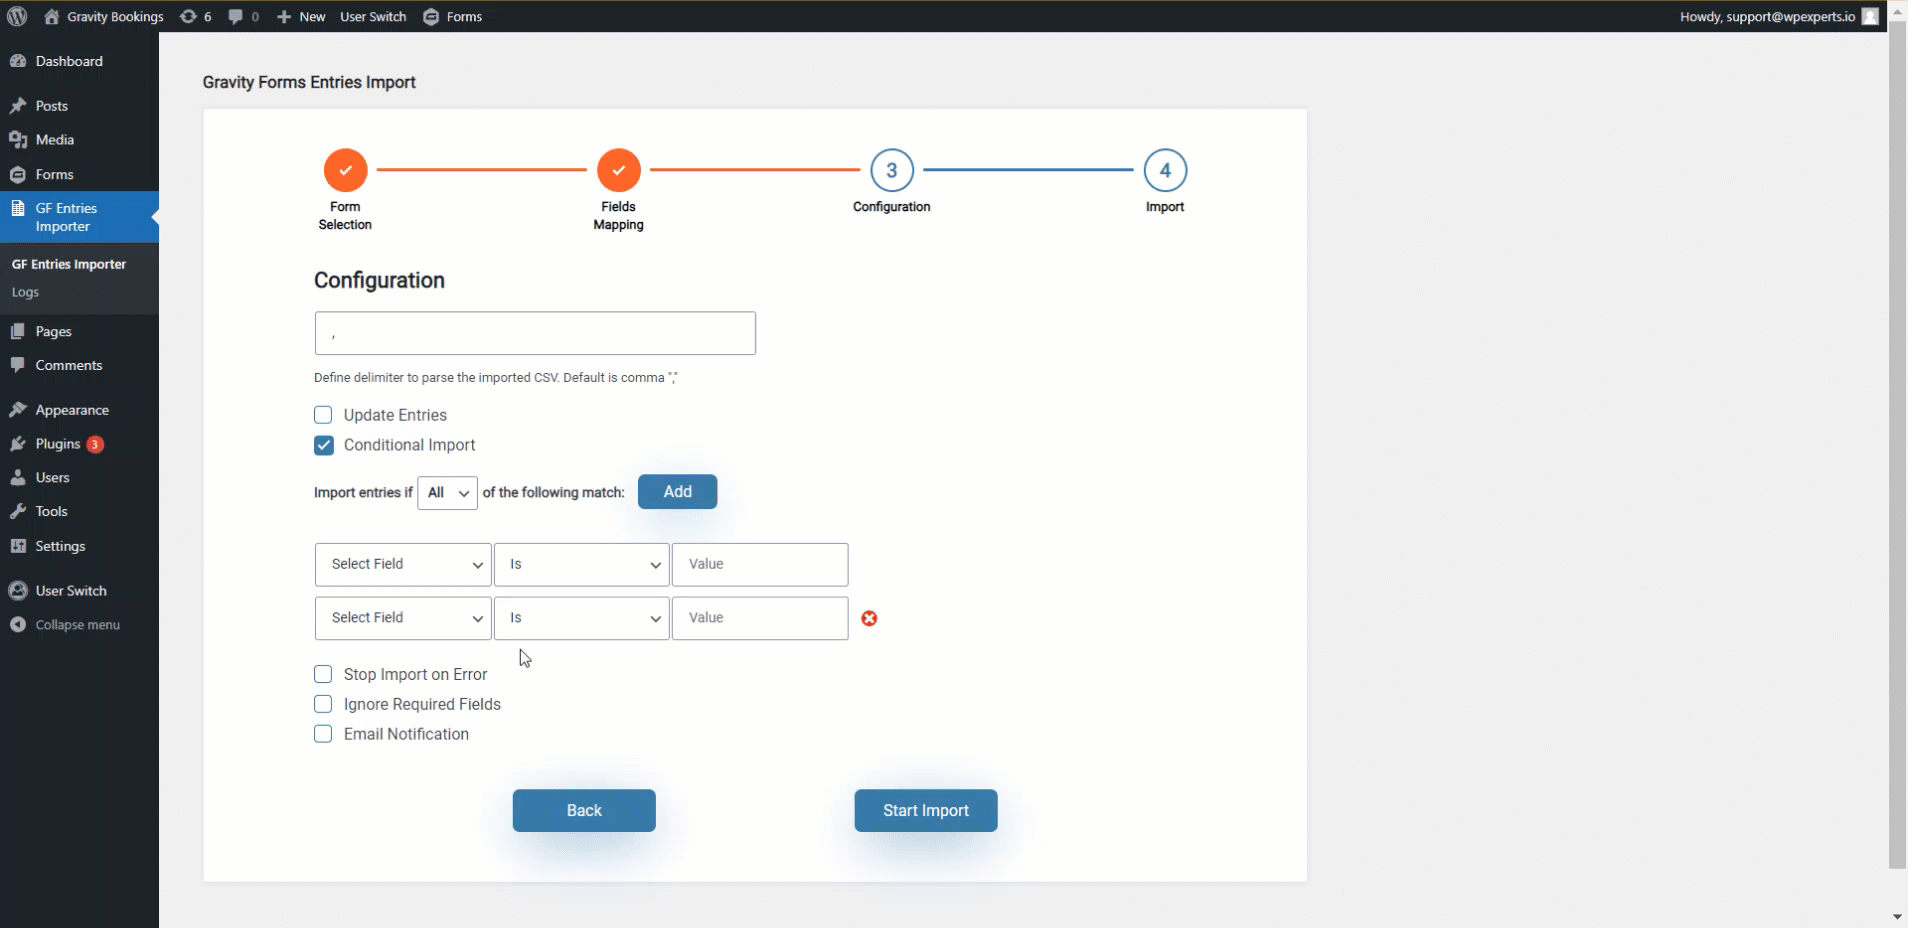
- Admin has multiple conditions to apply from as defined below
- Contains: by giving this condition the Admin directs the GF importer to fetch the data from CSV if that file contains a certain value that matches what the Admin has specified.
- Greater than: Conditional import will allow the Admin to add certain conditions with respect to which the data will be imported. By giving this condition Admin directs the GF importer to fetch the data that is greater than the specified value from the CSV.
- For example: the user needs to update or import the data of people who are aged greater than 20. Here, this option will allow the user to select the field header and then the condition, in our case it is greater than and then the value which will be 20 here. The importer will import the data based on the given condition and update only those entries where the age is greater than 20.
-
- Less than: Conditional import will allow the Admin to add certain conditions with respect to which the data will be imported. By giving this condition Admin directs the GF importer to fetch the data that is Less than the specified value from the CSV.
- For example: the user needs to update or import the data of people aged less than 20. Here, this option will allow the user to select the field header and then the condition, in our case it is less than and then the value which will be 20 here. The importer will import the data based on the given condition and update only those entries where the age is less than 20.
- Less than: Conditional import will allow the Admin to add certain conditions with respect to which the data will be imported. By giving this condition Admin directs the GF importer to fetch the data that is Less than the specified value from the CSV.
-
- IS: by giving this condition Admin directs GF importer to fetch the data from CSV, if only that CSV has the value specified by the Admin.
- ISNOT: by giving this condition Admin directs the GF importer to fetch the data from CSV. if the value in that file does not match what Admin has specified.
- In our case, we are selecting the Contains condition.

- After that, the admin must enter the Value that needs to be matched.
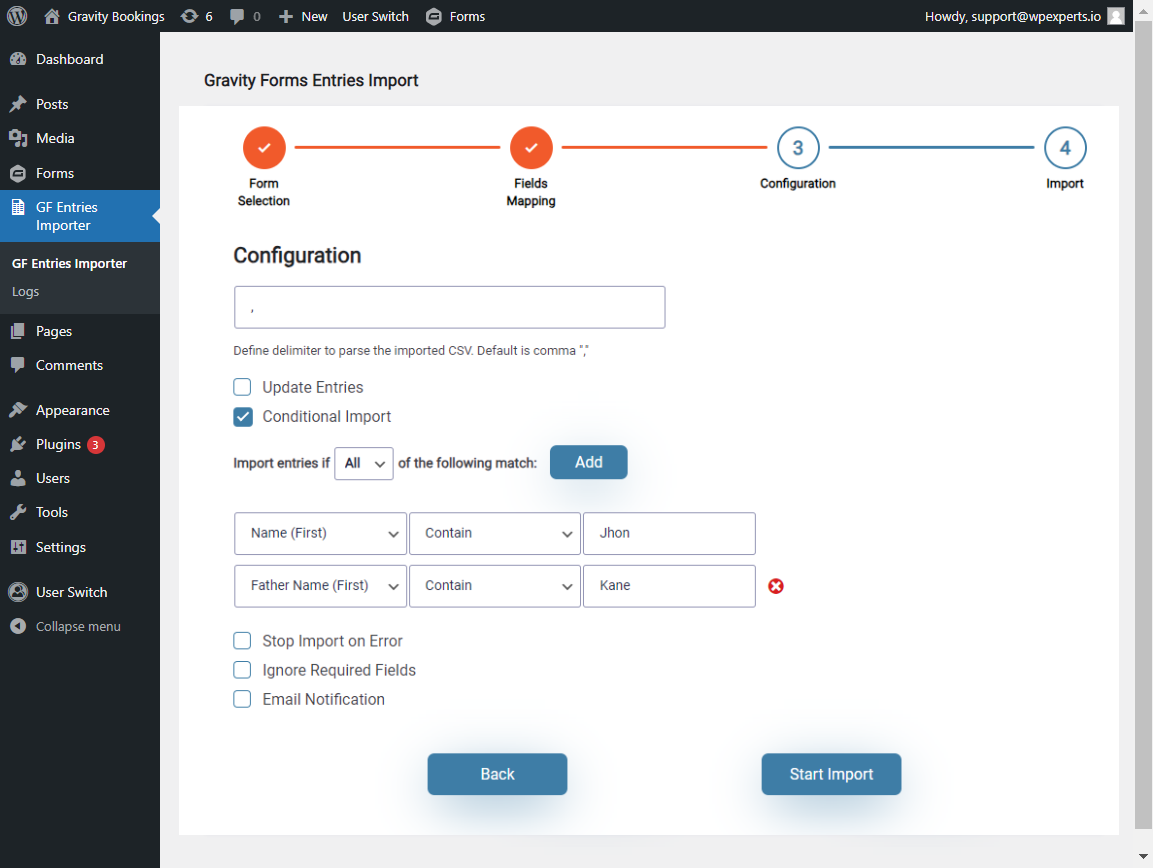
- Select Start Import button the import will be made based on these conditions.
-
Frontend Impact
-
Before
-
-
-
After
-
5.4.Ignore required fields
- After adding a CSV file with a name missing which is a required field.
- Click the Next Button.
- Once on the Configuration page, the admin can ignore required fields while importing. It will be imported as an empty entry.
- To activate this option select the checkbox Ignore required fields.
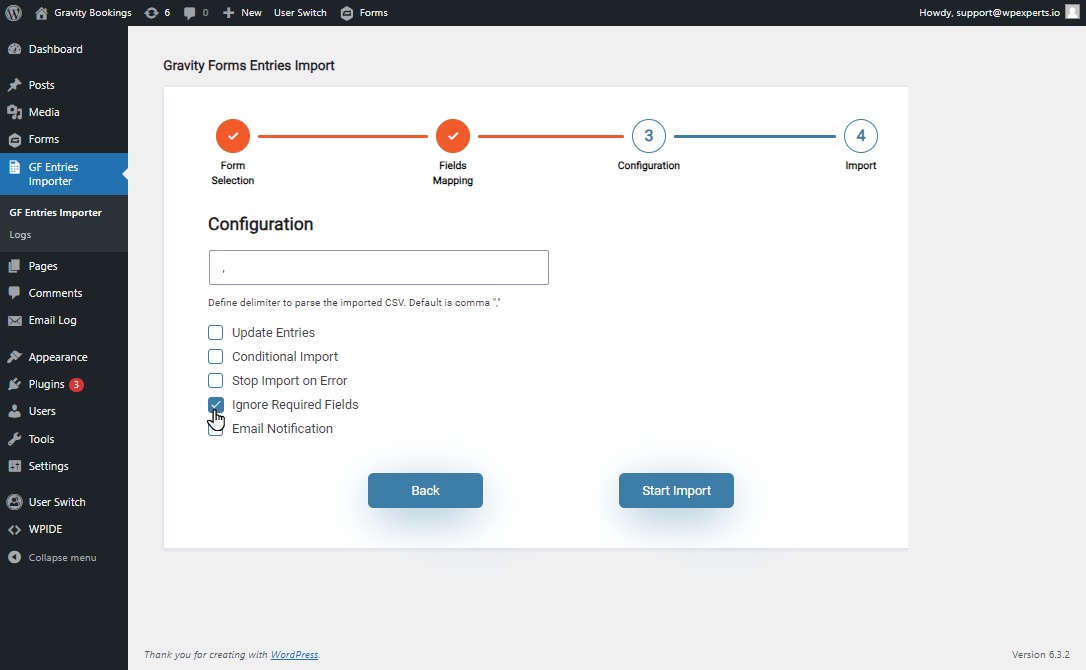
- Once done click Start Import.

-
Frontend Impact
-
Before
-
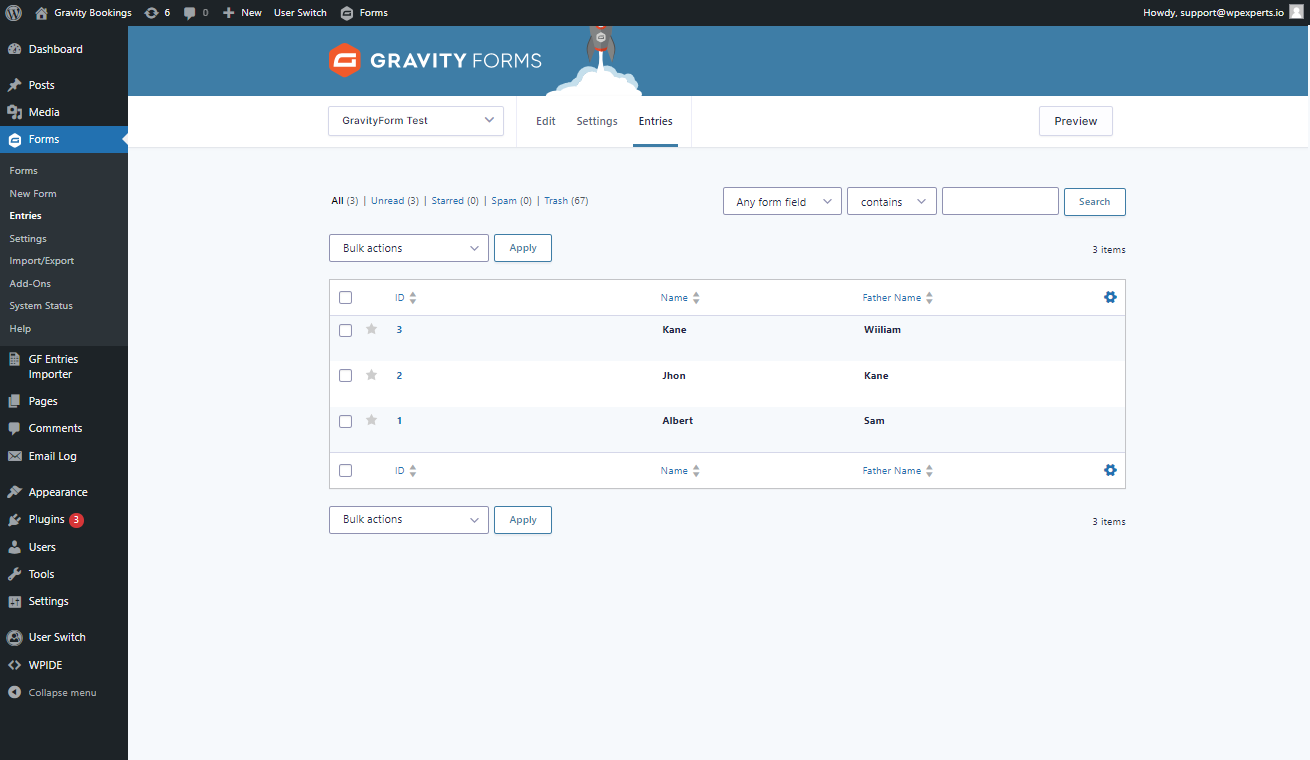
-
-
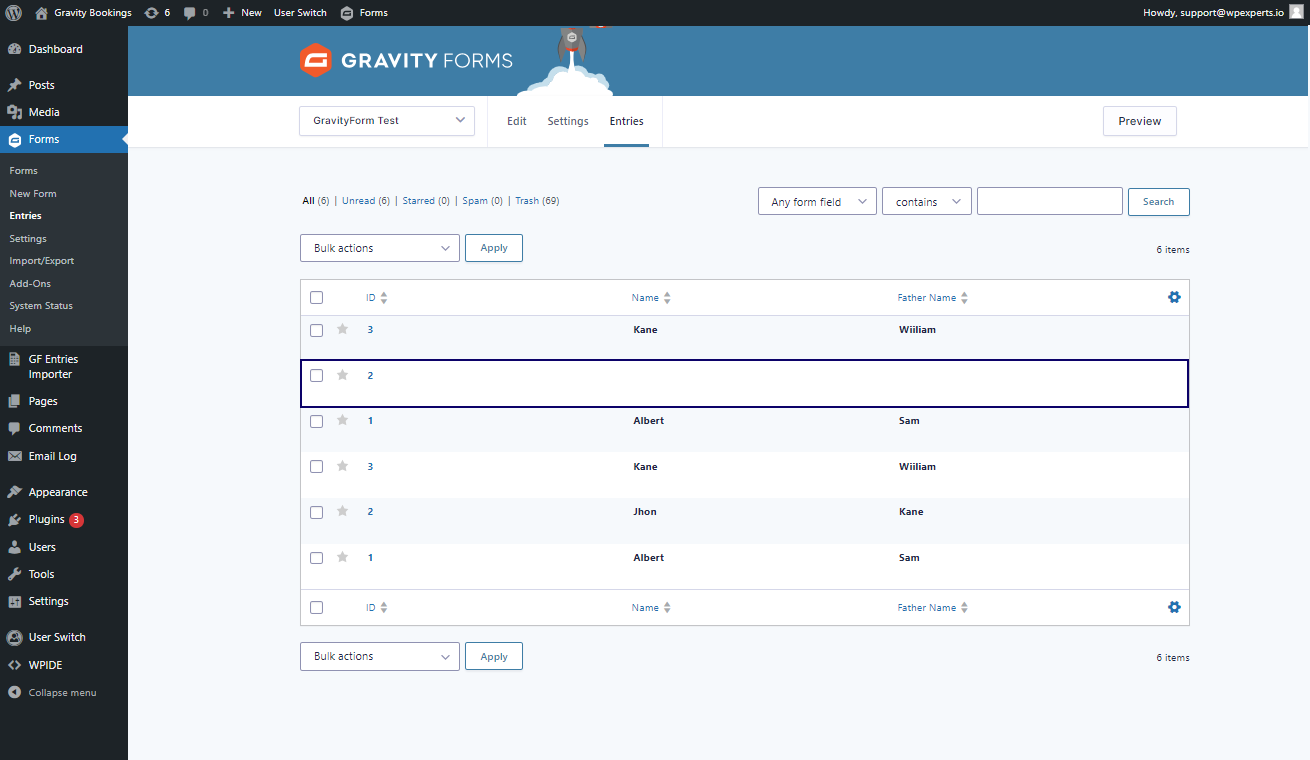
After
-
5.5.Email Notification
- After adding a CSV file the admin can be notified through an email.
- Click the next Button.
- Once on the Configuration page, the admin can check the Email Notification checkbox.
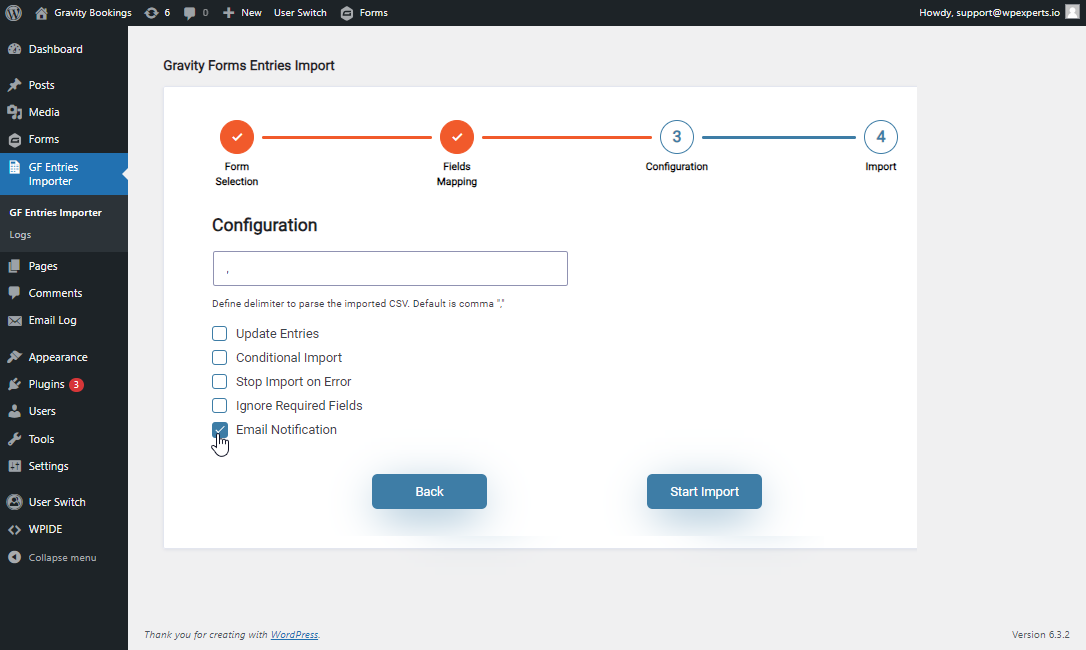
- Once done click Start Import.
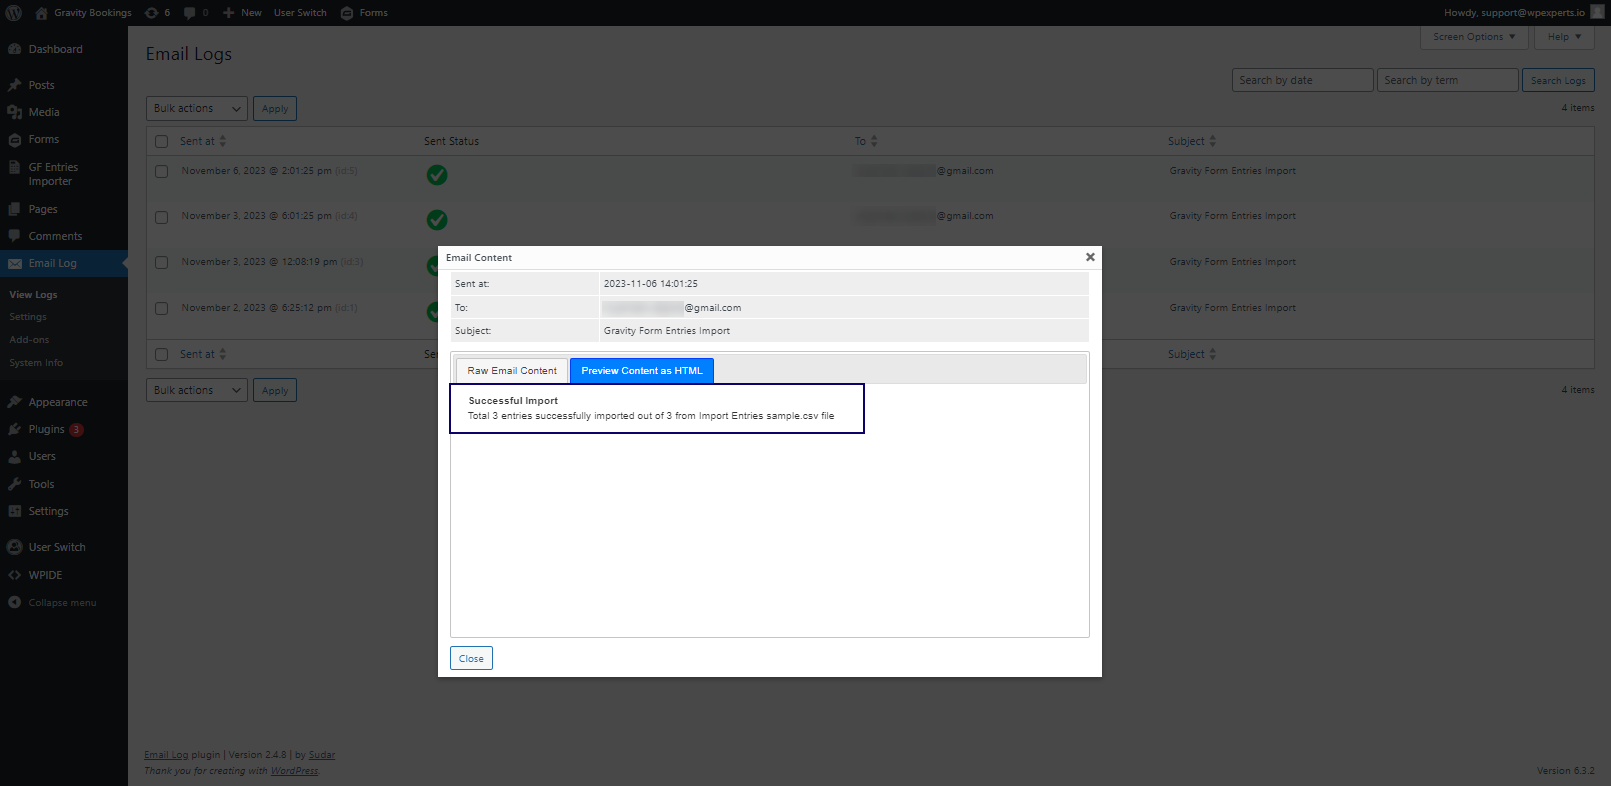
Frontend Impact
- The admin can view the notification email sent to the system administrator’s email.
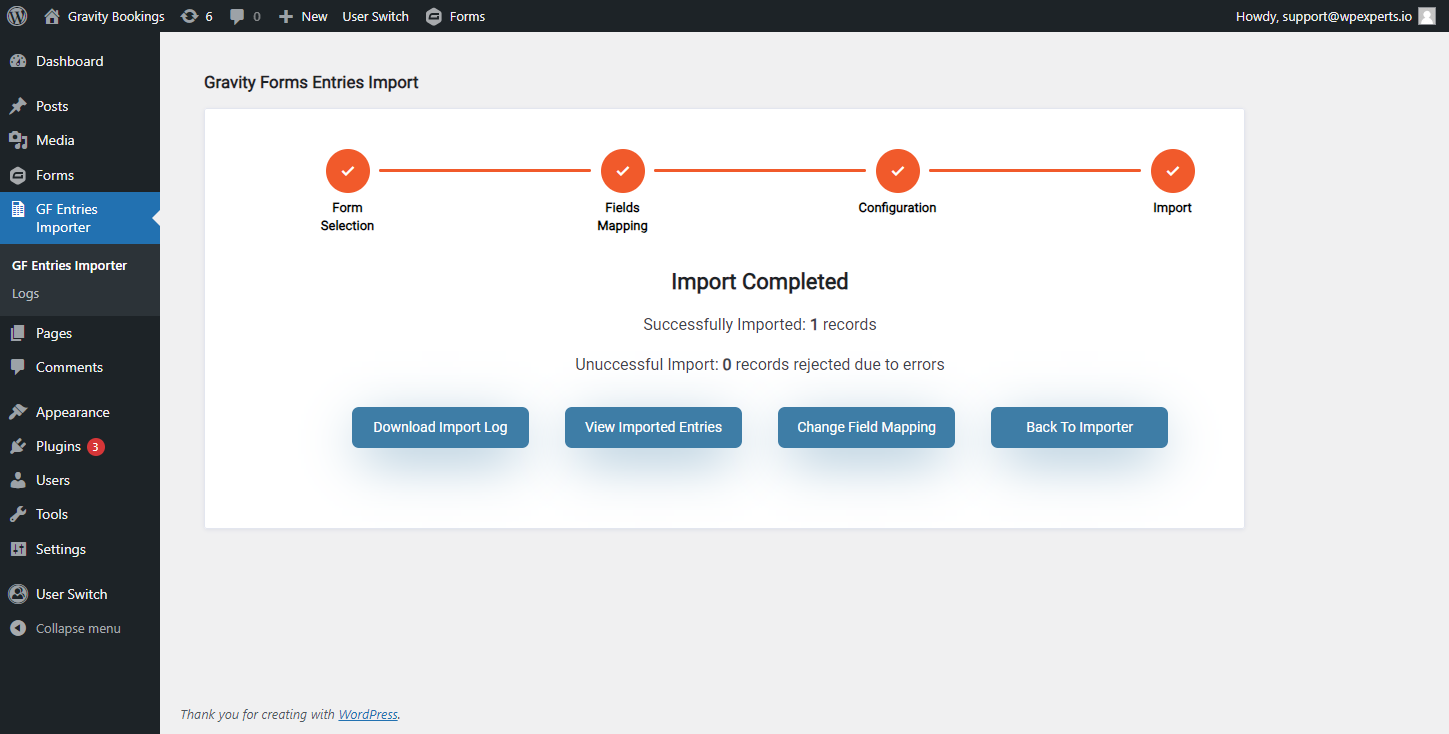
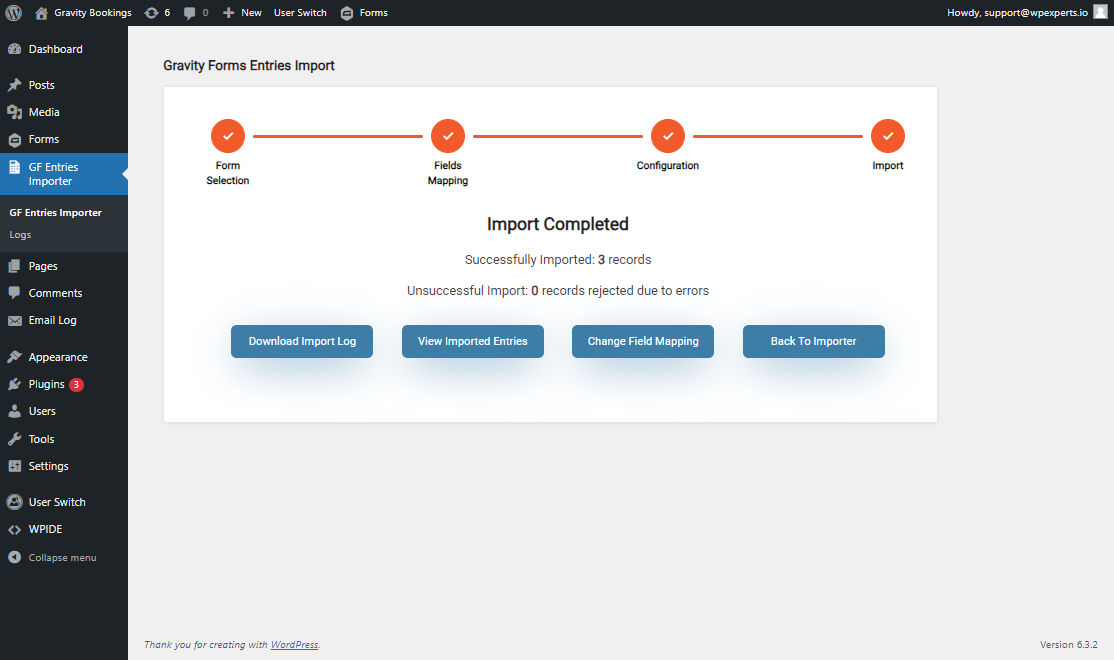
Import
- Once the Import is completed under the Import page admin can see 4 options.
- Download Import Log: This will download the import log file which contains all the successful and unsuccessful entries.
- View Imported Entries: This will redirect the admin to the Gravity Forms Entries page where the recent entries have been imported.
- Change Field mapping: This will redirect the admin back to the Field Mapping setup for the current import.
- Back to importer: This will take the admin back to the first step of import i.e. Form Selection.

Help Guide Powered by Documentor