Quick Guide To Create A Travel Booking Website For Tourism Business
Since the digital era has spread its wings on the online business landscape, people make an online presence for their rapid business growth.

The manual to automatic journey brought a significant change to the market level strategies, and at this age, people mostly trust online purchasing and browsing.
Whenever they need something, they prefer searching online rather than visiting the place in person or physically.
Similarly, traveling has left a remarkable impact on online business, and traveling is everyone’s desire to be fulfilled.
The first time travel to anywhere requires massive research, from packaging to staying in hotels; everything has to be fixed and decided before leaving for the travel.
If you do not have an online travel booking website for a tourism business, we will help you start and build your website to multiply your engagements and business.
The step-by-step procedure will help you out in such a case. From scratch to implementation, you will get everything here in this article.
Before letting you wait anymore, let’s hop onto the topic and resume following the process of building your online travel booking website for the tourism business.
Step #1. Domain Purchasing
A domain is basically the address of a website. Let’s say. abctravel.com, the DNS servers only identify the IPs; therefore, for human memorizing, abctravel is a domain name that is an IP address hidden behind this name.
For building any website, you need to decide on a name for it. In such a case, there are various domain registrars are available, and the list is defined below:
- GoDaddy
- NameCheap
- Bluehost
- Domain.com
- HostGator
These are well-known domain registrars offering a wide range of domain names with different prefixes, such as .com, .co, and .me. .net, etc.
Once you decide on your website name, search it on any domain registrar with your wanted prefix and see if it is available or not.
If you get one, go to the pricing plans and see what best suits your needs. Let’s say I need “abctravel.com.” I will find it on any domain registrar and see if it is available. See the screenshot below:
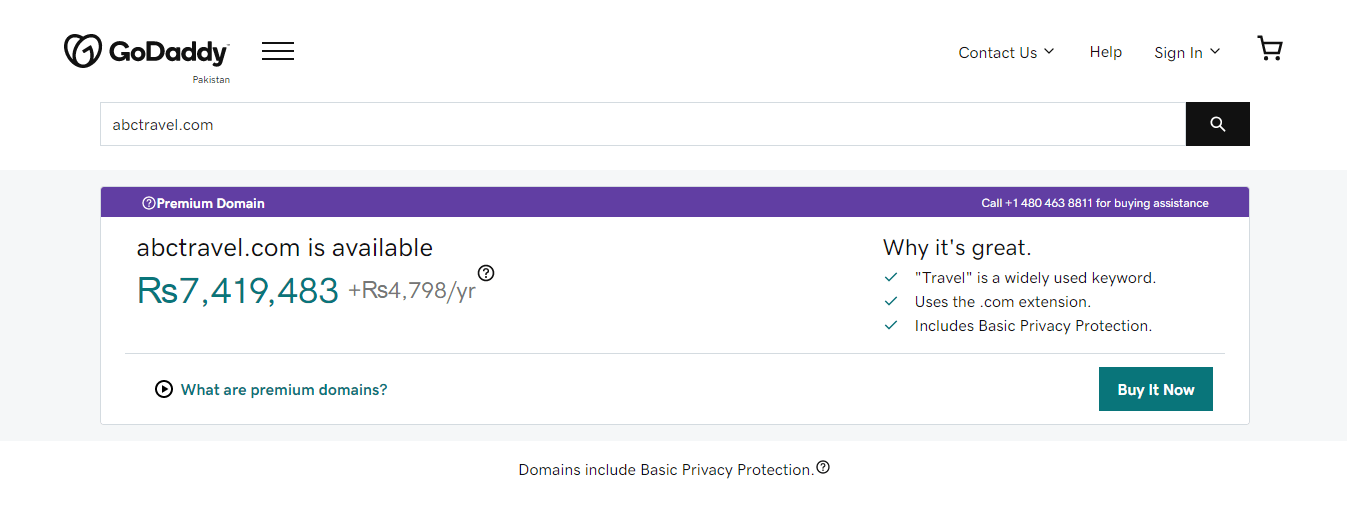
I searched for my wanted domain and found that it is available to purchase and start building my website under this name. To do so, click on the Buy it Now button and follow the payment process.
You can select your favorite domain registrar; I have picked GoDaddy for demonstration purposes. However, various domain registrars exist to choose your domain name(s) as per the pricing plans.
Step #2. Web Hosting
The very second important step is to purchase a home for your website, i.e., Hosting.
Hosting service lets you fix the place for your website that will be accessed anywhere in the world.
Now, various hosting providers are offering different hosting packages for different hosting types. Usually, there are four types of hosting.
- Shared Hosting (a good option for starting)
- Dedicated Hosting
- VPS
- Cloud Hosting
Hosting Providers
Several companies offer the best hosting services with the most wanted features when it comes to hosting service providers.
Here, we share a list of hosting providers and pick one of them that suits your website and budget.
- BlueHost
- Cloudways
- Kinsta
- WPEngine
- HostGator
These are the top giants, and their services are incredibly unique. Explore each of them and select any of them for your website to be hosted.
Step #3. WordPress Installation
WordPress is one of the best Content Management Systems (CMS) and is widely used to build websites instantaneously.
To install your website on WordPress, you might take a few minutes to install and live your website easily.
Most hosting providers offer WordPress installation services on your website, such as BlueHost. It is an official WordPress hosting provider service and is more affordable than others.
The primary benefit of this hosting provider is that it enables you to get started building your websites.
Once you purchase its hosting, it automatically installs WordPress under your domain name whenever you get started.
All you will need to login into your BlueHost account, and you will find a WordPress option in the My Sites section in your BlueHost dashboard.
Else, you can manually download WordPress on your local computer using the WAMP service and then take your site to live.
To download and install WordPress manually, you can click here and follow the instructions.
Step #4. Plugins Installation
To install a plugin on your WordPress website, the process is relatively easy, and it takes not more than five minutes.
Follow the steps below to install any WordPress plugin on your WordPress website.
First of all, you need to sign in to your WordPress admin account dashboard.
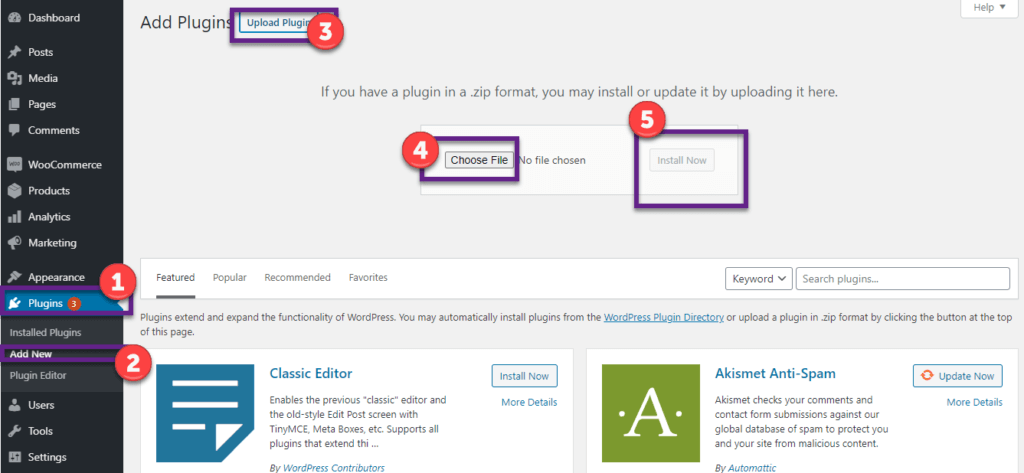
Once logged in successfully, navigate your cursor to the Plugin and click on Add New.
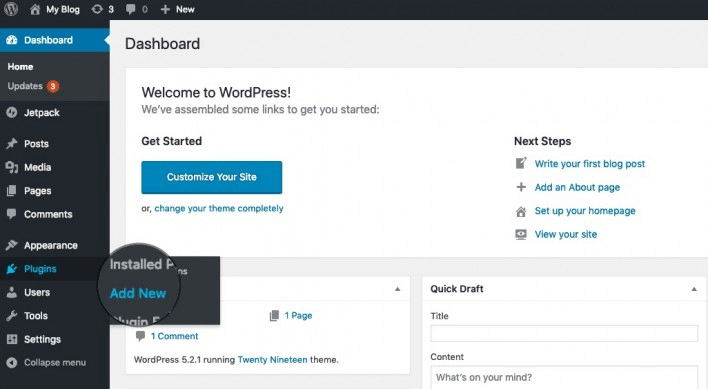
You will be in the plugins library, where you can search for your desired plugin, then click on Install Now button and Activate it afterward. Or you can manually upload the plugin compressed zip file and install it, as shown below in the screenshot.
Let us share a demonstration for installing a booking plugin that is Bookings for Gravity Forms.
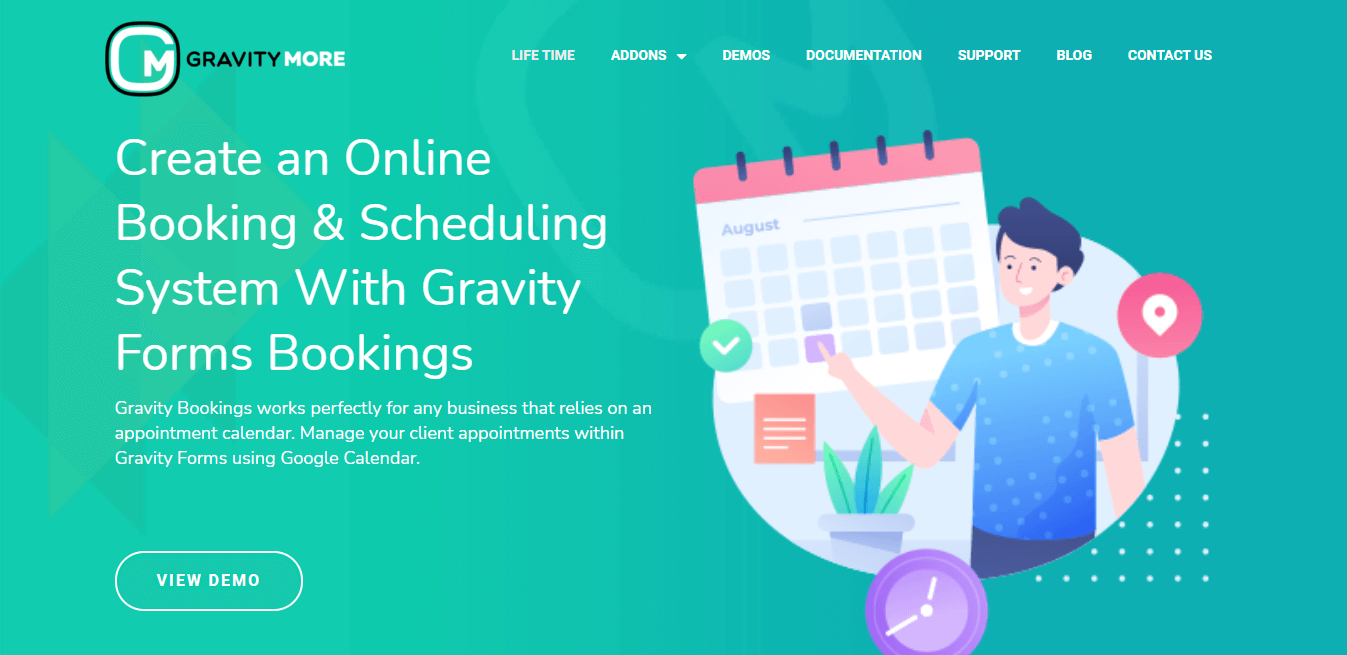
To download this plugin, click here and choose a plan.
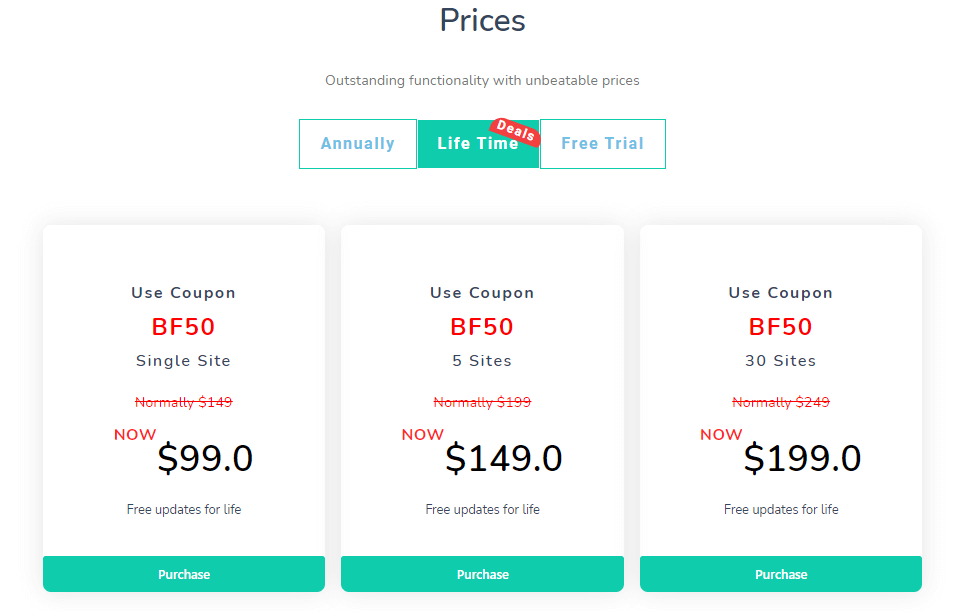
You can also avail yourself of the free trial offer to test this plugin.
- Pick any of these plans and start downloading this plugin.
- Once downloaded, follow the labeled steps shown in the screenshot and upload your plugin.
This plugin enables you to
- Build a hotel booking system (Advance reservation for accommodation)
- Build a travel booking system (For an airline, train, or bus service)
- Restaurant booking system (For eating at different venues during traveling)
And a lot more. This plugin helps you to convert your ordinary WordPress website into a travel booking website for the tourism business.
Step #5. Theme Selection
WordPress offers default themes for the users if you navigate to the Appearance → Themes, as shown below in the screenshot.
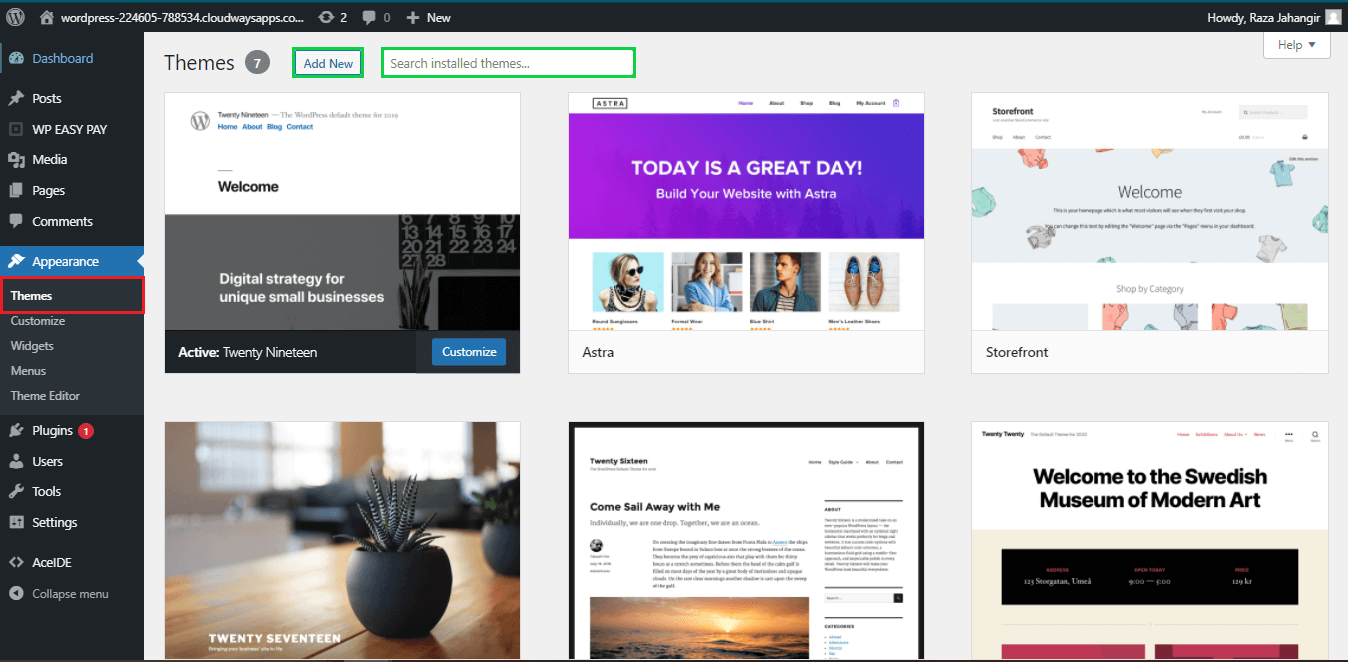
You can activate any of the themes pre-installed in your themes library. Also, you can search for any themes by typing in the search field, or if you have any theme installed on your local computer, you can click on the Add New button to upload it.
Furthermore, there are some additional steps to install or import themes in your WordPress website; you can check all of them by clicking here.
If you wish to customize your theme in your own way, you can navigate to the Appearance → Customize, and by using drag and drop functionality, you can modify your theme according to your requirements.
You can see the Widgets option in the Appearance section; here, you can manage your widgets like footer, calendar, posts, pages, etc.
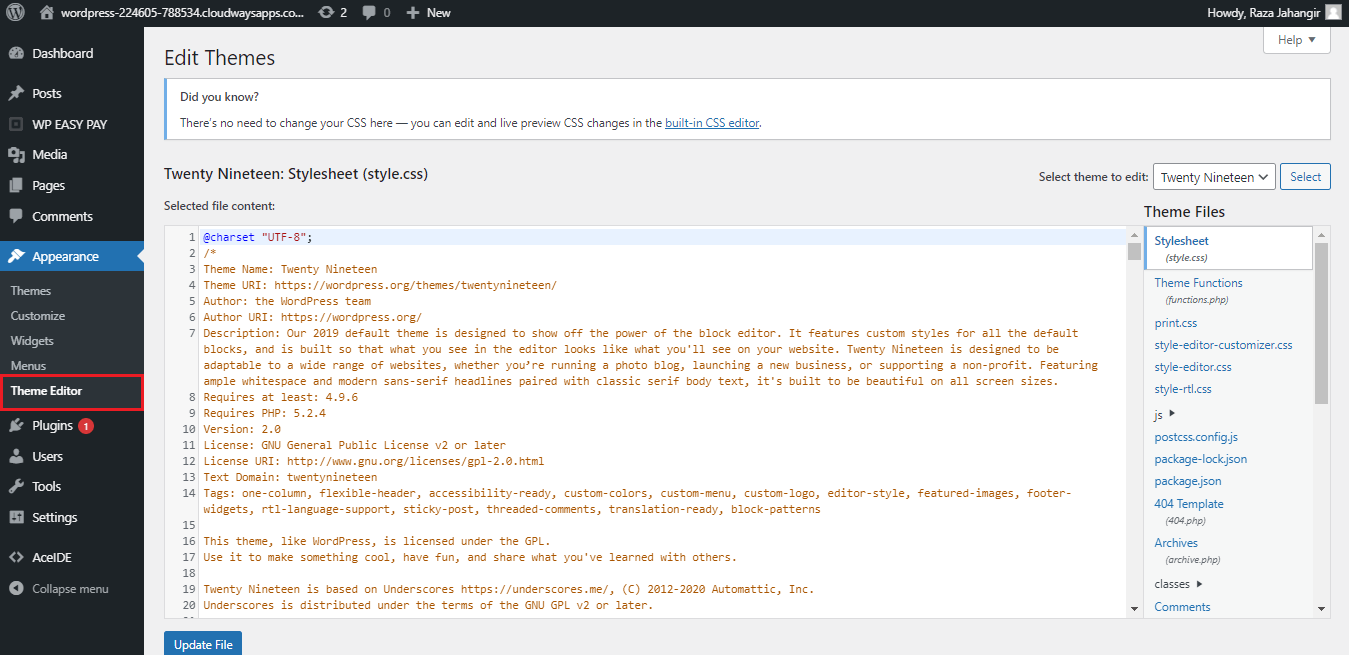
You have the option to play with the custom coding and add styling by applying modifications in the theme files. To do so, head over to the Theme Editor option.
Step #6. Contact Form
Allow your visitors or users to contact you, in any case, to get assistance from your experts. The contact form is the must-have asset of a website. To integrate a contact form into your travel booking website, please follow the steps below:
- Install the Gravity Forms (premium plugin) on your WordPress website to build a smart contact form.
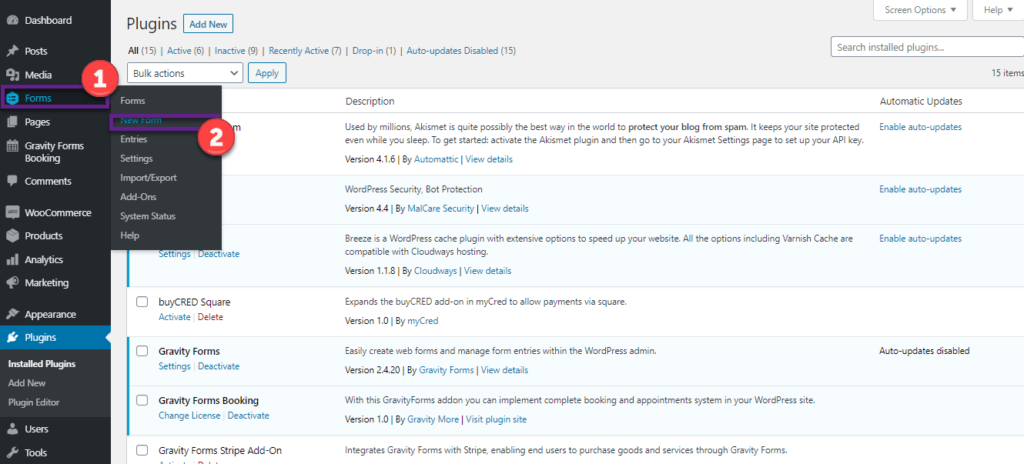
- Once installed, you will see a separate section of Forms in your WordPress dashboard.
- Next, go to Forms and click on create one.
- Insert the form title and description, then click on Create Form.
- Once created, you will see a list of options on the screen’s right-hand side, i.e., Standard Fields, Advanced Fields, Post Fields, and Pricing Fields. Simply drag and drop the fields that you want to add to your contact form.
- After adding the fields, click on Update Form.
- Now, go to All Pages and create the Contact page of your website.
- Insert the Page title and description box, type the description and click on the Add Form button for the form placing.
- Click on the Update button and then head over to your website’s Contact page to check the form’s display.
Read our other blog on how you can use Gravity Forms for eCommerce business: https://gravitymore.com/blog/gravity-forms-woocommerce-integration-for-ecommerce-business/
Step #7. Gamification Implementation
Gamification is the best way to implement and convert your casual visitors into loyal customers to build user engagement.
To do so, install the myCred gamification plugin on your WordPress website and start gamifying your website with more than fifty gamification add-ons.
myCred is a point management system that offers digital rewards to the customers who perform different activities on your WordPress website, like sharing, commenting, purchasing, etc. Due to this, users find fun elements in your website and interact more with your content.
To install the myCred plugin for gamification on your website, follow these steps.
- Navigate to your WordPress dashboard, and click on the Plugins → Add New.
- Type myCred in the search bar, and hit enter.
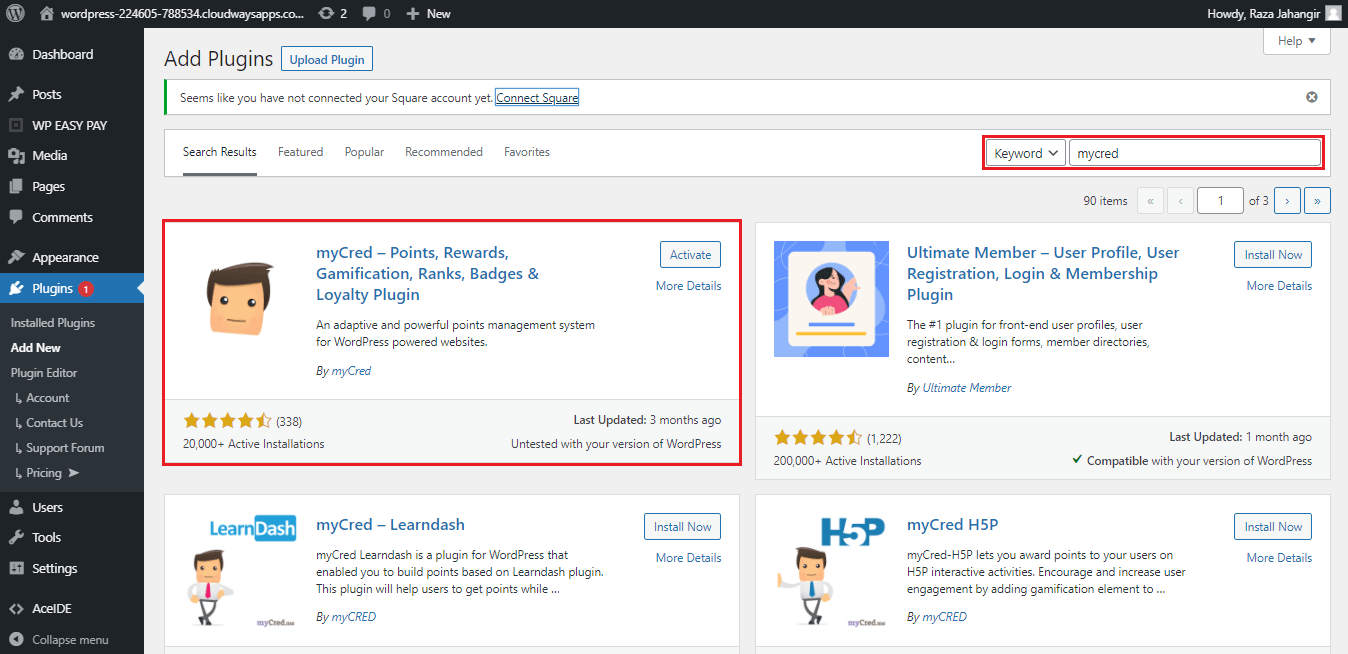
- Click on Install Now and then Activate it.
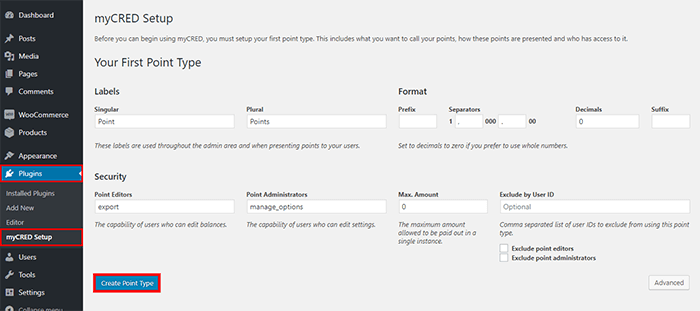
- Next, go to the Plugins → myCRED Setup to create point types which include labels, formats, and security.
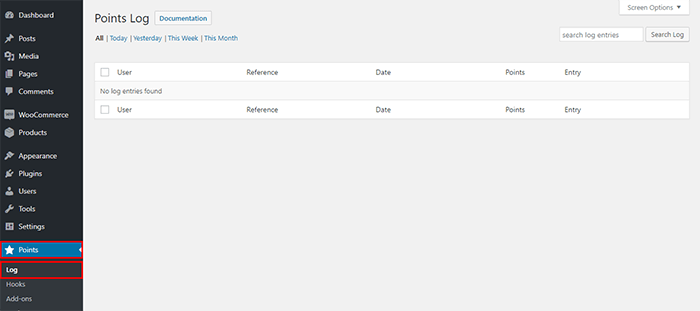
- Next, you will see the “Setup Complete” screen, and if you go to the dashboard left sidebar, you will see a Points section. There, you will see four options: Log, Hooks, Addons, and Settings.
- If you click on the Logs option, you will see a screen to manage the user’s history and profound, raw data.
- If you click on Hooks, you can enable or disable the hooks as per your needs. See the screenshot below.
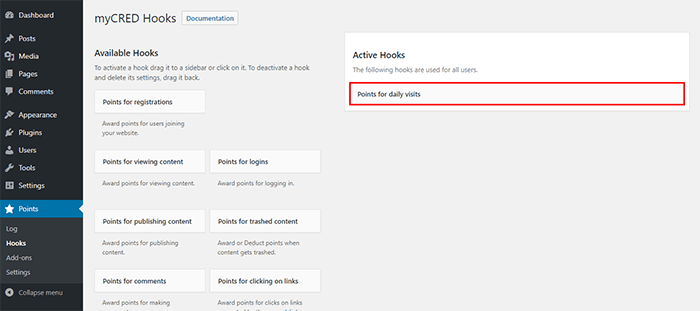
Here, a hook “Points for a daily visit,” is active, which means whenever the users visit your website, preset points will be offered to them.
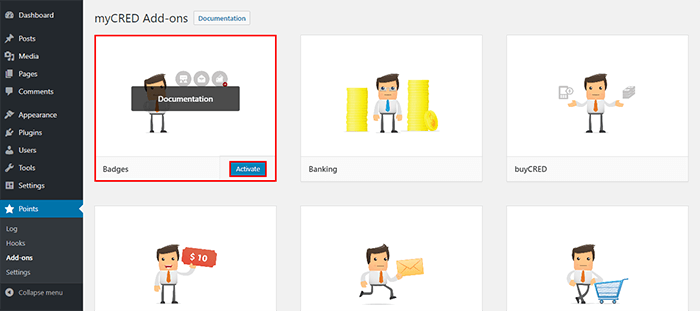
- If you navigate to the Addons, you will have more than fifty freemium addons for different purposes. You can hover your cursor over the preinstalled addon and simply click on the Activate button, as shown below.
- From the Settings tab, you can set up your myCred plugin accordingly.
Step #8. Payment Gateway Integration
This process has to be taken under proper and cautious consideration. The payment gateway is the main element of any website, and without it, no transaction is possible. You can accept simple payments by integrating a payment gateway into your website.
To integrate a safe and secure payment gateway into your WordPress website, please follow the steps below.
- Sign in to your WordPress admin dashboard.
- Navigate to Plugins → Add New.
- Search “APIExperts Square for WooCommerce.” You will see a similar window.
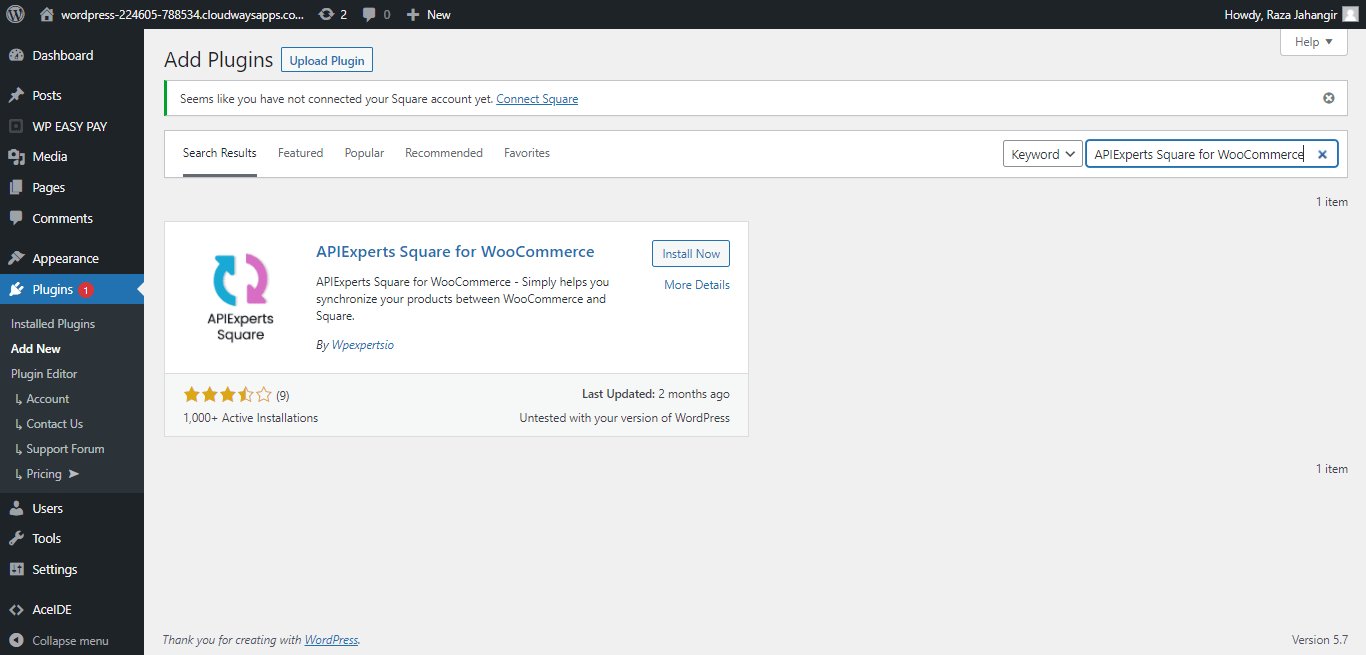
- Click on the Install Now button and then Activate it.
- Once activated, you will see a Woo Square option at the left sidebar of your dashboard.
- Click on Woo Square and then click on the Connect With Square button.
- Next, you will be asked for the permissions; click on Allow to proceed.
- API Experts will ask for your confirmation of your website. Click on That’s My Site – Redirect Me.
- Now, select your location and click on the Save Changes button.
Once you are done successfully, you can refresh your site and check the integration of the WooSquare payment gateway into your WordPress website.
Note: You can also use the WP EasyPay plugin to accept Square payments on your WordPress site.
Step #9. Social Media Widgets
The social media icons on your website play a vital role in bringing traffic to your website from your social media accounts or vice versa.
To do so, follow the steps below and add the social icons connected to your website.
- Navigate to the Plugins → Add New and search for the Menu Image plugin.
- Click on Install Now button and Activate the plugin.
- Now, you will see a different Menu Image option on the left sidebar.
- Next, click on Appearance → Menu and create a new menu with the name “Social Media.”
- Click on Custom Links and create custom URLs for social media.
- Next, expand the drop-down of each menu and set the image and size.
- Then, click on Save Menu.
- Refresh your website and preview the changes.
Wrapping Up!
Thanks to WordPress for making our life easier. Website development is not that difficult anymore if you know how to create a website using the best content management system, i.e., WordPress.org.
We have covered all the significant steps that have to be taken to build a travel booking website for the tourism business.
You do not have to be a coder or programmer to build a website; if you follow this quick guide, it will take hardly 30-45 minutes to create a website.
Take a start and share your experience with us.