


Adding Captcha to WordPress: How to Add reCAPTCHA v3 Using Gravity Forms
Adding Captcha to online forms is indispensable for engaging customers and gathering data. However, they also let spambots and fake submissions malign various databases. This is where reCAPTCHA, Google’s free anti-spam service, comes in.
Adding Captcha to WordPress through reCAPTCHA v3 for Gravity Forms offers invisible yet seamless protection against spam with minimal impact on real users. Gravity Forms is one of the most popular WordPress form plugins, used by over 5 million websites. Integrating reCAPTCHA v3 enhances Gravity Forms with state-of-the-art spam prevention and security.
This guide will walk through implementing reCAPTCHA v3 in Gravity Forms step-by-step. By leveraging the latest automation and machine learning, we can easily improve the user experience while keeping our data safe from bots.
Table of Contents
- Understanding reCAPTCHA v3
- Setting Up reCAPTCHA v3
- Implementing reCAPTCHA v3 in Gravity Forms
- Testing and Troubleshooting
- Wrap up
Adding Captcha to WordPress – Understanding reCAPTCHA v3
reCAPTCHA v3 represents a significant upgrade over previous versions. It introduces advanced risk analysis that runs constantly behind the scenes without any user interaction required. The risk can be averted by adding Captcha to WordPress.
Whereas reCAPTCHA v2 used visible challenges like selecting images or clicking a checkbox, v3 is entirely invisible to legitimate human users. Based on sophisticated bot detection heuristics, it simply generates a spam score between 0 and 1 for each form submission.
If a score falls below your configured threshold, the submission is blocked as likely spam. For users, the form behaves normally with no visible reCAPTCHA elements. Adding Captcha to the WordPress online booking forms significantly improves form conversion rates. Moreover, it still provides robust protection according to Google’s benchmarks.
For Gravity Forms Booking, integrating reCAPTCHA v3 is a no-brainer.
Setting Up reCAPTCHA v3 for Your Website
To start using reCAPTCHA v3, you’ll first need to sign up for reCAPTCHA and configure the credentials in your website code. Here are the steps:
- Go to the Admin Console and create a new reCAPTCHA v3 site key
- Under Domain Verification, add each domain that will use reCAPTCHA
- Click Submit to receive your Site Key and Secret Key
Now, we can install and configure the Gravity Forms reCAPTCHA v3 add-on using these credentials:
reCAPTCHA v3 Installation – Adding Captcha to WordPress
- Go to WordPress Dashboard
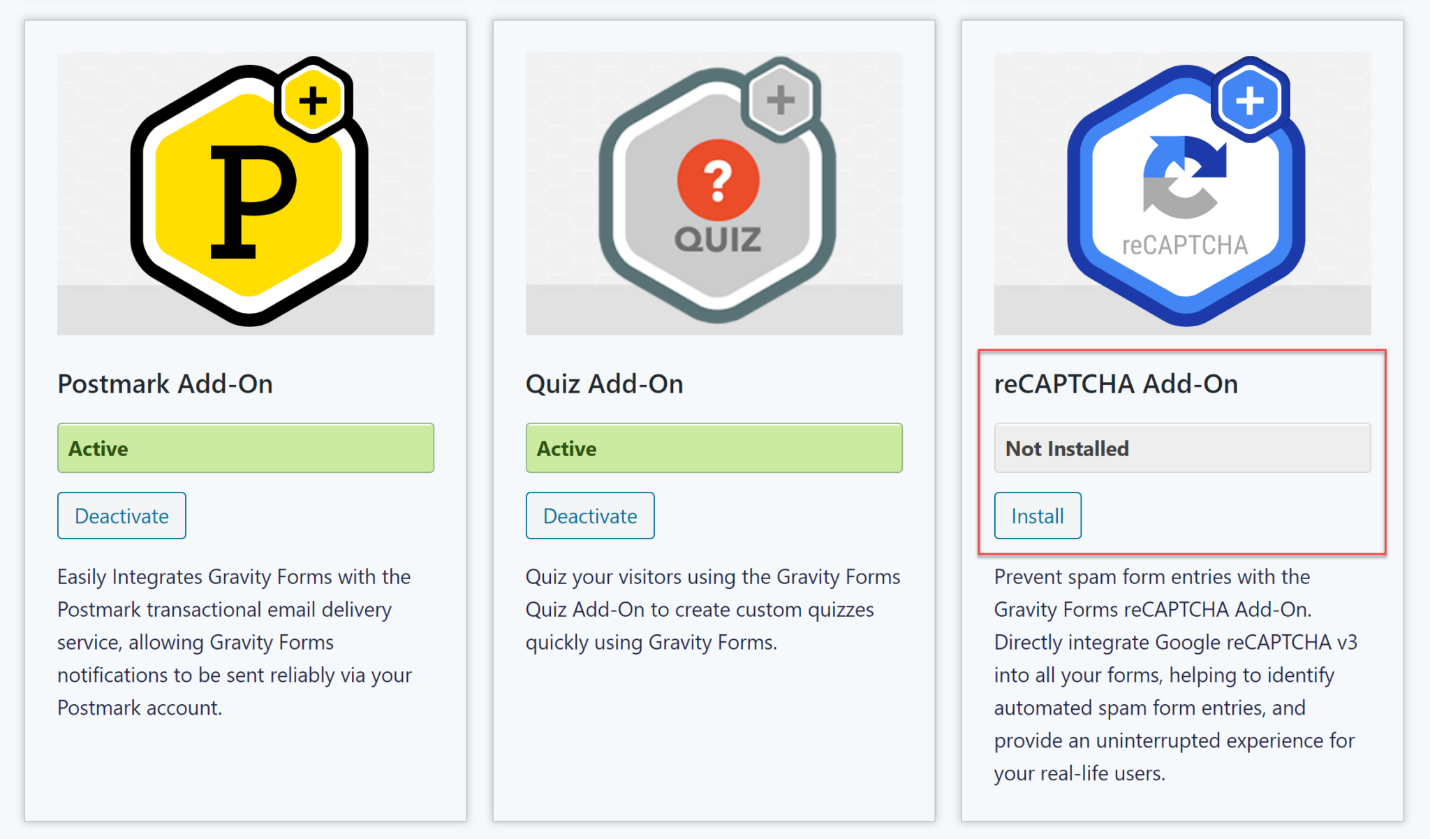
- Go to Plugins > Add New
- Search for “Gravity Forms reCAPTCHA” and click “Install”
- In Gravity Forms settings, go to Settings > reCAPTCHA
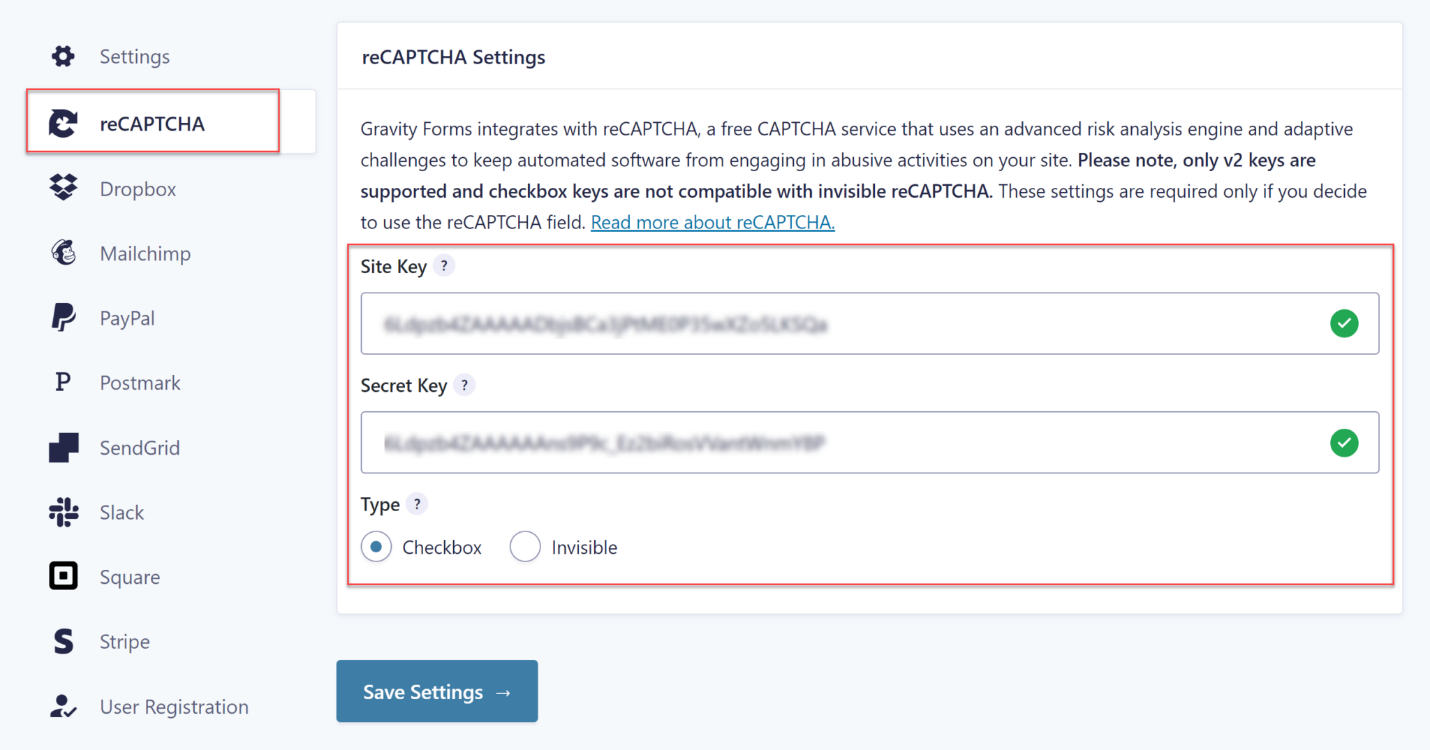
- Enter your Site Key and Secret Key
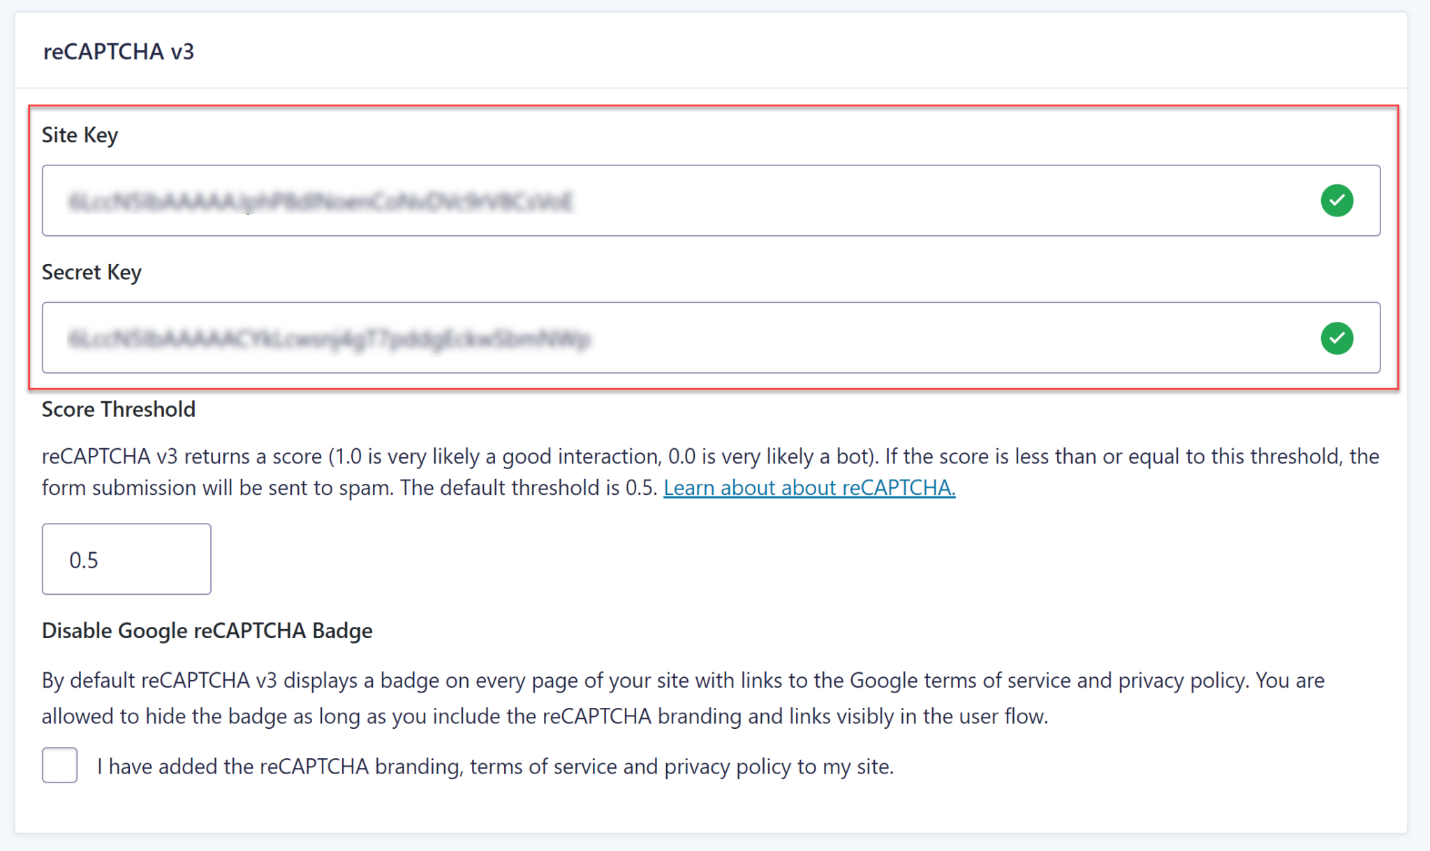
- Adjust the Score Threshold according to your spam tolerance
And that’s it! With the add-on installed and configured, we can now add reCAPTCHA v3 protection to forms.
Implementing reCAPTCHA v3 in Gravity Forms
Gravity Forms makes it easy to add reCAPTCHA v3 using the visual form editor or coded Form Editor. Let’s go through both methods.
Using the Form Editor
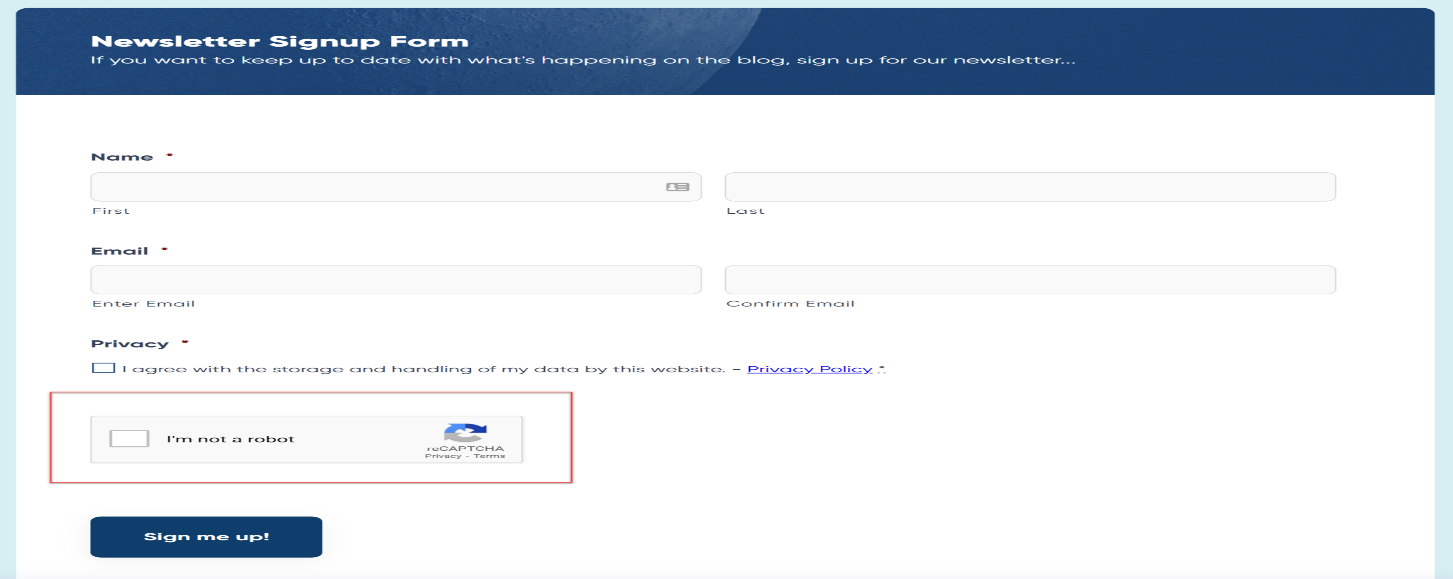
- Edit the desired form
- Drag the reCAPTCHA field into your form
- Adjust optional field settings like label, captcha size, etc.
- Save your form, and the reCAPTCHA will protect submissions
That’s all it takes to seamlessly integrate reCAPTCHA v3 into your form with a few clicks!
Using Form Editor Code
For developers who prefer customization, you can add reCAPTCHA v3 directly in the code:
- On the form, click Form Editor > Form Layout
- Where you want the reCAPTCHA field, add:
[recaptcha type=”v3″ site_key=”your_site_key” data-theme=”light” data-size=”normal”]
- replace your_site_key with your unique reCAPTCHA v3 site key
- Customize with additional available parameters
- Save and exit Form Editor
Now, your Gravity Form has the same seamless anti-spam protection using a coded approach.
Testing and Troubleshooting
Once added to your forms, it is crucial to test that reCAPTCHA v3 is working as expected:
- Verify scores are displayed in Form Entries
- Submit spam submissions and ensure they are blocked
- Submit normal entries and confirm no reCAPTCHA interactions
- Check for any JavaScript errors on the page
For any issues, first, ensure your Site Key and Secret Key are entered correctly in the Gravity Forms settings. Also, to add Captcha to WordPress, confirm your reCAPTCHA type, size, theme, and score threshold are configured.
Furthermore, refer to the Gravity Forms and Google reCAPTCHA documentation for more detailed troubleshooting steps.
Final Words
Integrating reCAPTCHA v3 into Gravity Forms is a quick win to maintain seamless & state-of-the-art bot protection. We can safeguard our online forms and data with the latest spam prevention technology with a simple setup and a few clicks.
Given Gravity Forms’ immense popularity, it’s highly recommended that all users implement reCAPTCHA v3 for enhanced security and conversion rates. So, add Captcha to your WordPress online booking form website, and don’t leave the door open for spammers and bots!


