


Spam is a common issue that can plague any kind of form. To combat this problem, you should add Google reCAPTCHA on your form blocks, promotional pop-ups, newsletters, and product waiting lists. Essentially, it prompts visitors to verify that they are human by checking a box or completing a task, such as identifying a series of letters, making it more difficult for spambots to submit forms successfully.
There are two versions of Google reCAPTCHA – v2 and v3. Both versions aim to reduce spam, but v3 utilizes more advanced technology and may be more effective at detecting bots. So keep reading to find out how Google reCAPTCHA helps you eliminate malicious form entries, the differences between Google reCAPTCHA v2 and v3, and most notably, how to add it to a form.
A Brief Introduction About Google reCAPTCHA
Google reCAPTCHA is a free service offered by Google that helps protect websites from spam and abuse. As mentioned above, it accomplishes this by presenting users with a verification procedure, such as checking a box or identifying a series of letters, to verify that they are human and not a bot.
This way, it helps prevent automated software from engaging in malicious activities on the site, such as spamming forms or scraping content.
There are two versions of reCAPTCHA available: reCAPTCHA v2 and reCAPTCHA v3. Both versions aim to reduce spam, but v3 utilizes more advanced technology and is more effective at detecting bots.
Now, you’ve got an idea of what Google reCaptcha is. Let’s discuss reCAPTCHA v2 and v3 separately.
What Is Google reCAPTCHA v2?
Google reCAPTCHA v2 authenticates an interaction in two ways. One is with the “I’m not a robot” checkbox, and the second is the “invisible reCAPTCHA” security badge.
The difference between the two is as follows:
Checkbox reCAPTCHA
Checkbox reCAPTCHA is a version of Google’s reCAPTCHA service that displays a checkbox to users and asks them to verify that they are not robots.

So, when a user checks the box and submits the task, reCAPTCHA analyzes their actions and determines whether they are likely to be a human or a bot. If reCAPTCHA determines that the user is likely to be a human, it allows the form submission; otherwise, it does not.
Invisible reCAPTCHA
In contrast, invisible reCAPTCHA runs in the background and does not require users to interact with any challenges. Instead, it uses advanced algorithms to analyze the user’s actions and determine whether they are likely to be a human or a bot.

If reCAPTCHA determines that the user might be a human, the user can submit the form. This version of reCAPTCHA is designed to be less intrusive and more user-friendly than other versions.
What Is Google reCAPTCHA v3?
Google reCAPTCHA v3 is the latest version of Google’s reCAPTCHA service. While unlike previous versions of reCAPTCHA, v3 does not present users with challenges such as checking a box or identifying a series of letters. Instead, it uses advanced algorithms to analyze user actions and determine risk levels.
Based on this analysis, reCAPTCHA v3 assigns a score from 0.0 to 1.0 to each user. A higher score indicates the possibility that the user is a human and vice versa.
Website owners can then use this score to decide whether to allow the user to access certain content or complete specific actions on the site. For example, a site owner might set a threshold at which all users are considered low-risk and allowed to access certain content without additional verification.
Overall, reCAPTCHA v3 provides better bot detection and a less intrusive experience than previous versions. However, reCAPTCHA v3 requires your site to send data about your user behavior to Google servers.
Note: If you want to learn more about these two reCAPTCHA approaches, read this Google reCAPTCHA guide. It will help you to decide which one is best for you.
How to Add Google reCAPTCHA v2 in a Form
Important Note: Before diving into the process, you need to have the Gravity Forms plugin installed on your WordPress website, allowing you to add Google reCAPTCHA v2 in any form you create.
The process to add Google reCAPTCHA v2 in a form is very easy. However, to do it for the first time, you’ll need to create a Google account and connect it to your website.
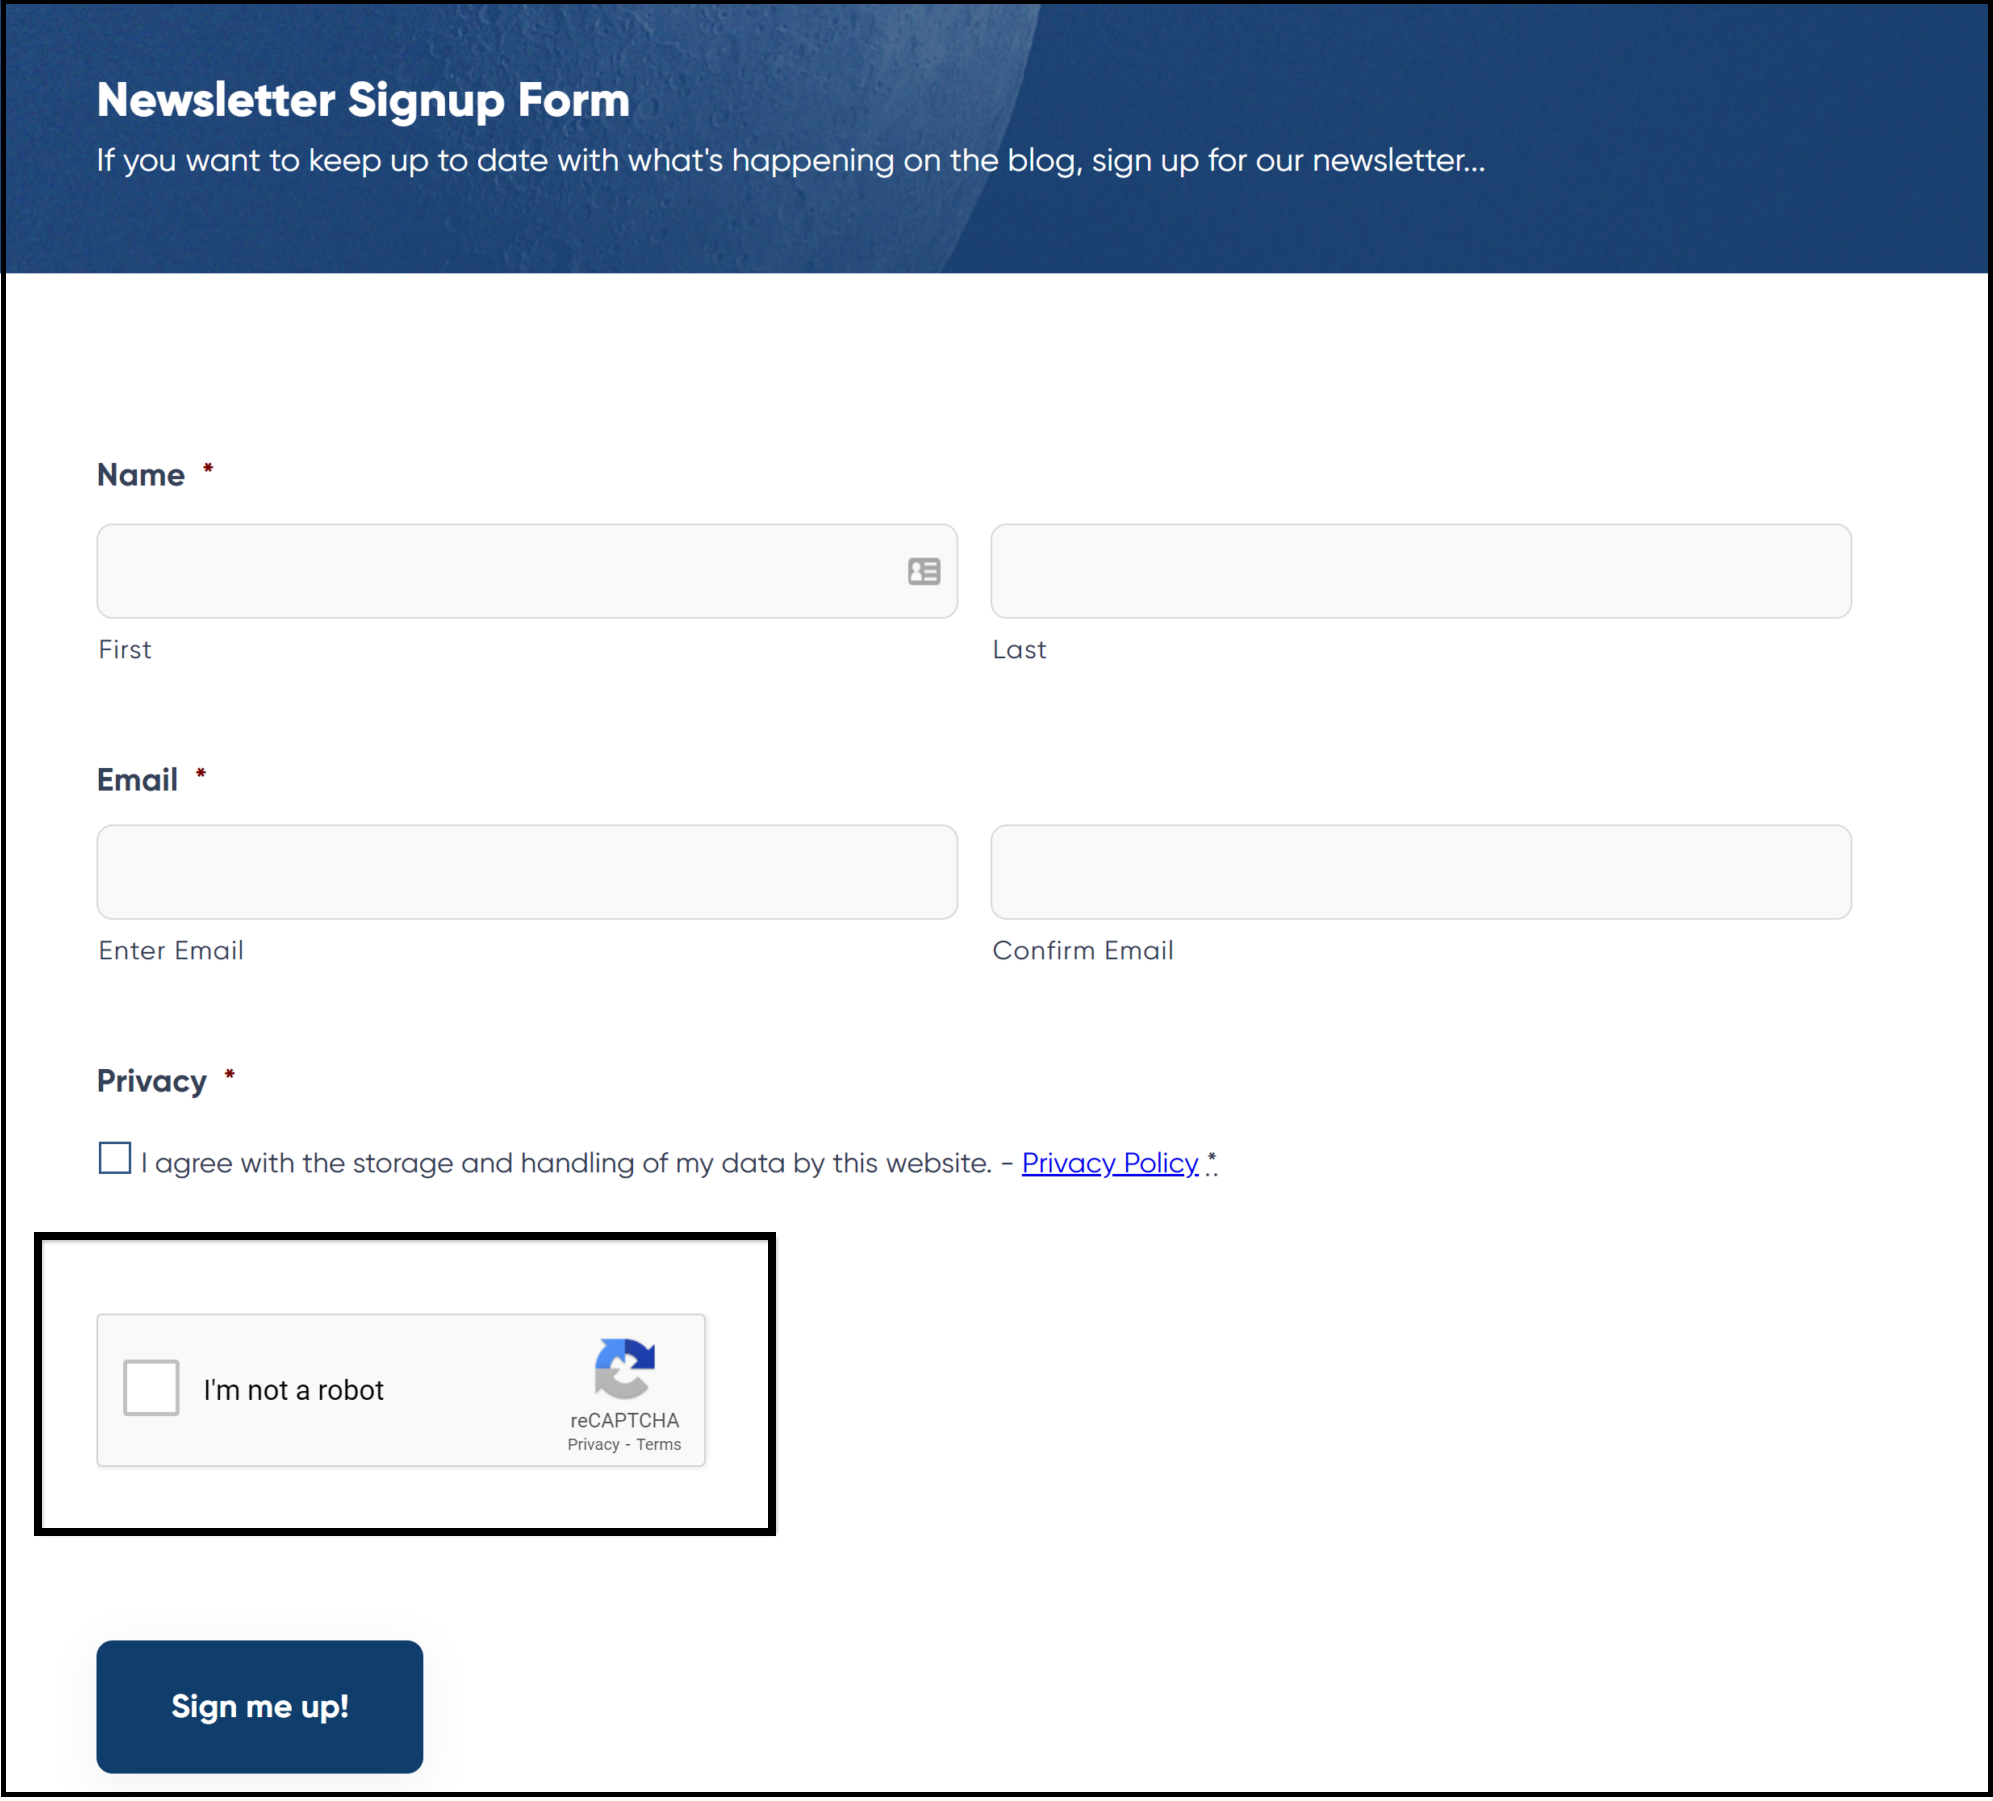
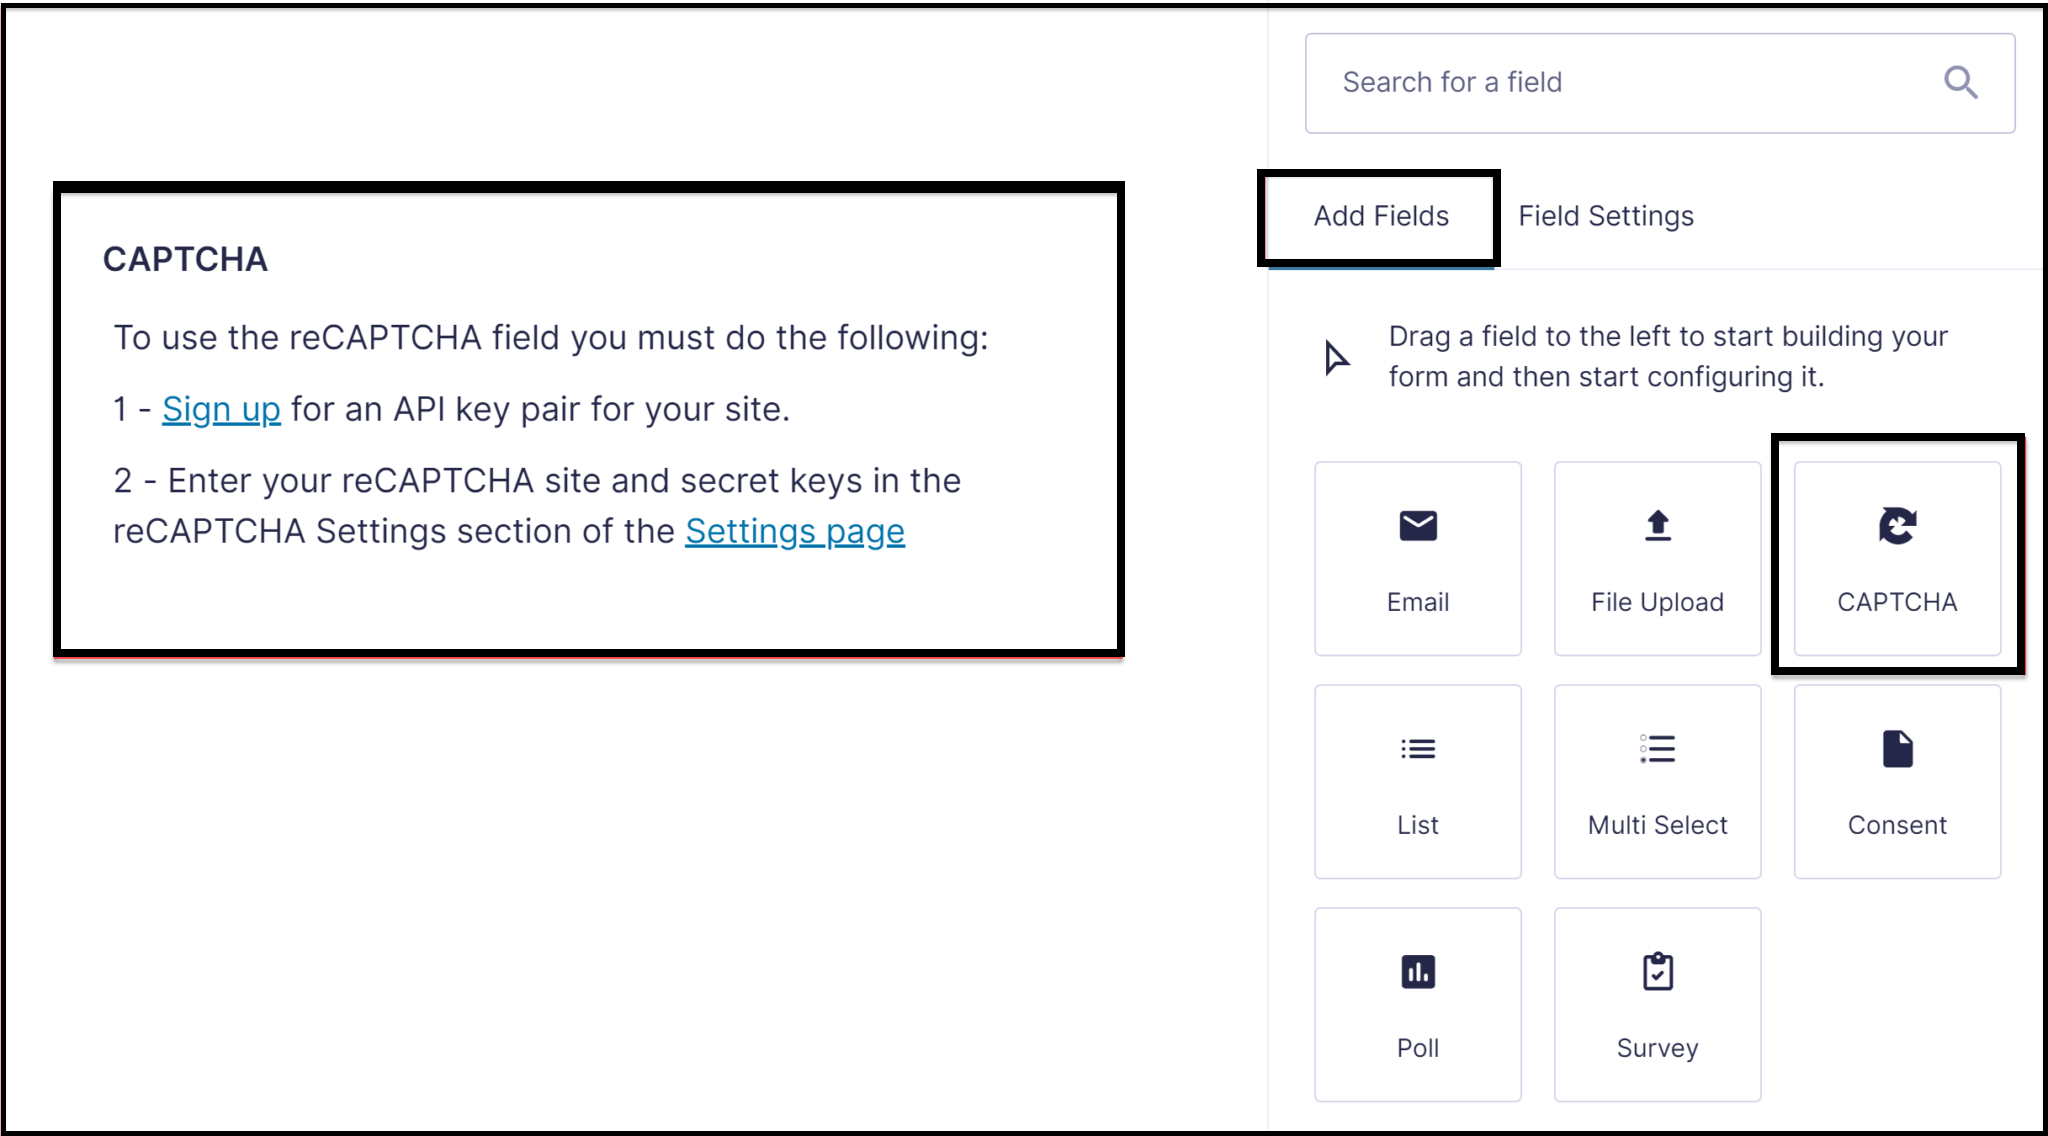
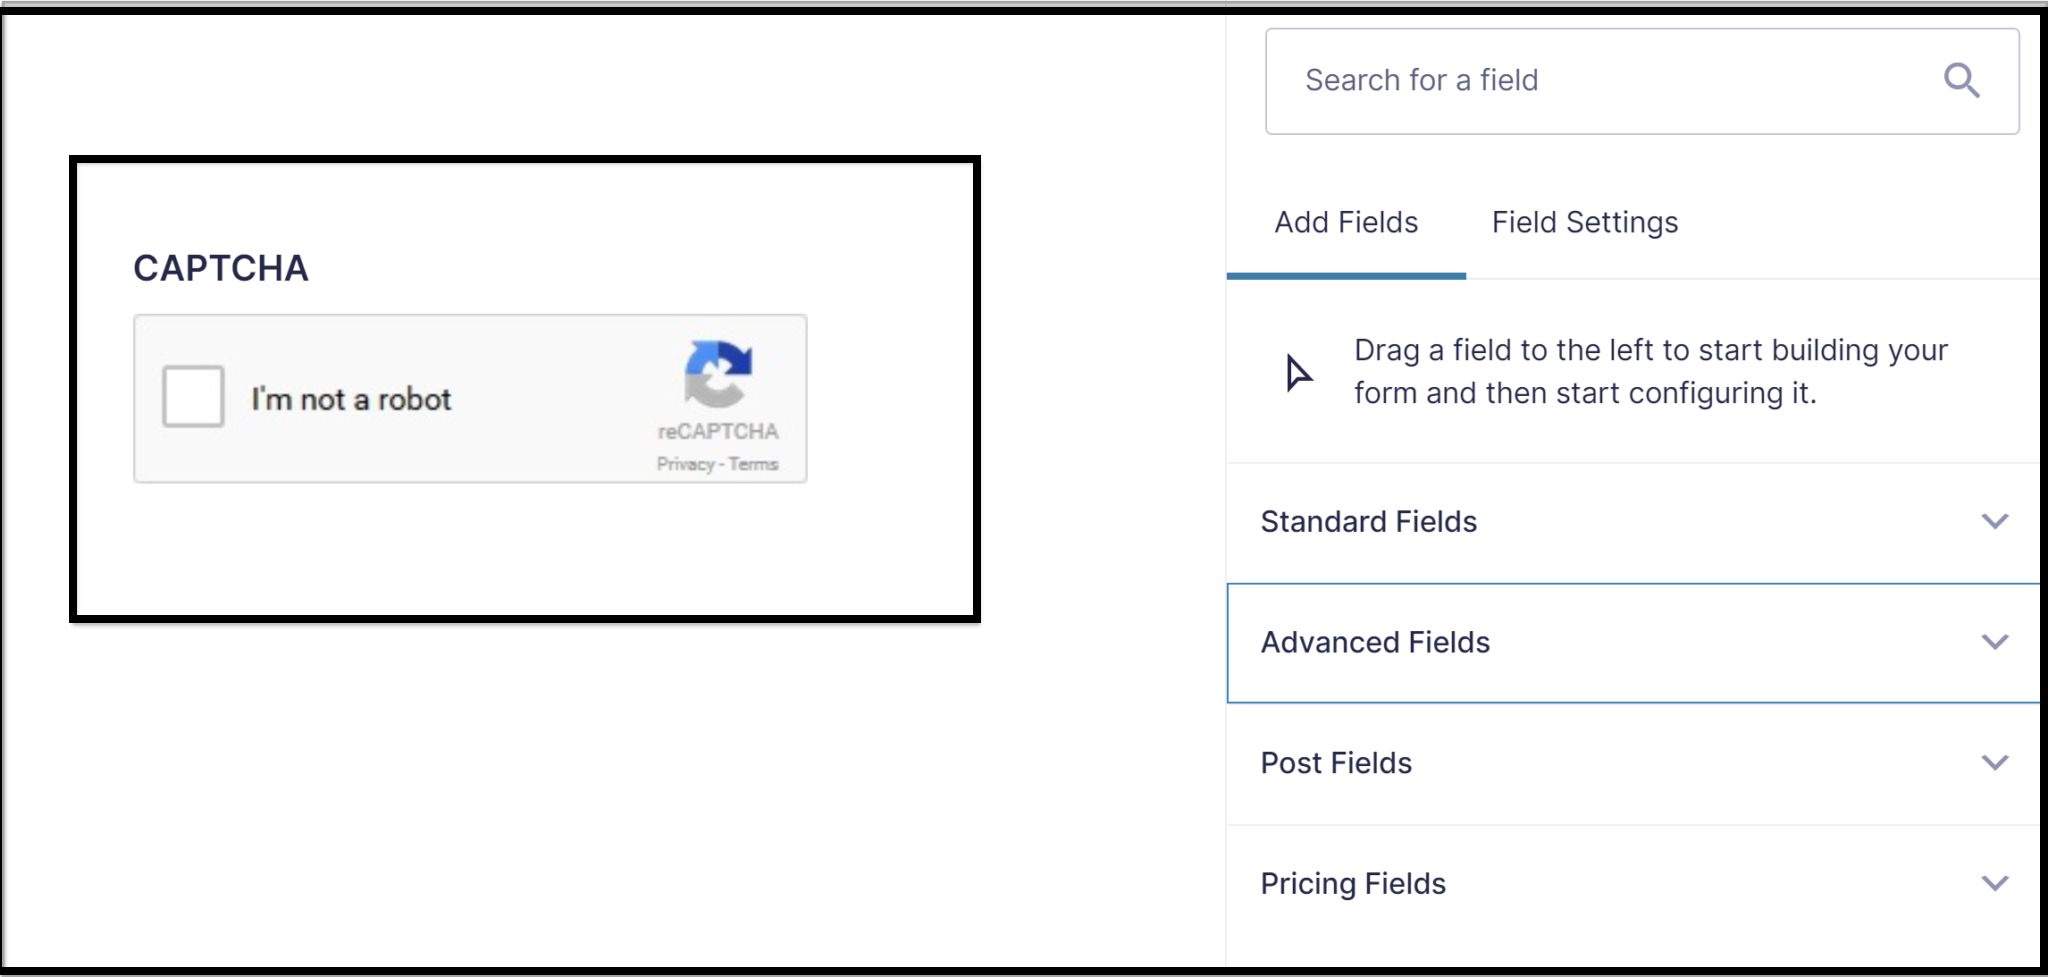
So, first of all, open a form on your website in which you want to incorporate Google reCAPTCHA v2. Now add a “CAPTCHA” option available in “Advanced Fields.”
According to the screenshot below, the “CAPTCHA” box will require registering for a Google account to get your site’s API Site key and Secret key. For this, simply open the “Sign Up” link in the CAPTCHA box.
Now, Google requires you to “Register a New Site.” You must choose “Google reCAPTCHA v2” Next, check the “I’m not a Robot” tickbox.
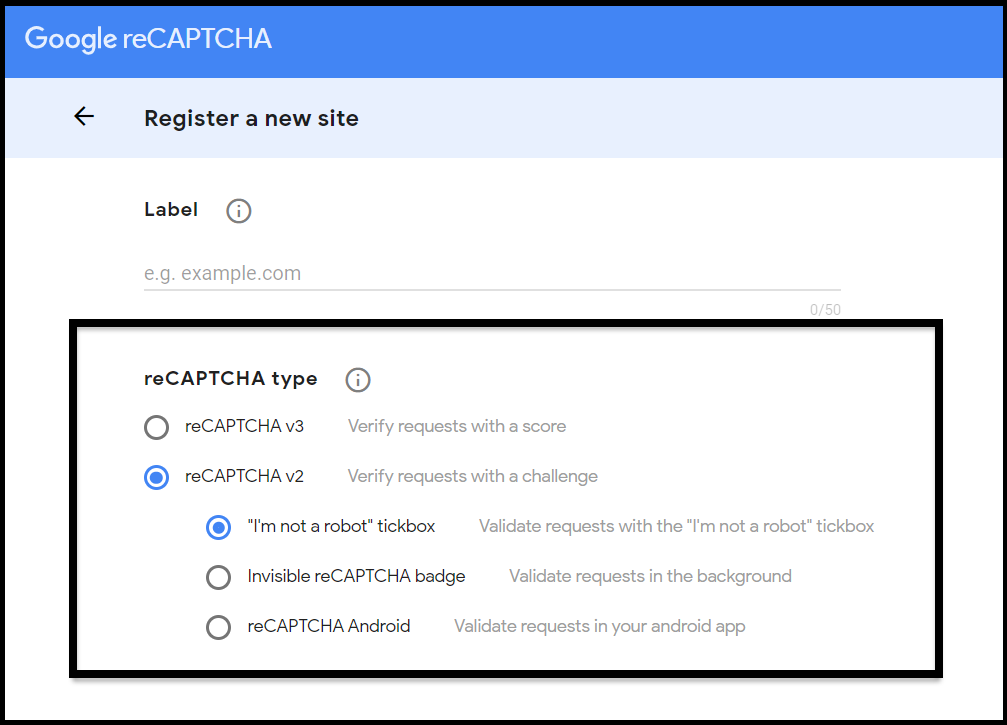
Now you will see the “Site Key” and a “Secret Key.” As sown below;

Now, return to the WordPress dashboard and navigate Forms > Settings in the left-hand menu. Once there, select the reCAPTCHA option and paste both keys under the reCAPTCHA Settings section.
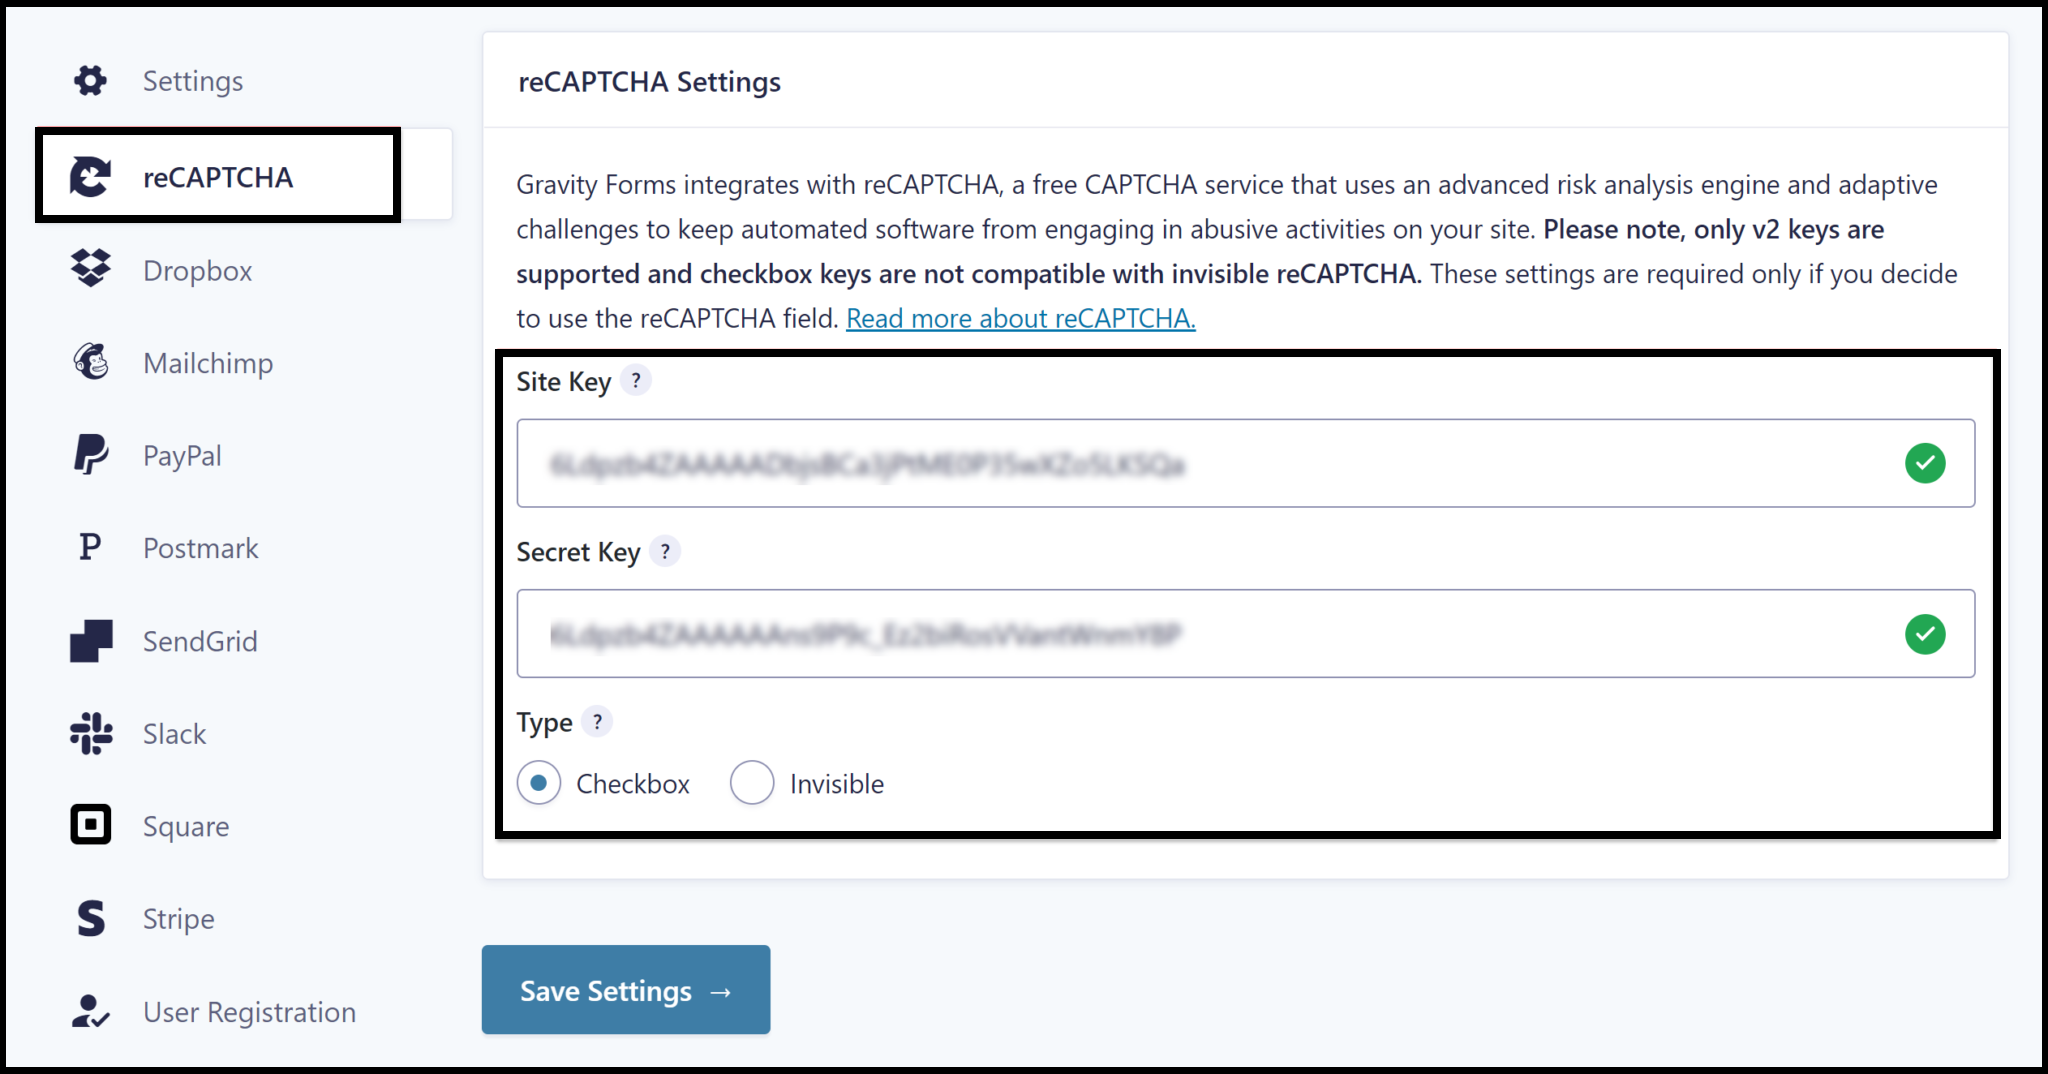
Once you have configured your reCAPTCHA settings, choose the Checkbox or Invisible option and click Save Settings.
Then, return to the form and click Update to save your progress and refresh the page. You should see that the CAPTCHA field has been replaced with a reCAPTCHA v2 tickbox.
That’s it; Now, let’s move on to the process of adding Google reCAPTCHA v3 to your form.
How to Add Google reCAPTCHA v3 in a Form
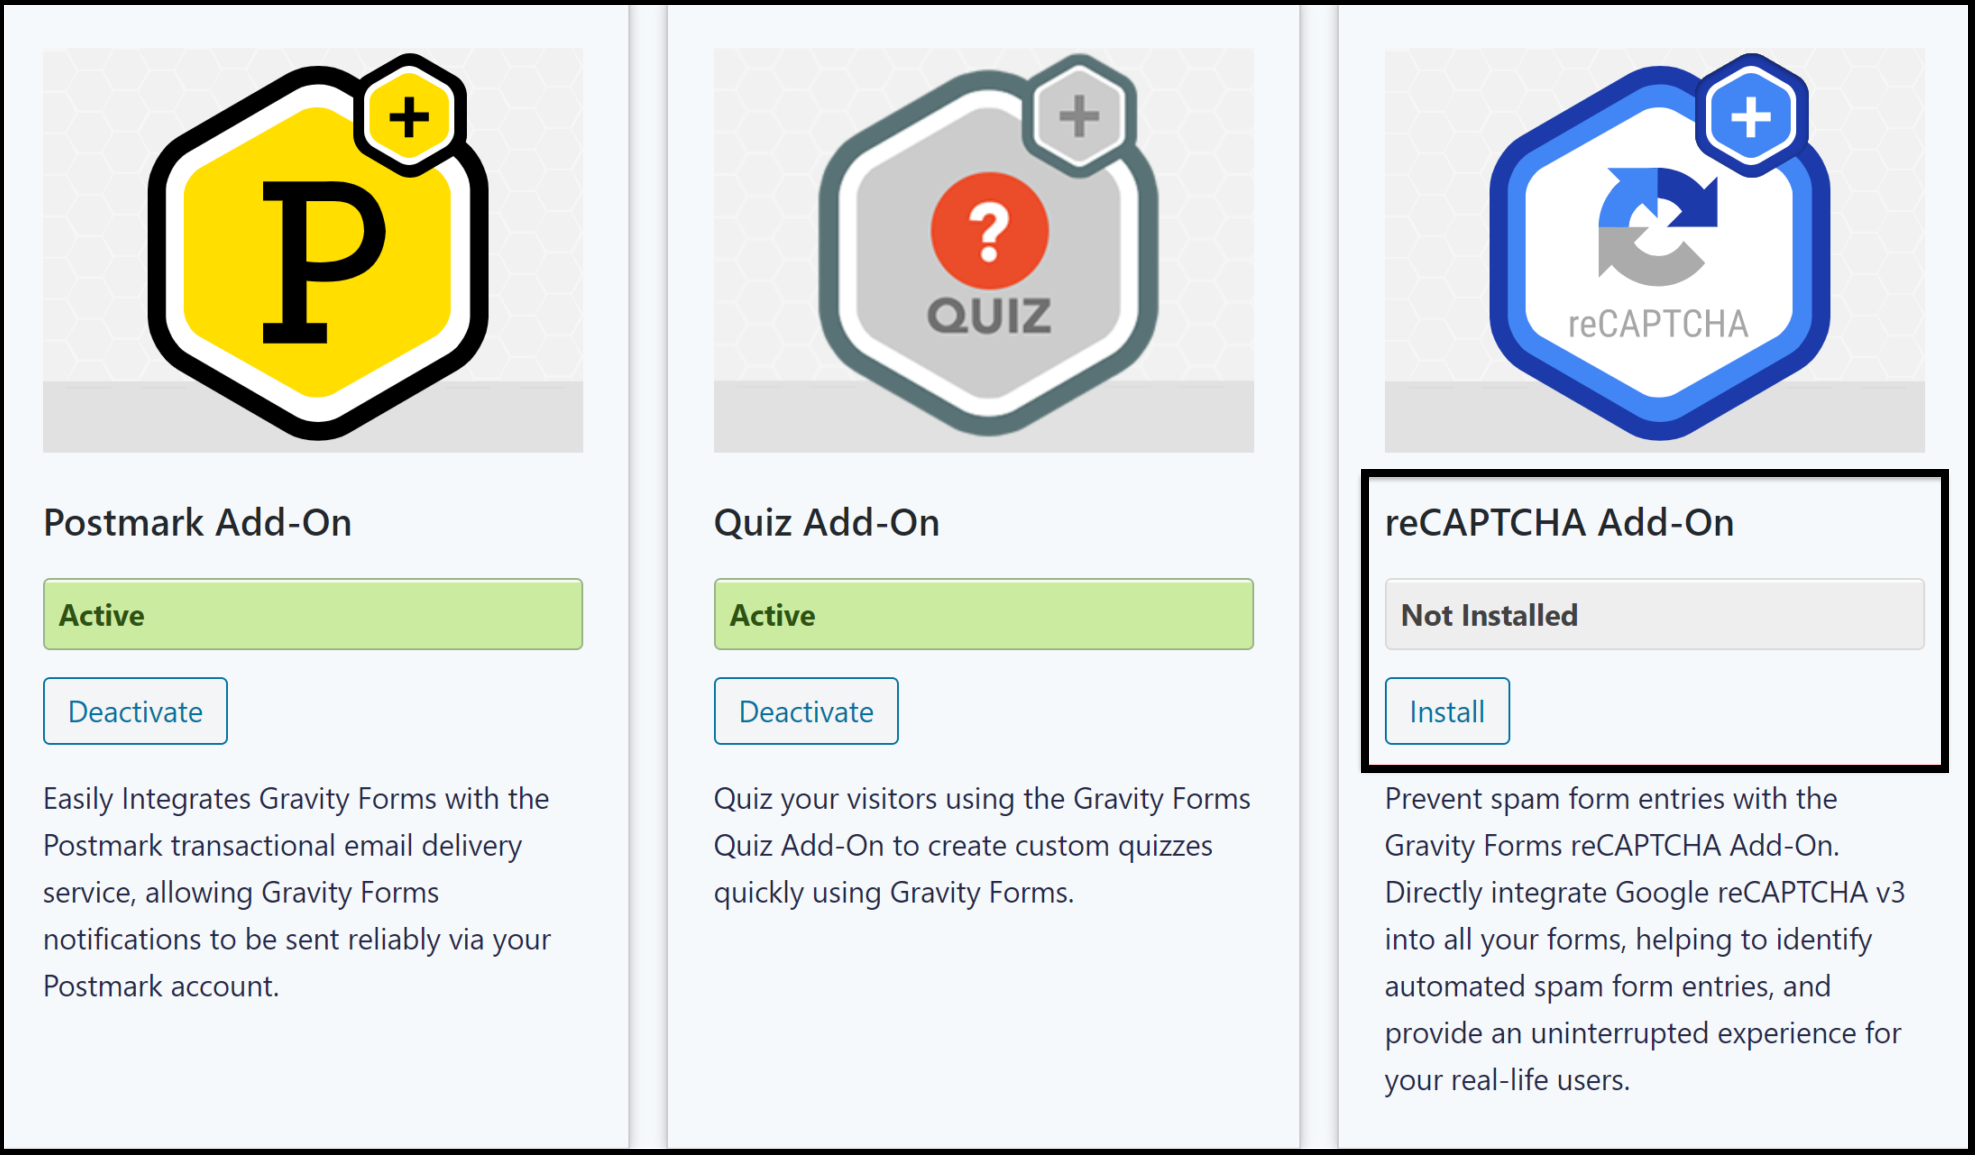
To add Google reCAPTCHA v3 to your forms, begin by installing the Gravity Forms reCAPTCHA Add-On. This is available for all license types, but you’ll need Gravity Forms 2.5 or higher to enable it.
To install the add-on, go to Forms > Add-Ons in your WordPress dashboard and find the reCAPTCHA Add-On. Click on Install > Activate to complete the installation.
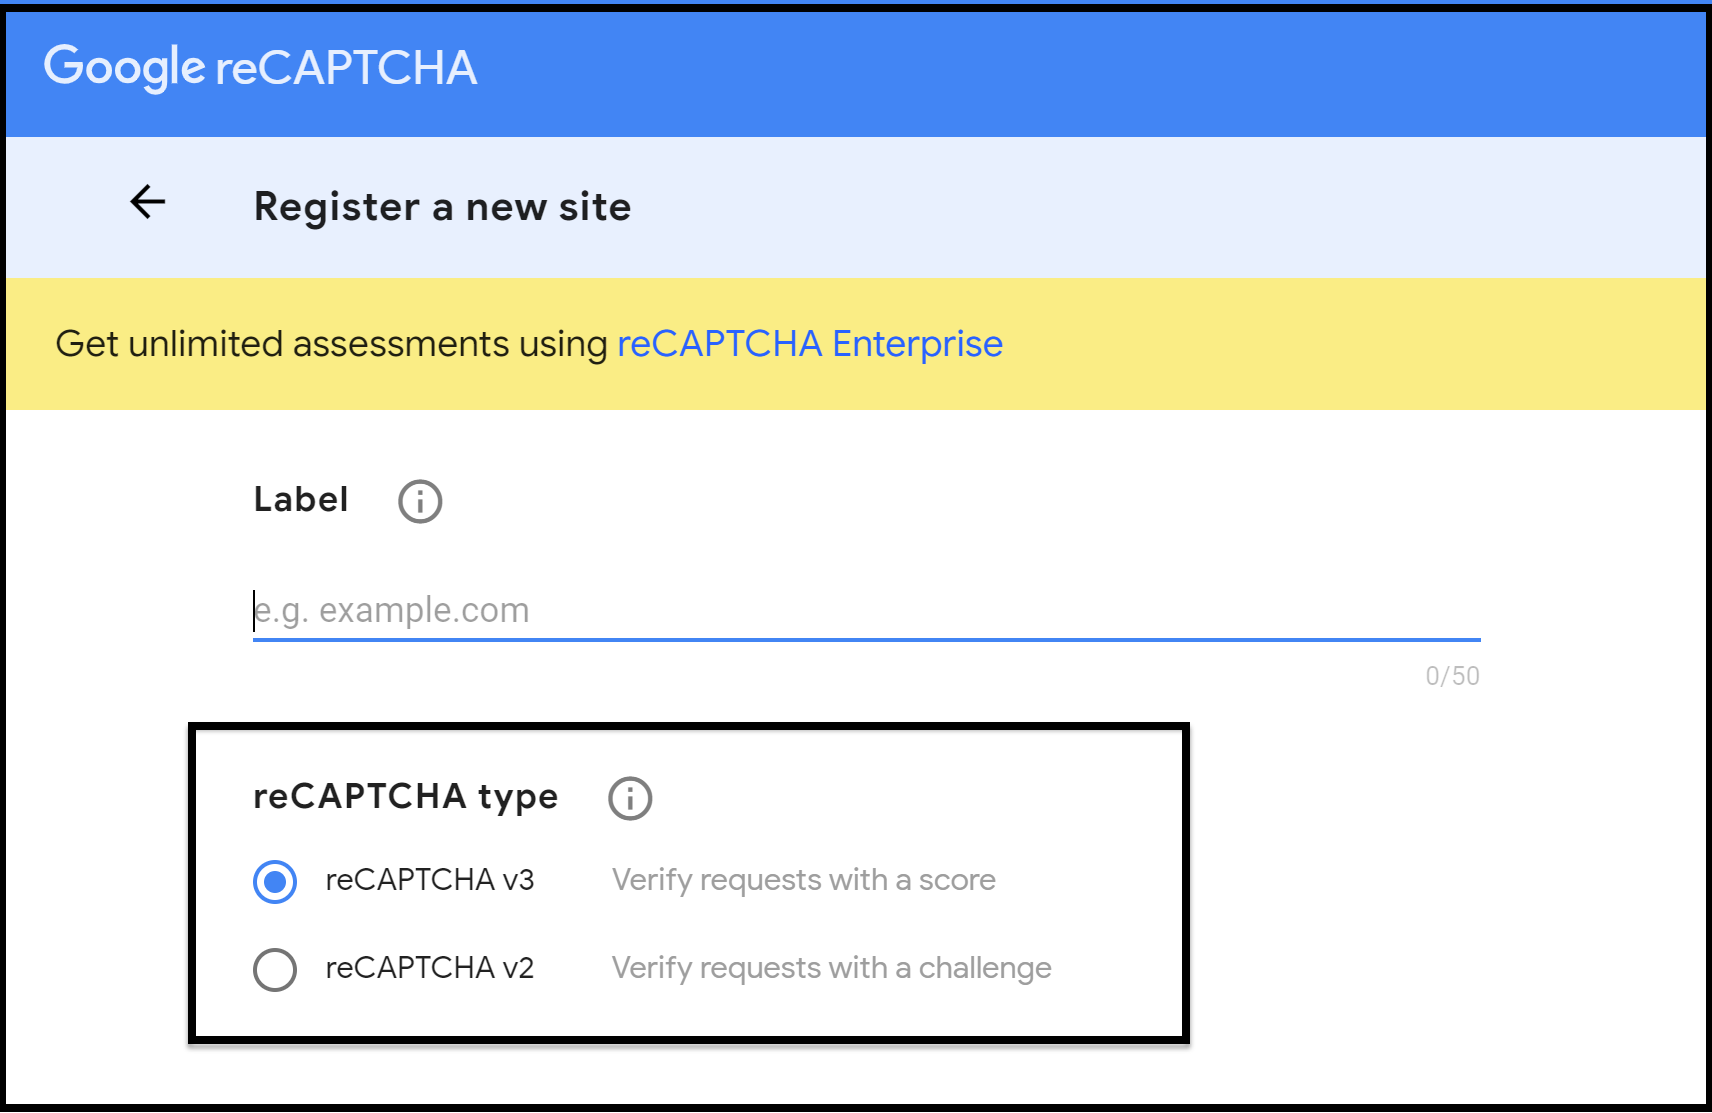
Next, you’ll need to link your Gravity Forms account to the Google reCAPTCHA service. For this, create an account on the Google reCAPTCHA Admin page (if you do not have one) and follow the instructions to register your website.
But, this time, you’ll have to choose “Google reCAPTCHA v3,” and you will receive a “Site Key” and a “Secret Key”.
Now, back in your WordPress dashboard, go to Forms > Settings > reCAPTCHA and enter the Site Key and Secret Key under Google reCAPTCHA v3. Next, click on Save Settings, and you should have green checkmarks next to both keys, which indicate that both keys are valid.
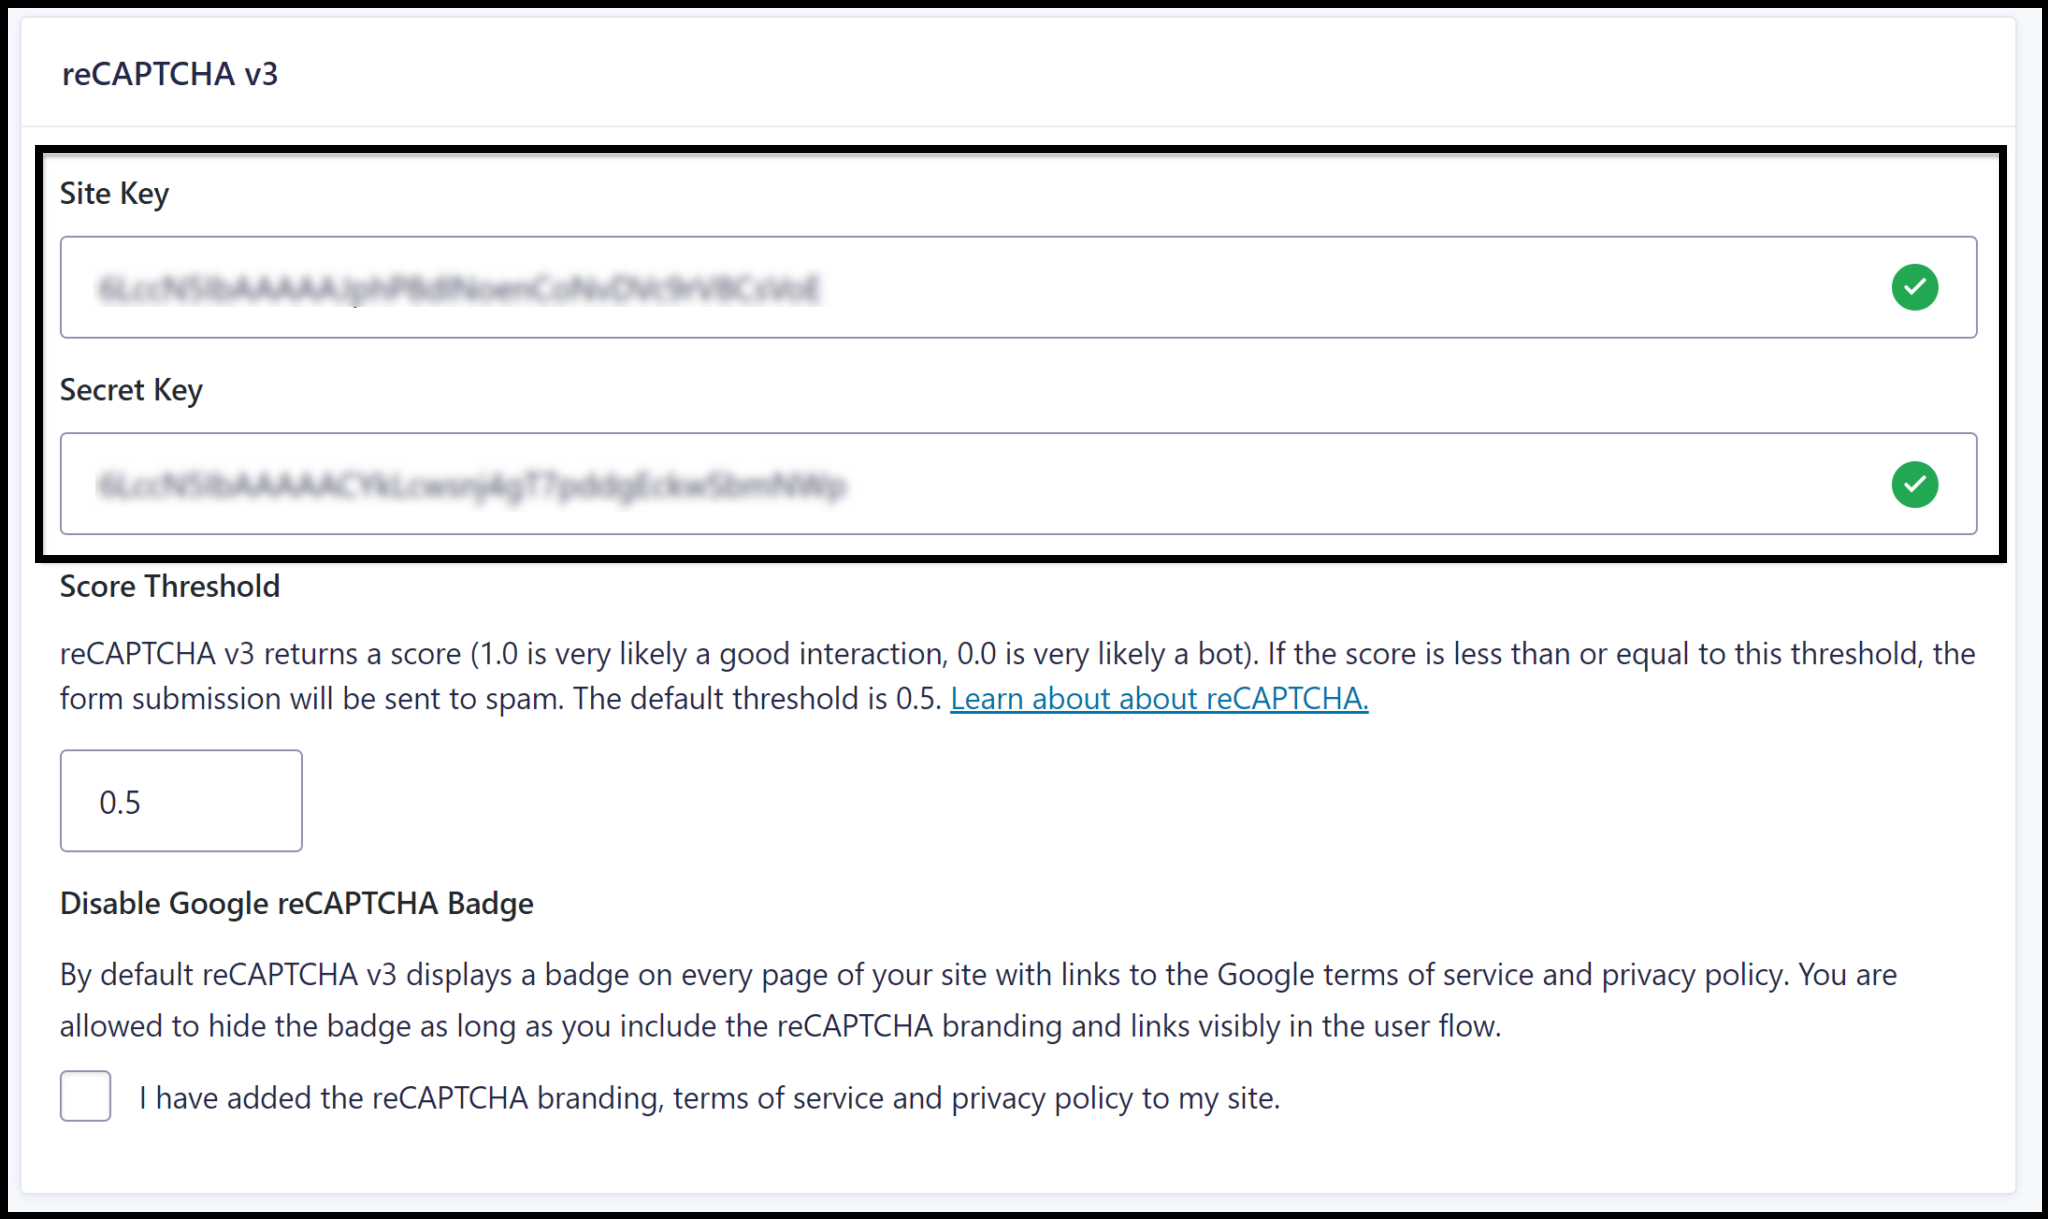
In the global settings above, you can adjust the spam threshold and disable the Google reCAPTCHA badge (if you meet Google’s required conditions).
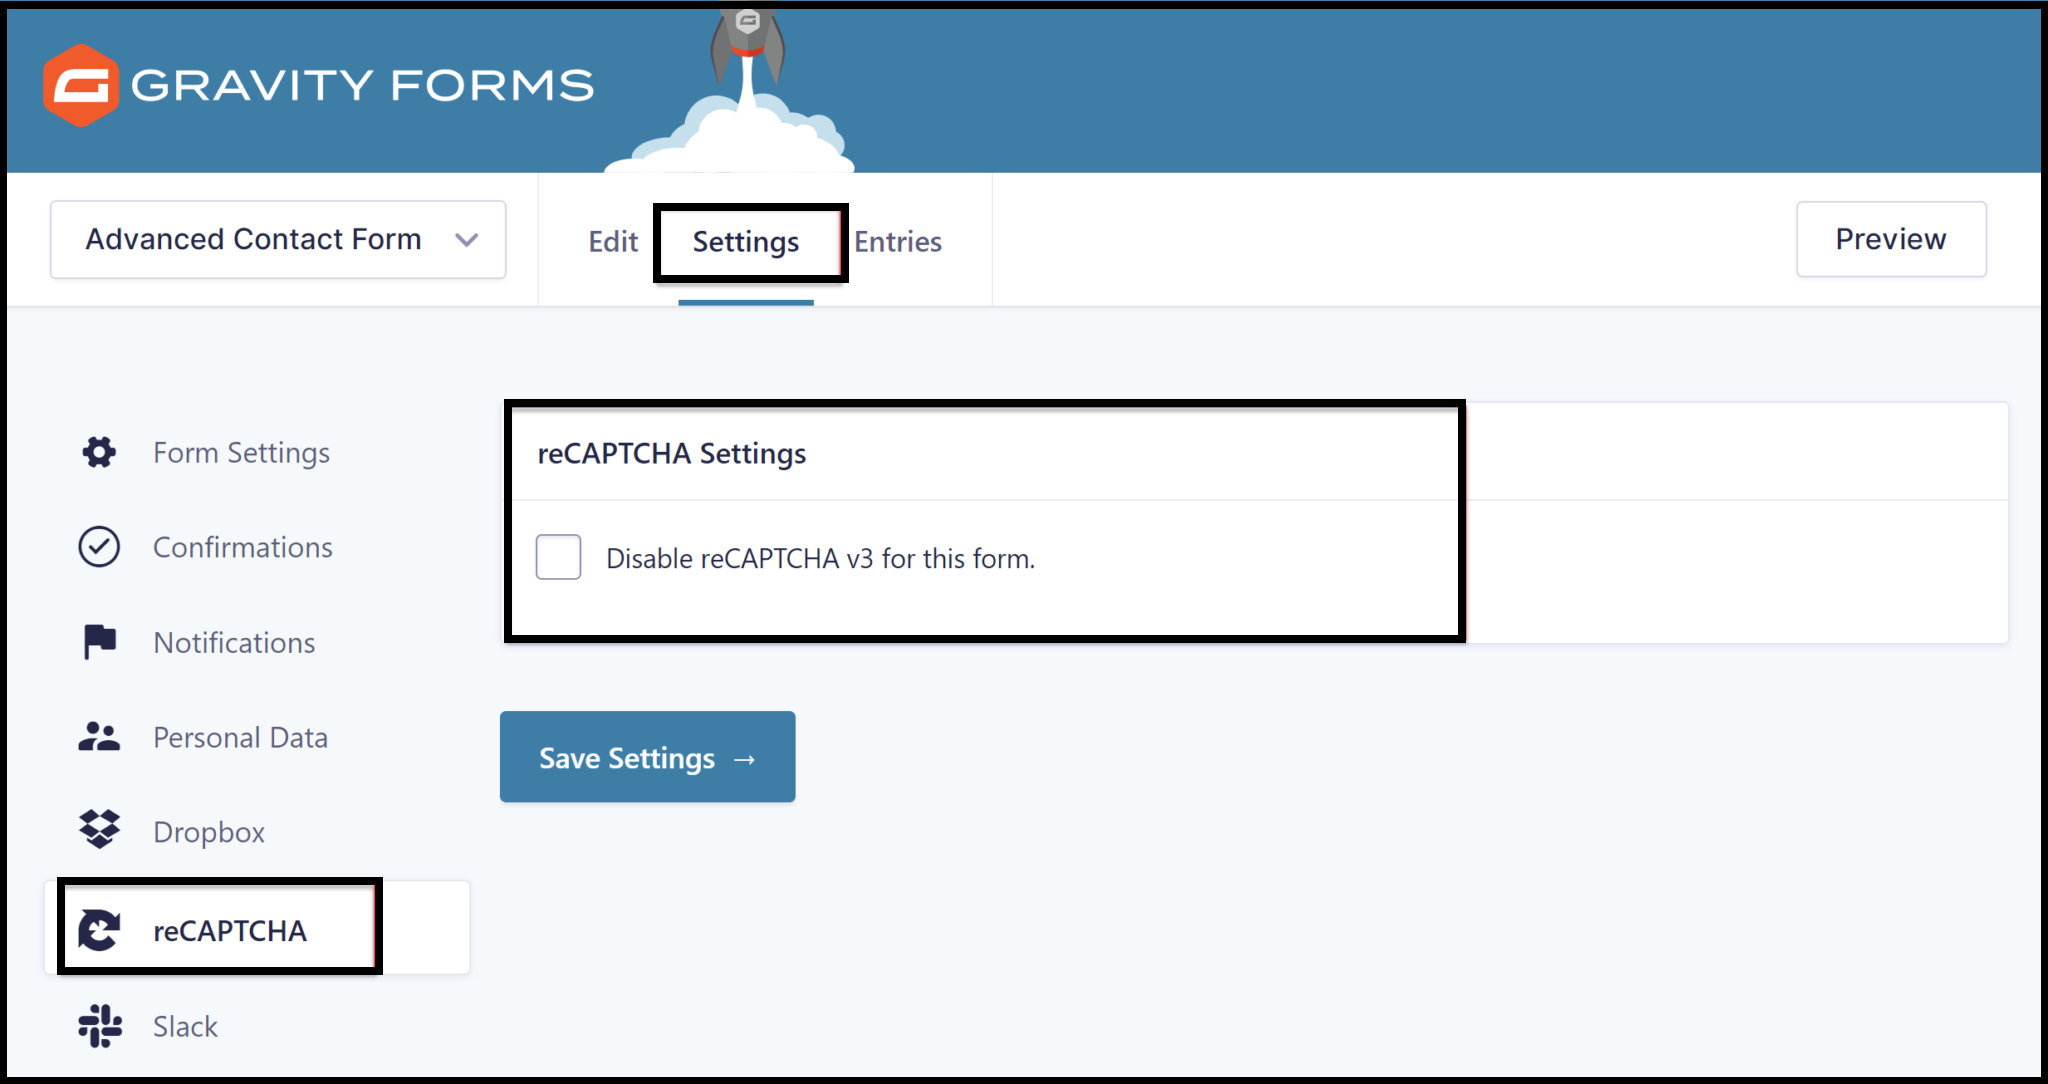
Once you’ve set up reCAPTCHA v3, it will be active on all forms. If you want to disable it for a specific form, go to that Form and choose Form Settings > reCAPTCHA, as shown in the picture below;
Note: Keep in mind that the reCAPTCHA Add-On will not interfere with the older built-in reCAPTCHA v2 function. You can use both on the same page if you need to.
Wrapping Up
Despite the fact that no solution is entirely foolproof, adding Google reCAPTCHA to your form is a sensible strategy for minimizing spam form entries. Additionally, using both Google reCAPTCHA v2 and v3 can help you to manage spam entries effectively on your website.
So, whether you have a small personal blog or a large business website, reCAPTCHA can help protect your site from unwanted spam.


