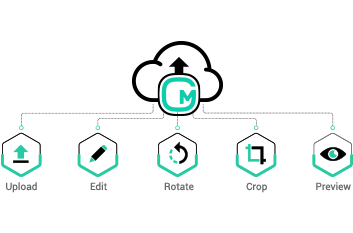
Google Cloud Printers With Gravity Forms

1.PLUGIN DESCRIPTION #

This Add-on will help you to connect Gravity Forms with Google Cloud and if you have any printer connected with Google Cloud then it will automatically make a printout.

Once a user submits Gravity Form on your site that will generate PDF to Cloud Printer.

2.HOW TO USE PLUGIN #

Initial Settings:

These are basic settings

How to activate and connect with google console it is best described here
Please look over here:

Individual Form Settings:

You can enable disable each form to be printed to google cloud printers. And you will find each form PDF settings.

Each Form Settings:

Here you will find each form settings.

  • Enable/Disable: You can enable/disable each form to be submitted to google cloud printers.
  • Paper size: You can set PDF paper size from A1 to A8
  • Paper Orientation: Landscape or Portrait
  • Organization Name: This will appear in header of page
  • Organization address: This will appear in header after organization name
  • Footer: Any text here will appear in footer
  • Print Copies: How many copies to be printed if form is submitted

3.CONFIGURING GOOGLE CLOUD PRINT API ACCESS #

Visit the Google API console, and create a new project

To allow access to your Google Cloud Print printers.

click on the link to your API console to take you to Google; then click on the option to create a new project in the “Project” menu:

Choose “Select project” from the drop-down “Project” menu…


Click on “Create project” …


Enter “Project Name” in the Project Name Field…
 

Go to the Credentials to manage API credentials

Click on “Credentials” then “OAuth consent screen” then see something like the screenshot below.…


You will then probably be told that you need to give your application a name. When you have done so, it will bring you back to this screen.


Click on “Credentials” then “Create credentials” then select “OAuth client ID”..

Choose “Web Application” as the application type


Next, enter some details:

For the name, enter any label you please – it does not matter.
When asked, paste in (as the “Authorized redirect URI”) the URL that was shown to you on your Google Cloud Print settings page back in your WordPress admin console: (do paste it from there – don’t copy any screenshot below).

For the “Authorized JavaScript origins”, enter the same thing but remove everything after the initial hostname in the URL. i.e. something like http://www.example.com

Then press the “Create” button.

You will then be shown your client ID and secret.


Go back to your WordPress dashboard, and enter the details

You should now have a client ID created. Paste the details back into the Google Cloud Print settings page in your WordPress admin console. (Don’t copy our ones from the screenshot above – they are just an example, and will not work for you!). Save the settings.

Then (i.e. after saving the settings), follow the link that WordPress will show you, to complete authorization.


Google will then show you a screen to confirm the authorization. The screenshot may not be identical to the one below:


After doing this, you’re done.

Help Guide Powered by Documentor
Suggest Edit

Leave a Reply

Scroll to Top