


Gravity Forms is a popular plugin for WordPress that allows you to create, manage, and publish forms.
WooCommerce is a powerful eCommerce platform enabling you to sell products and services online. Together, these two plugins can be used to create and sell products.
WooCommerce and Gravity Forms are easy-to-use plugins that offer much flexibility when creating and selling products online. This article will show you how to use both plugins to create and sell products.
Perks of Using Gravity Forms to Create WooCommerce Products
Here are some benefits of using Gravity Forms to create WooCommerce products:
-
Easy-to-use
Gravity Forms is designed to be easy to use, even for beginners. You don’t need coding skills to create a product form; the form builder interface is intuitive and user-friendly.
-
Customizable product fields
Gravity Forms allows users to create custom product fields not available in WooCommerce by default. This means that you can create products that have unique attributes or specifications.
-
Streamlined product creation
Using Gravity Forms to create products can save you time and effort. You can use the same form to create multiple products, and you can also use the form to update existing products.
-
Conditional logic
Gravity Forms has a powerful conditional logic feature that allows you to show or hide certain fields based on user input. This can be very useful for creating products that have multiple variations or options.
-
Integration with payment gateways
Gravity Forms integrates seamlessly with many payment gateways, including PayPal, Stripe, and Authorize.net. This means you can accept product payments directly through your website.
How to Set Up Your WooCommerce Products with Gravity Forms
If you’re using Gravity Forms to manage your WooCommerce products, there are a few things you need to do to ensure everything is set up correctly. Here’s how to set up your WooCommerce products with Gravity Forms:
1. Install the Gravity Forms Plugin
The first thing you need to do is install the Gravity Forms plugin. This can be done through the WordPress admin panel or by downloading the plugin from the Gravity Forms website and uploading it to your WordPress installation.
2. Creating Product Fields in Gravity Forms
Once the plugin is installed, you must set up your products in WooCommerce. This can be done by creating a custom form that lets you add the necessary fields to add a new product.
3. Configure Your Form Settings
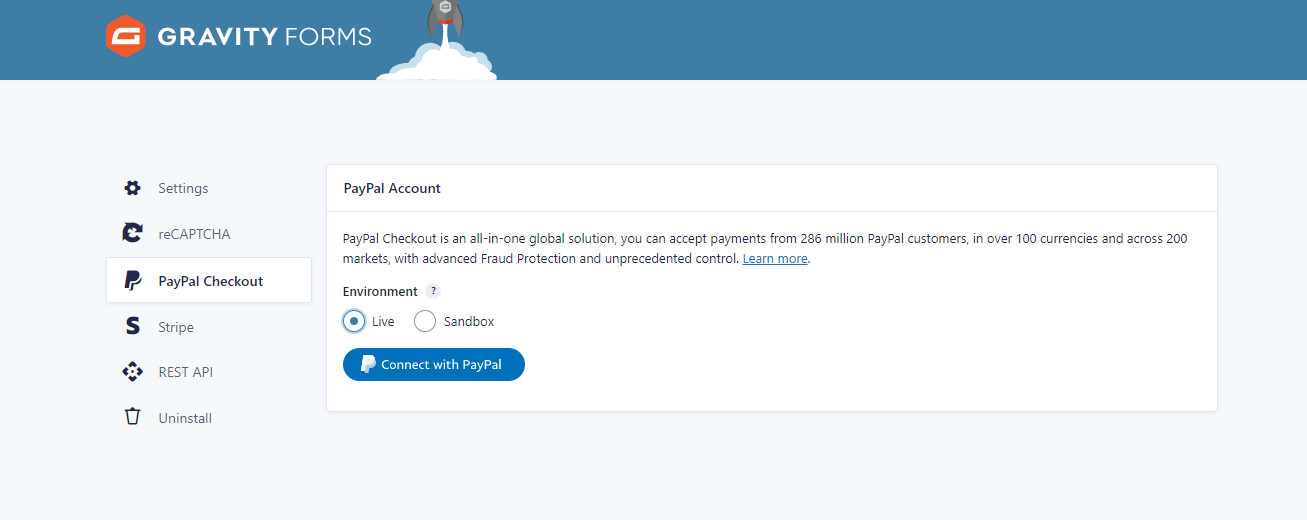
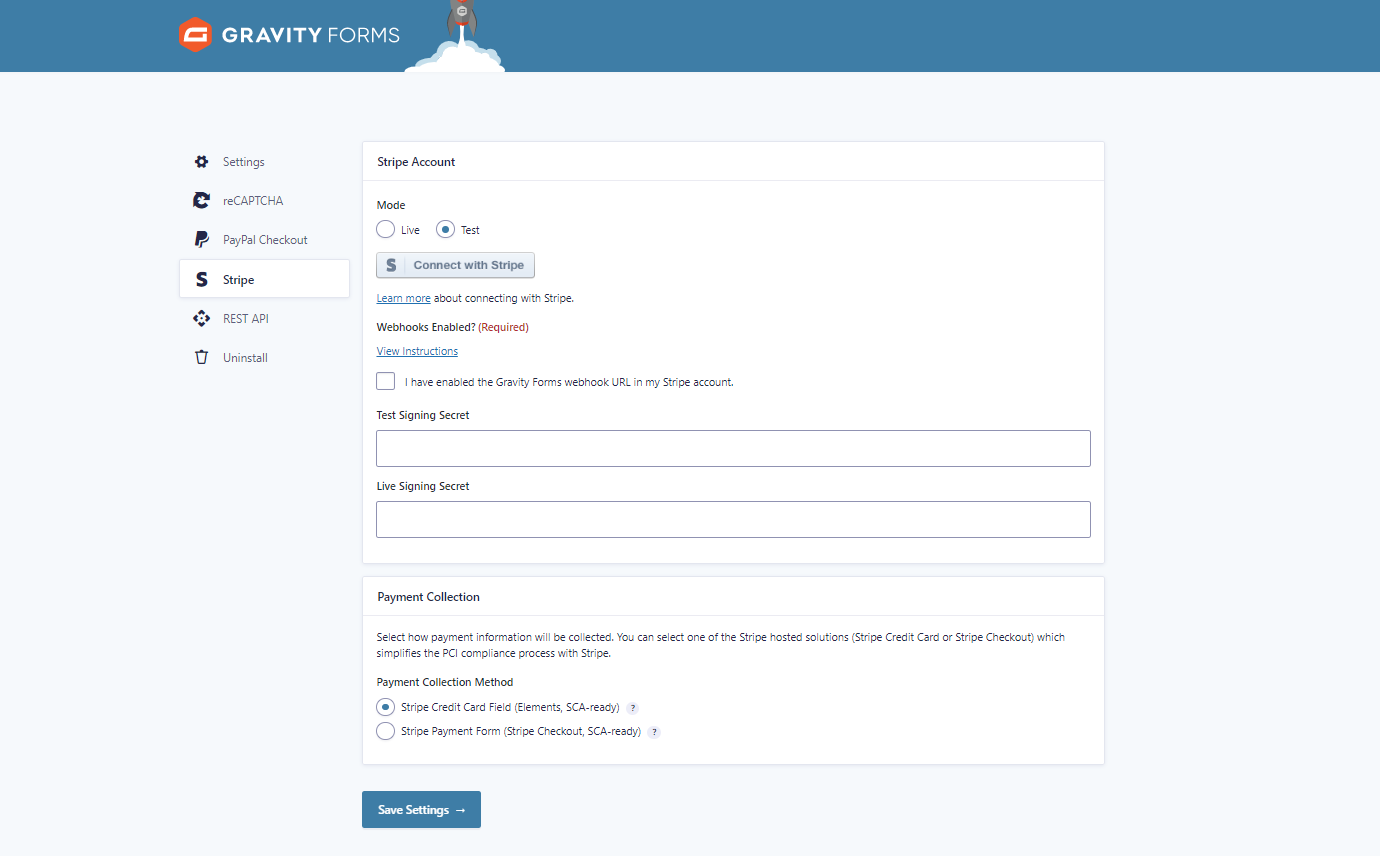
Now that your products are set up, you must configure your form settings to accept customer payments. This can be done by going to the Form Settings page in the WordPress admin. If you’ve installed the PayPal checkout, Stripe add-on, or any other Gravity Forms payment gateway add-on, you’ll find the settings to make it active.
4. Save Your Changes and Test Your Form
Once you’ve saved your changes, you should test your form to ensure everything works correctly. You can do this by submitting a test entry through your form and then checking that all product details are populated correctly in WooCommerce.
Learn More About Creating Product Fields in Gravity Forms
When you create a product in WooCommerce, you need to enter a lot of information about that product. Gravity Forms makes it easy to add custom fields to your products so you can collect the information you need.
To create a custom field for your products, go to the Forms tab in your WordPress dashboard and create a new form. Then, under the “Add Fields” tab, you’ll see a list of all the default fields available in Gravity Forms.
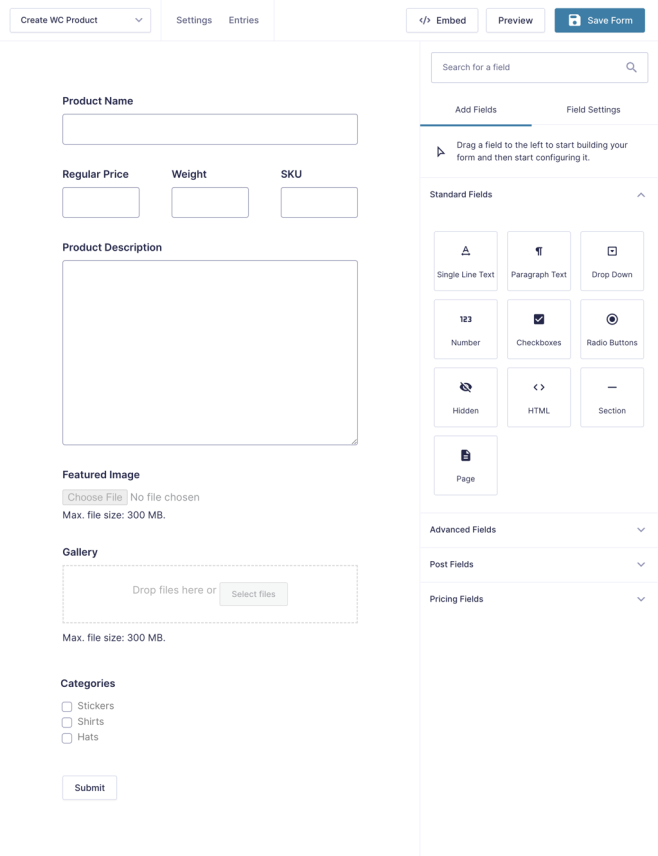
Once you’ve added all the fields you want, click the “Save Form” button.
Customizing Your Payment Settings
When setting up payment options for your WooCommerce products, Gravity Forms makes it easy to customize your settings and get the right payment processing solution for your business.
There are a few different ways to set up payments with Gravity Forms, and the best option for you will depend on your business’s needs. For example, if you’re selling physical goods, you’ll need to set up a payment gateway so customers can pay for their orders. Alternatively, you can use the built-in Stripe integration to take payments directly through Gravity Forms if you’re selling digital products.
Set Up a Payment Gateway
The first step to setting up payments with Gravity Forms is to set up a payment gateway. You must create an account with a supported payment gateway, such as Stripe or PayPal. Once you’ve created an account and logged into your dashboard, you can retrieve the credentials needed to integrate the payment gateway with Gravity Forms.
Configure Your Payment Settings
Once you have the required API keys for your payment gateway, you can go back into Gravity Forms and configure your payment settings. To access these settings, go to WooCommerce > Settings > Payments tab and select the appropriate payment gateway from the list of options.
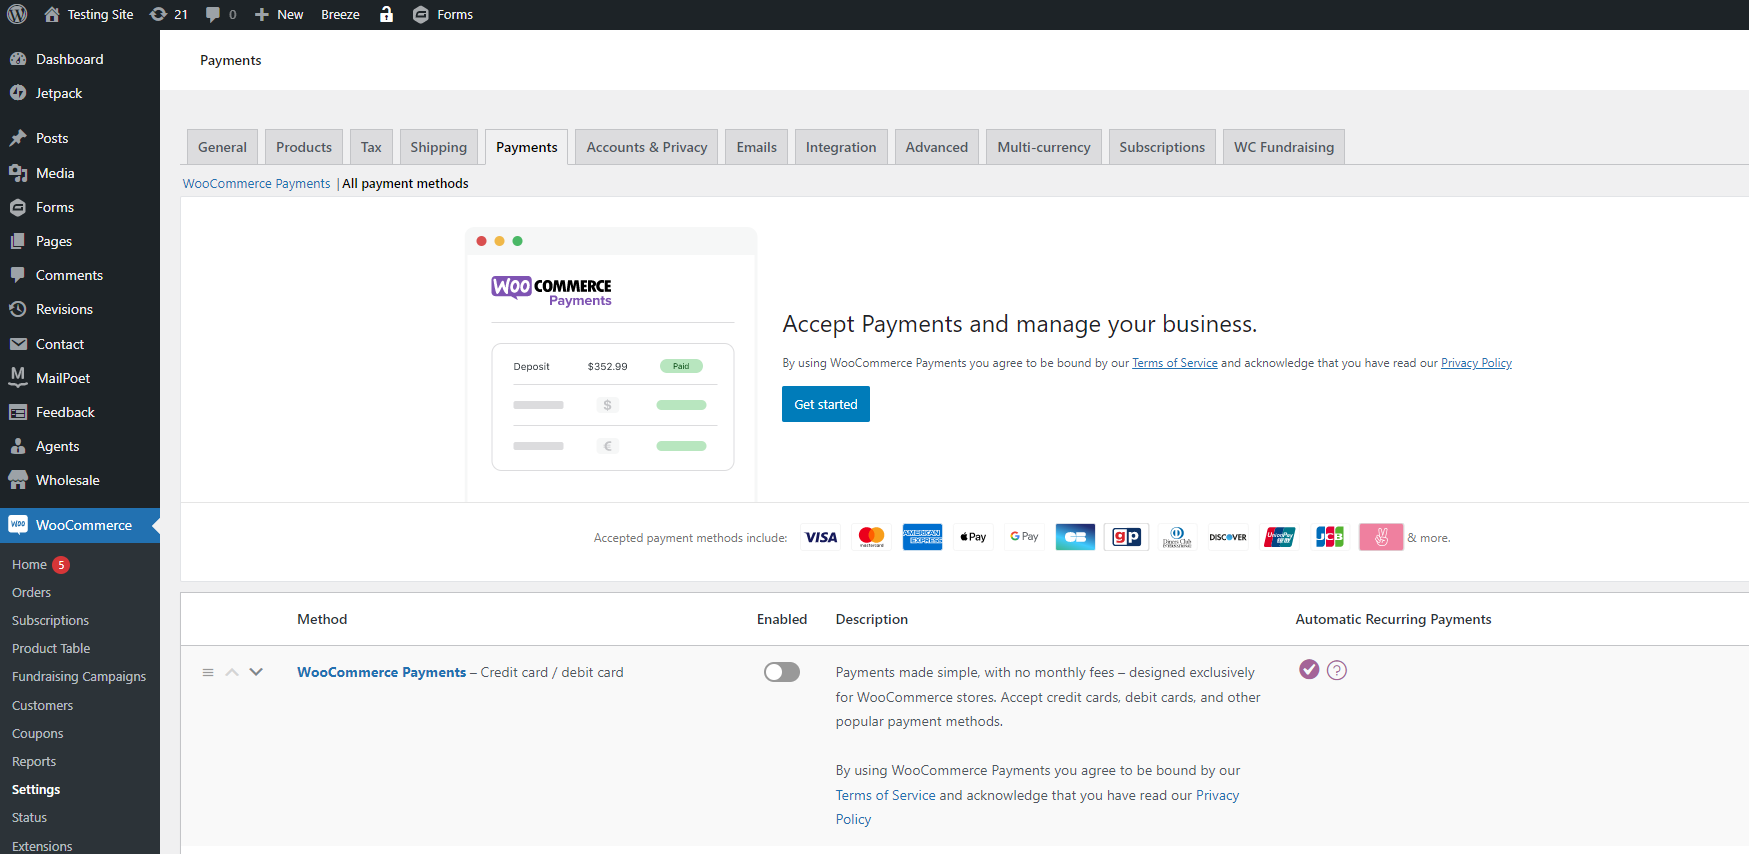
Fill out the required information (such as API keys) and click “Save Changes” when you’re finished. You can also customize other settings related to how customers pay for their orders on your website, such as setting up automatic refunds or requiring customers to enter billing information before completing their purchases.
Testing Your Form
There are two parts to testing your form: functionality and design.
To test the functionality of your form, you will need to submit it with accurate data. This means going through each field and inputting the required information. Once you have completed the form, hit the submit button to send your data to the server. You should receive a confirmation message or email if everything has been set up correctly.
To test the design of your form, you will need to view it in both a desktop and mobile browser. This will give you an idea of how users will interact. Pay attention to the overall layout and ensure all fields are visible and easy to fill out.
Final Words
Creating products in WooCommerce with Gravity Forms is a great way to streamline your product creation process and save time. With the many options available, you can customize your forms to fit your needs and create any product or service you want. Plus, the help of Gravity Forms’ add-ons, such as Zapier, Stripe, and PayPal, makes collecting payments for these products much more manageable. So, if you are looking for an efficient way to manage to create WooCommerce products on your site, look no further than using Gravity Forms!


