


Gravity Forms with Google Spreadsheets
Google Sheets is a useful tool that acts as a protection shield to save any file or data, permitting users to access it from anywhere around the globe. With the s, users can manage any data associated with Gravity Forms within its own Google Spreadsheet.
Gravity forms Google Sheet Add-on helps users export data from gravity forms to your google spreadsheet via instantly mapping the gravity forms field on your Spreadsheet. This add-on easily maintains and manages your Gravity Forms data without any intervention, malfunctioning, and loss of information.
Features
The features of Gravity Forms Google Sheets Add-on include:
- Permits users to send gravity forms information to Google Spreadsheet after form submission on your site.
- Separate Google Spreadsheets included in each gravity form.
- When the user submits forms, data gets inserted into the selected sheet acting as a new row for each field. It would also be best to choose the back-end fields you want to show on the Spreadsheet.
- The data is listed horizontally on each sheet.
- Visualizes relevant data.
- Filters data as per your needs.
- Data Management with Unlimited Forms.
How to integrate gravity forms with google spreadsheets in the following section
1. Integration of Client ID and Client-Secret ID
Step#1
The first phase is to get a client ID and client-Secret ID from Google’s Developers Console. The user must go to developers.google.com.
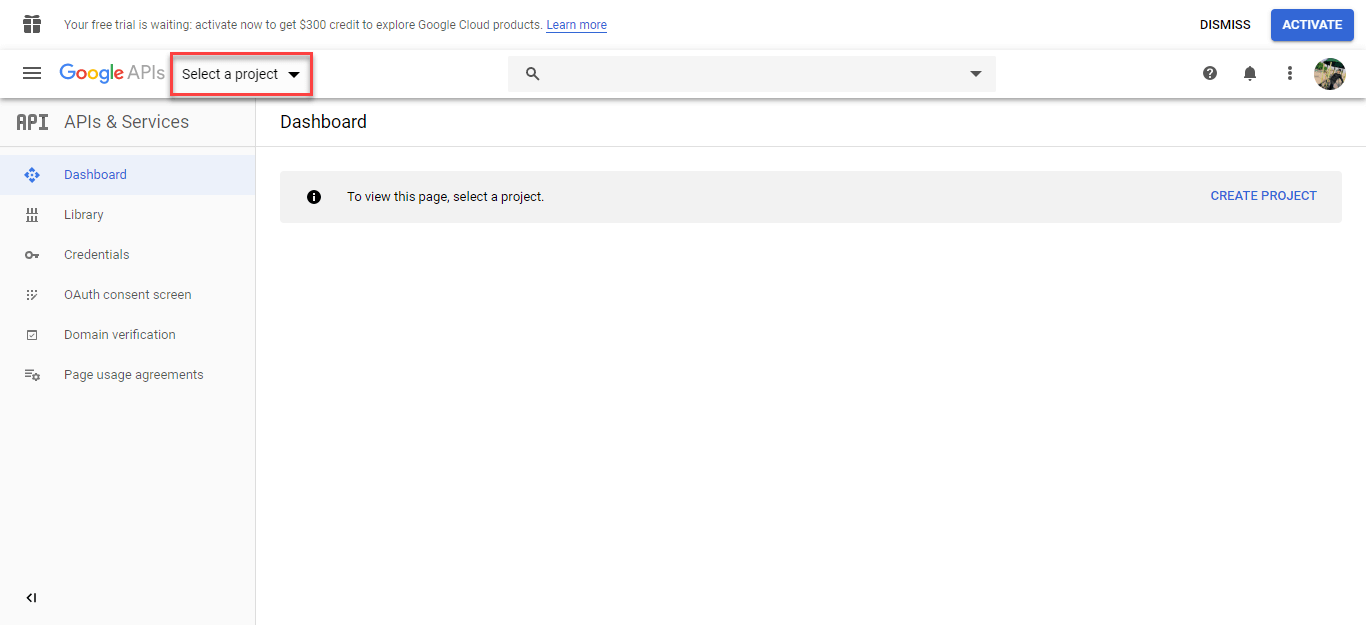
Step#2
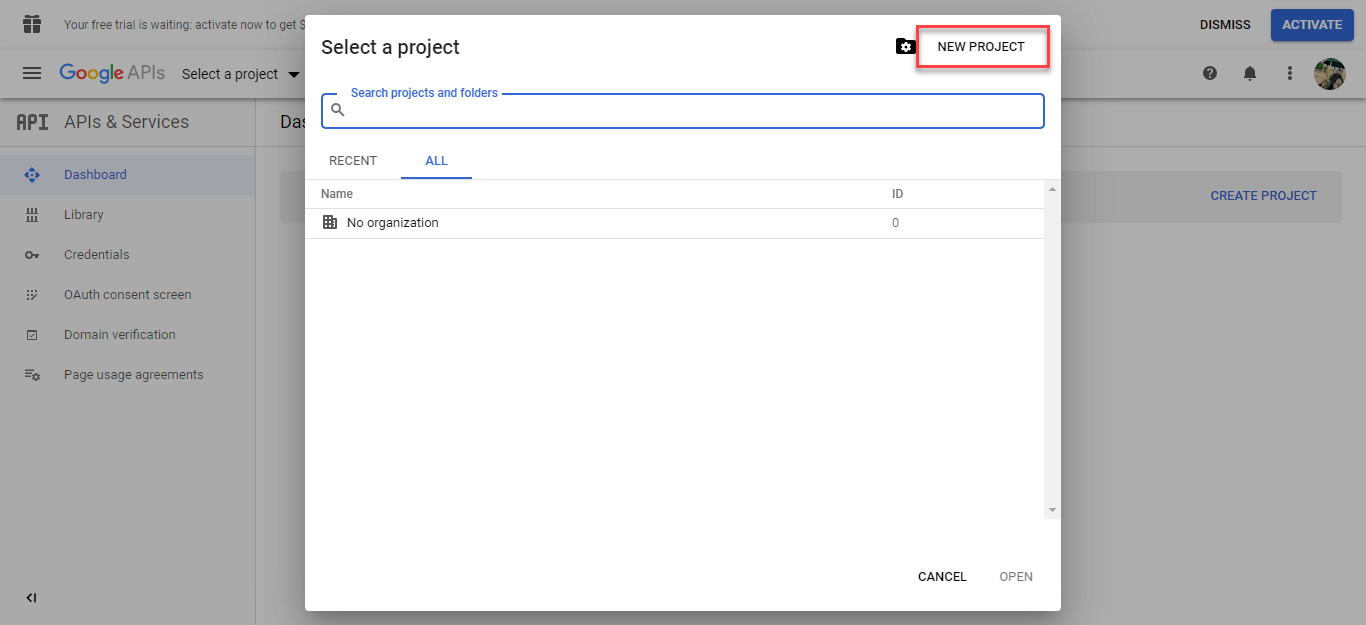
Click on the “Select a Project” option, after which a pop-up window appears, then click on the “New Project” option.
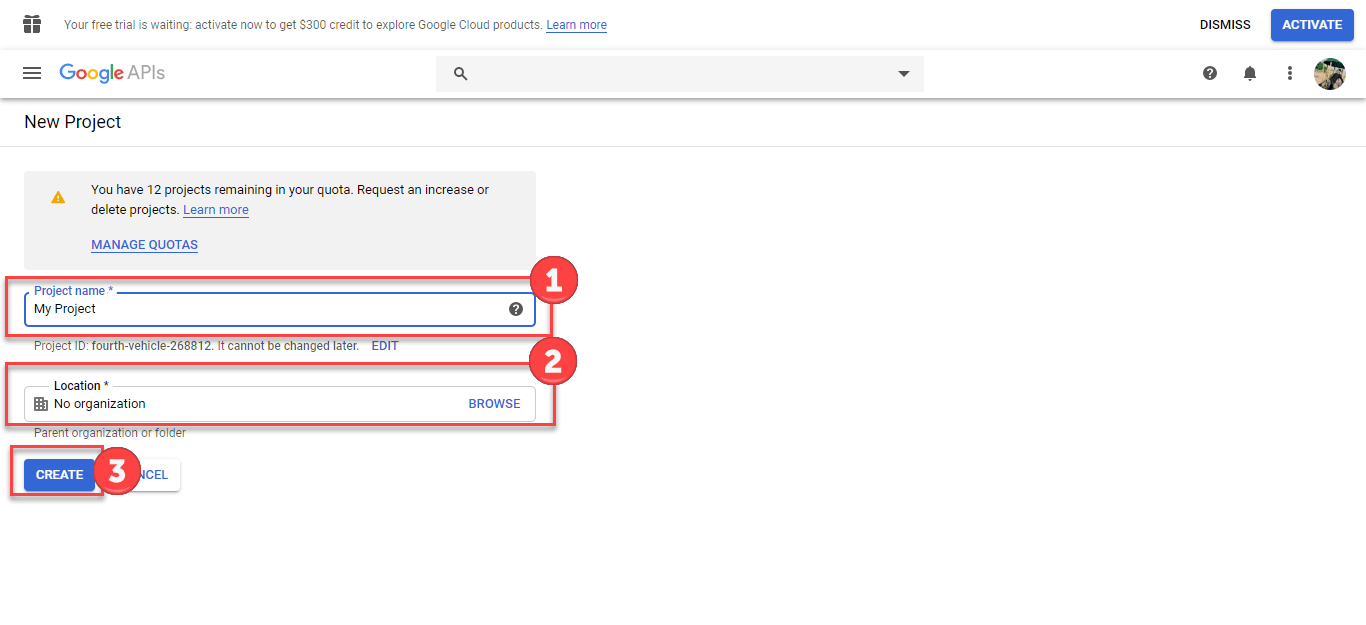
- Add Project Name
- Navigate your location or select the “No Organization” option.
- Click on the “Create New Project” button.
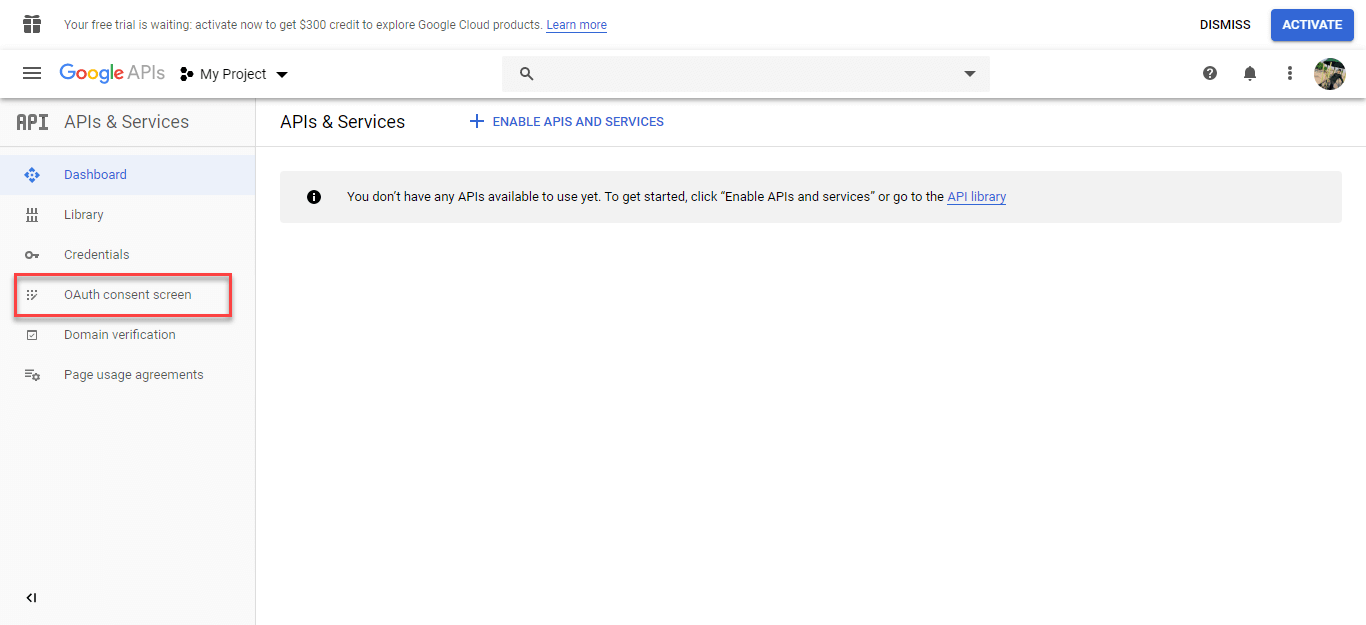
Step#3
Scroll to the left ‘API & Services’ Bar and click the ‘Oauth Consent Screen’ option.
![]() Choose the “External” radio button.
Choose the “External” radio button.
![]() Press the “Create” Button.
Press the “Create” Button.
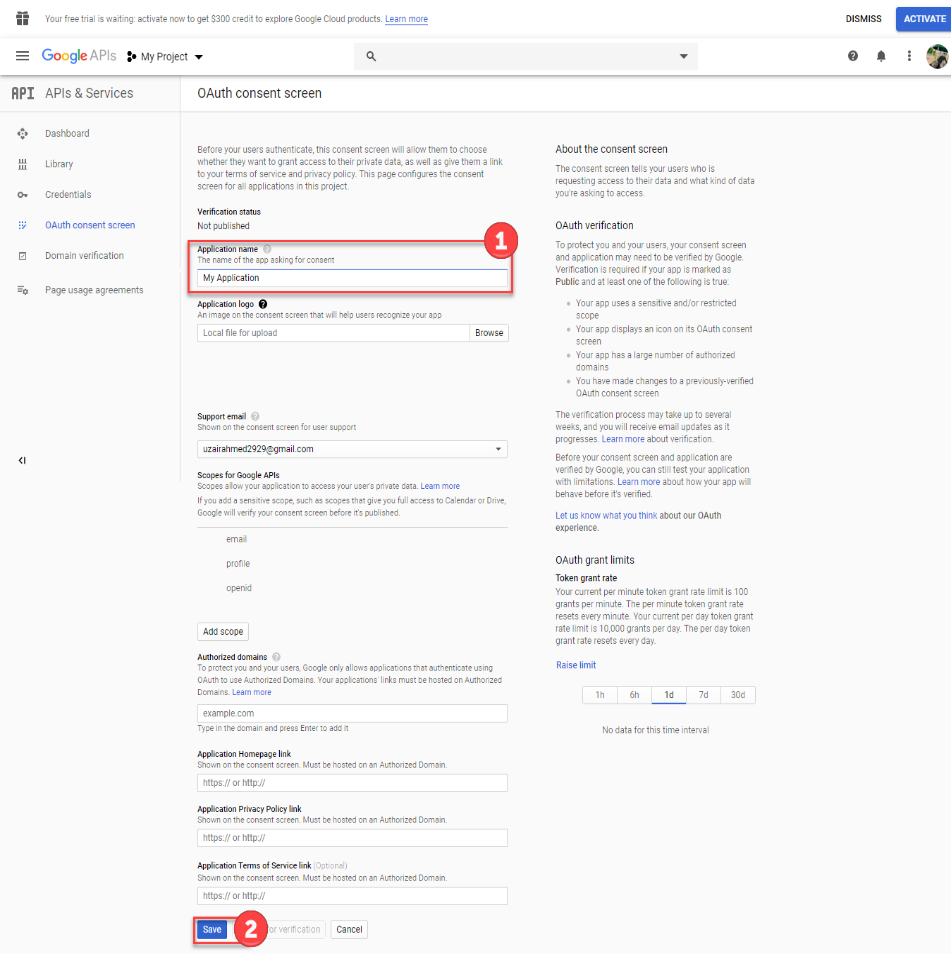
Step#4
After step#3, you need to:
![]() Enter “Application Name” in the field bar.
Enter “Application Name” in the field bar.
![]() Press the “Save” button.
Press the “Save” button.
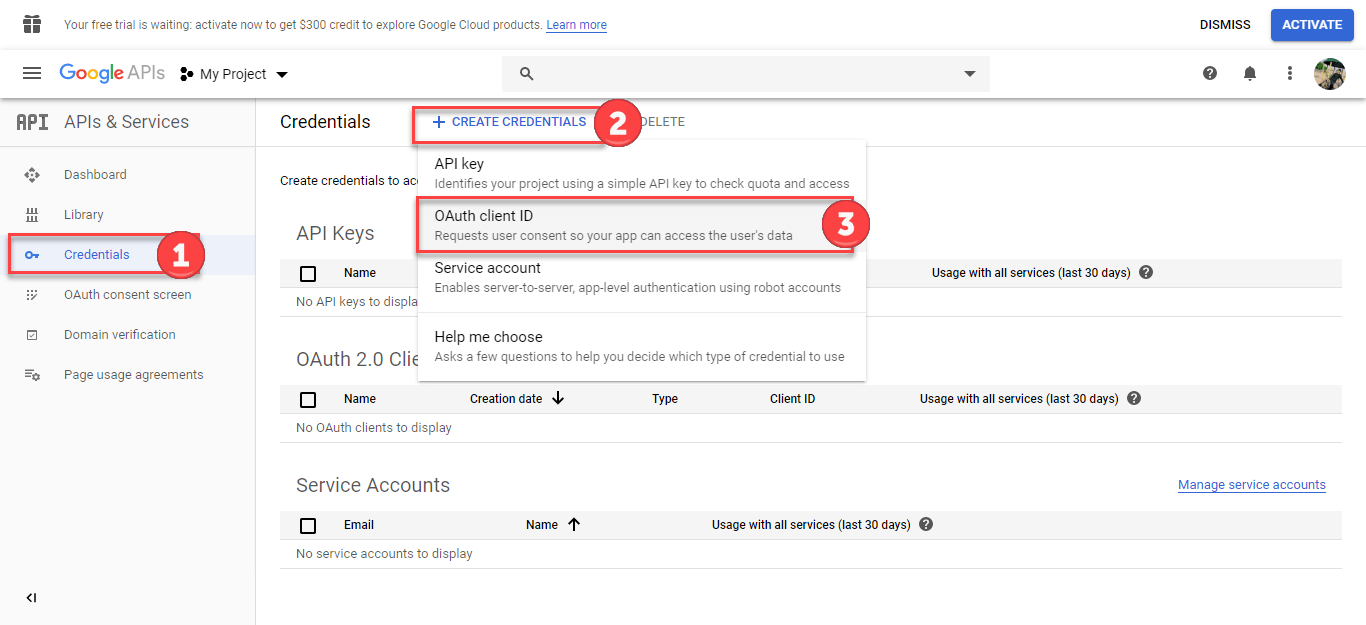
Step#5
![]() Scroll through the menu on the top left corner and click on the “Credentials” option.
Scroll through the menu on the top left corner and click on the “Credentials” option.
![]() Navigate center-wise and click on the “Create credentials” button.
Navigate center-wise and click on the “Create credentials” button.
![]() Press “Oauth Client ID” from the dropdown menu bar.
Press “Oauth Client ID” from the dropdown menu bar.
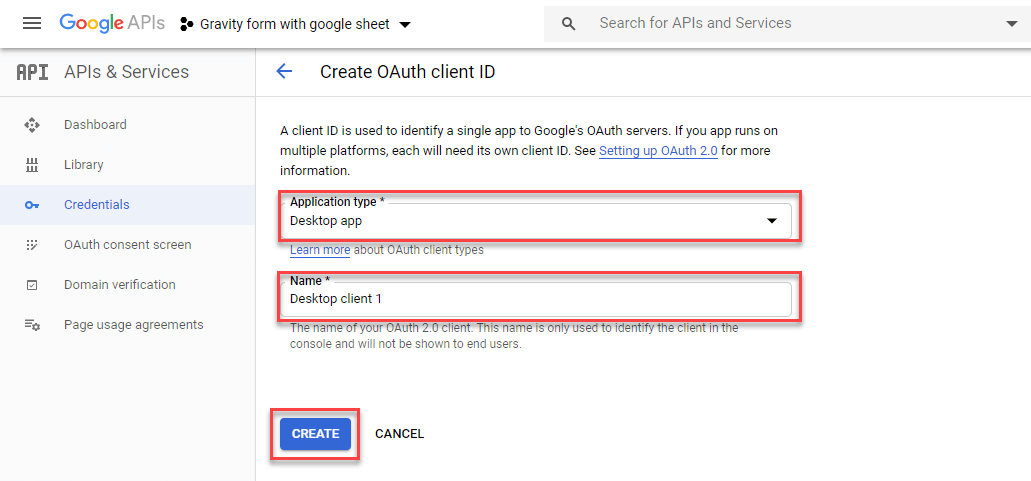
Step#6
This step provides an intuitive edge to:
![]() Choose Application Type to “Desktop App.”
Choose Application Type to “Desktop App.”
![]() Implement the text you require in the field bar within “Name.”
Implement the text you require in the field bar within “Name.”
![]() Press the “Create” button.
Press the “Create” button.
Step#7
In this step, you need to:
![]() Select and Copy Client ID, “Your Client ID.”
Select and Copy Client ID, “Your Client ID.”
![]() Select and Copy Client-Secret ID, “Your Client Secret.”
Select and Copy Client-Secret ID, “Your Client Secret.”

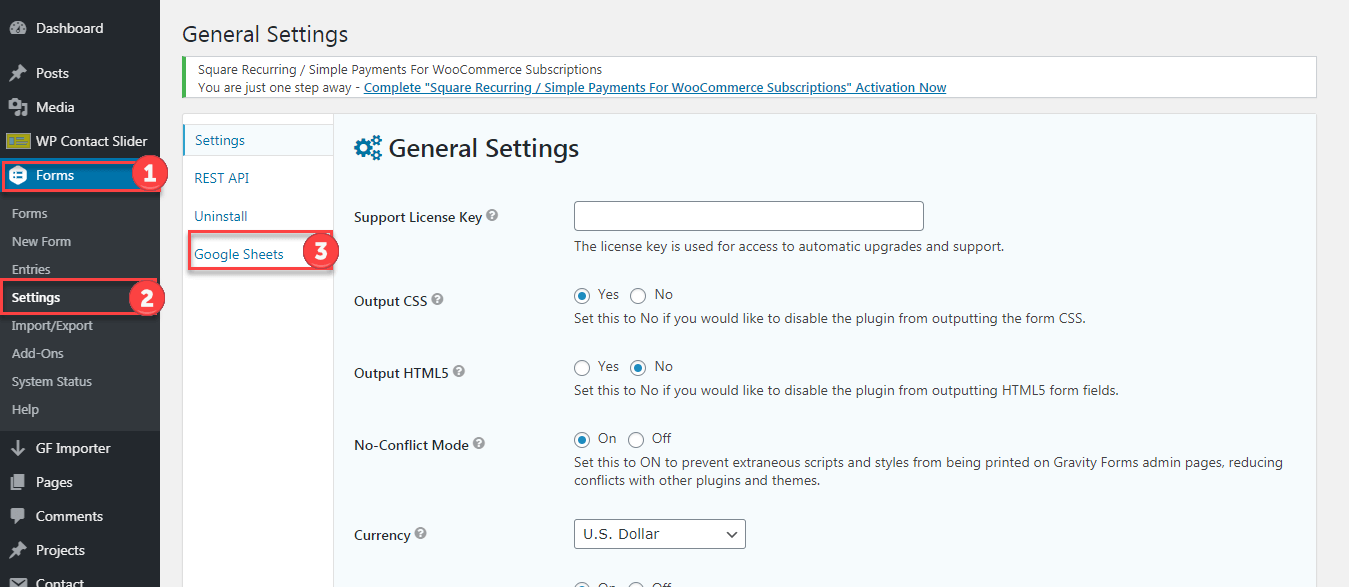
Step #8
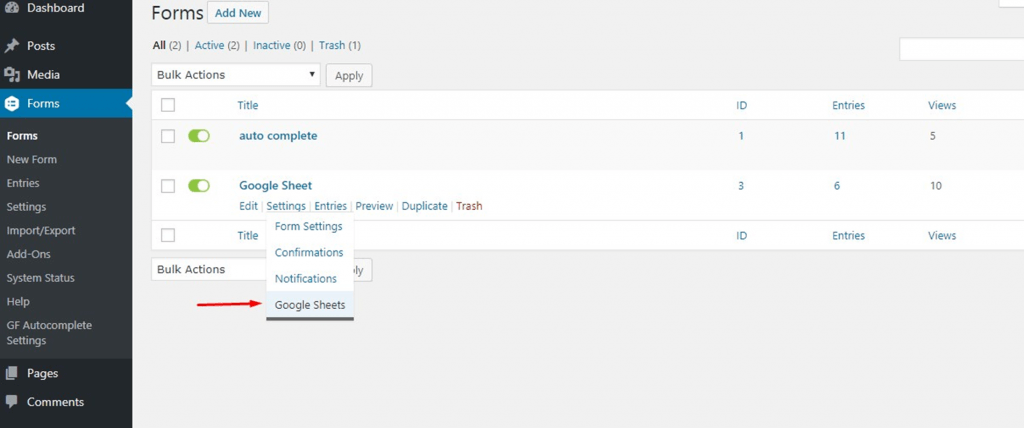
![]() Scroll towards the “Forms” tab in the “Dashboard” bar menu and select the “Settings” option.
Scroll towards the “Forms” tab in the “Dashboard” bar menu and select the “Settings” option.
![]() Navigate to the left, and click on “Google Sheets.”
Navigate to the left, and click on “Google Sheets.”
Step #9
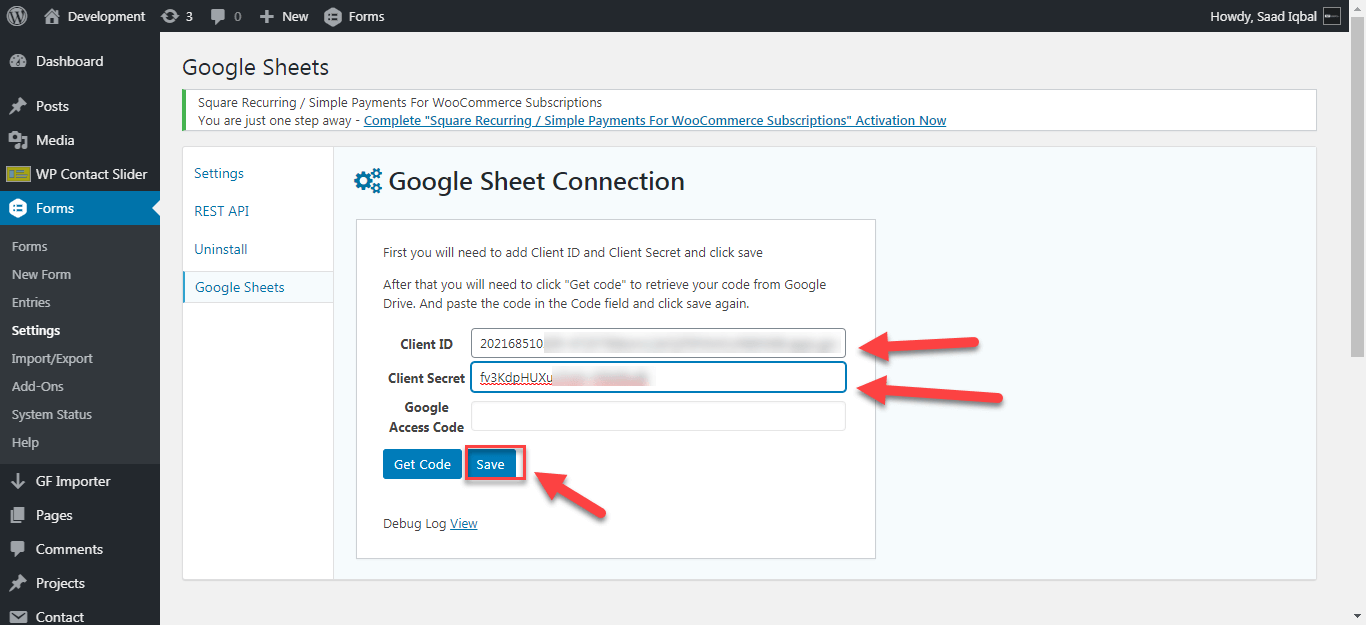
![]() Enter “Client ID” and “Client-Secret ID” in their specific field bars.
Enter “Client ID” and “Client-Secret ID” in their specific field bars.
![]() Press the “Save” button.
Press the “Save” button.
Step #10
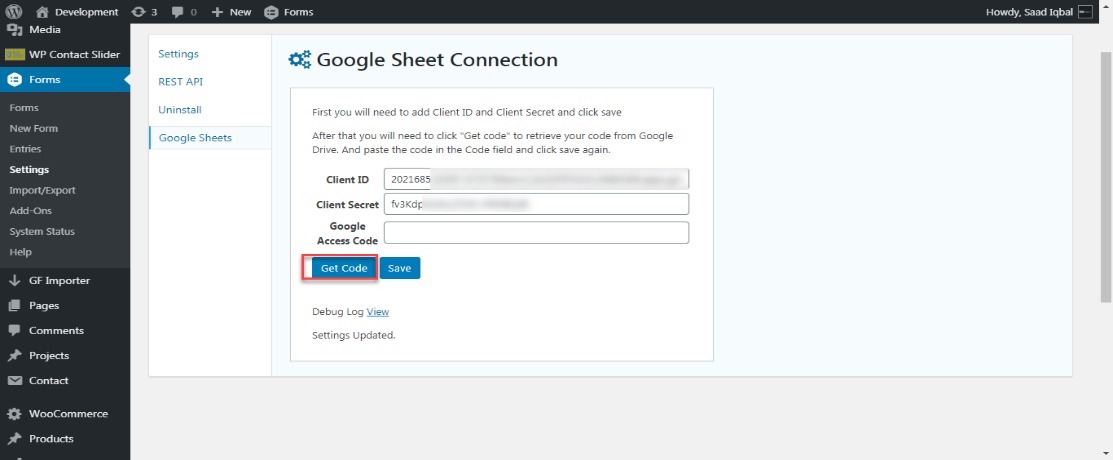
Once you click on the “save” button, a form pops up:
![]() Click on the “Get code” button.
Click on the “Get code” button.
Step #11
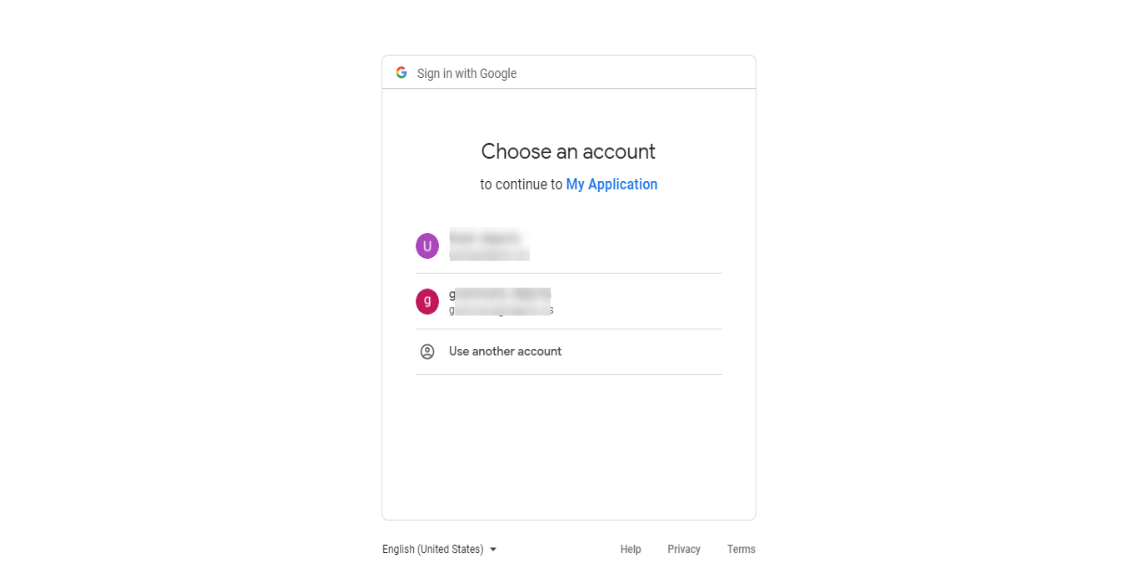
![]() The user gets linked to the Gmail account sign-up / sign-in form.
The user gets linked to the Gmail account sign-up / sign-in form.
![]() Select or Enter your Gmail Account to integrate/connect with Google Forms via Google Sheet Connector.
Select or Enter your Gmail Account to integrate/connect with Google Forms via Google Sheet Connector.
Step #12
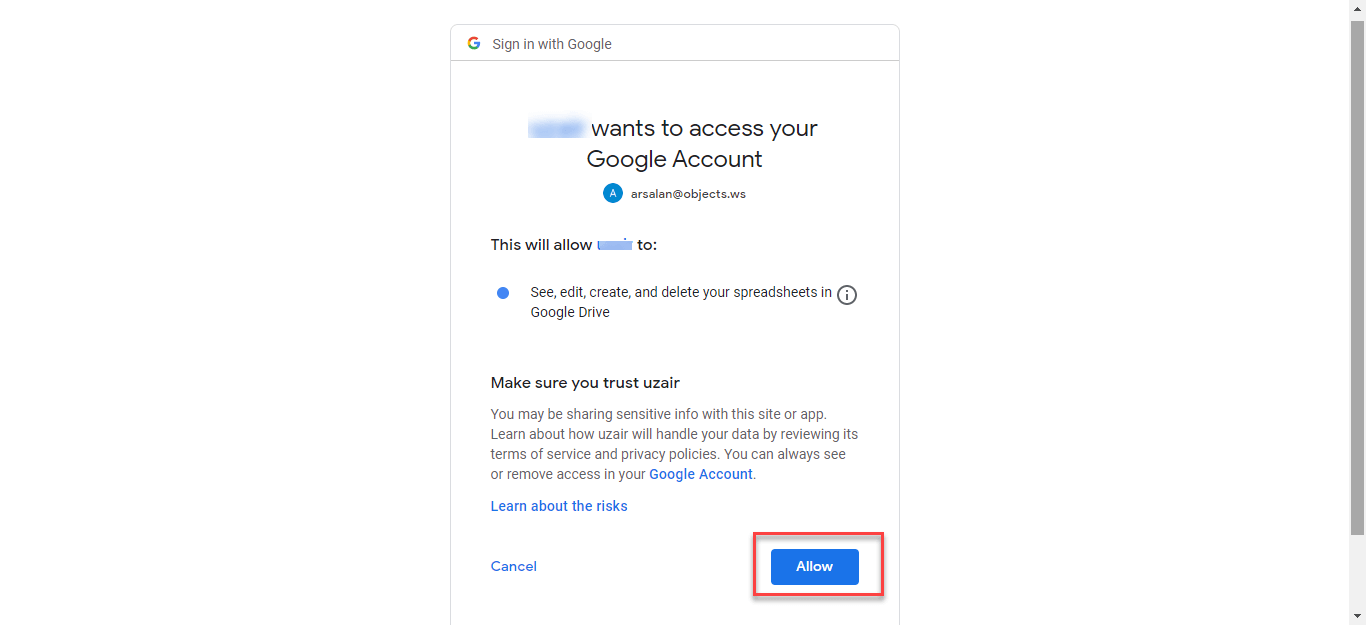
Once you have signed in with an account, you’ll get redirected to the “Access Screen”.
![]() Navigate to the bottom right and click on the “Allow” button.
Navigate to the bottom right and click on the “Allow” button.
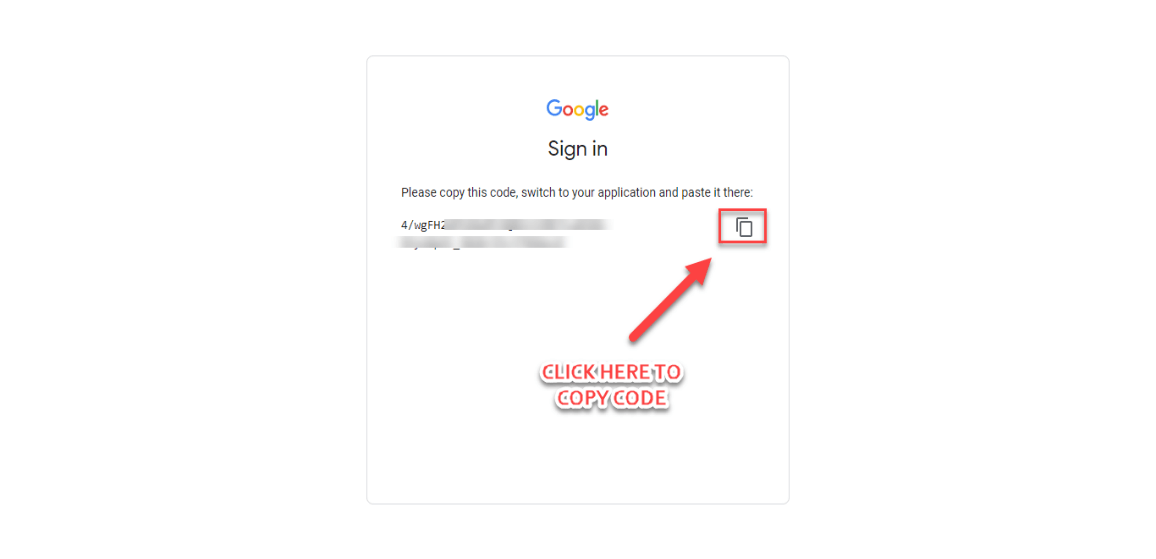
![]() Once you have clicked the “Allow” button, you’ll be redirected to the next screen, click on the icon, and copy the secret “code.”
Once you have clicked the “Allow” button, you’ll be redirected to the next screen, click on the icon, and copy the secret “code.”
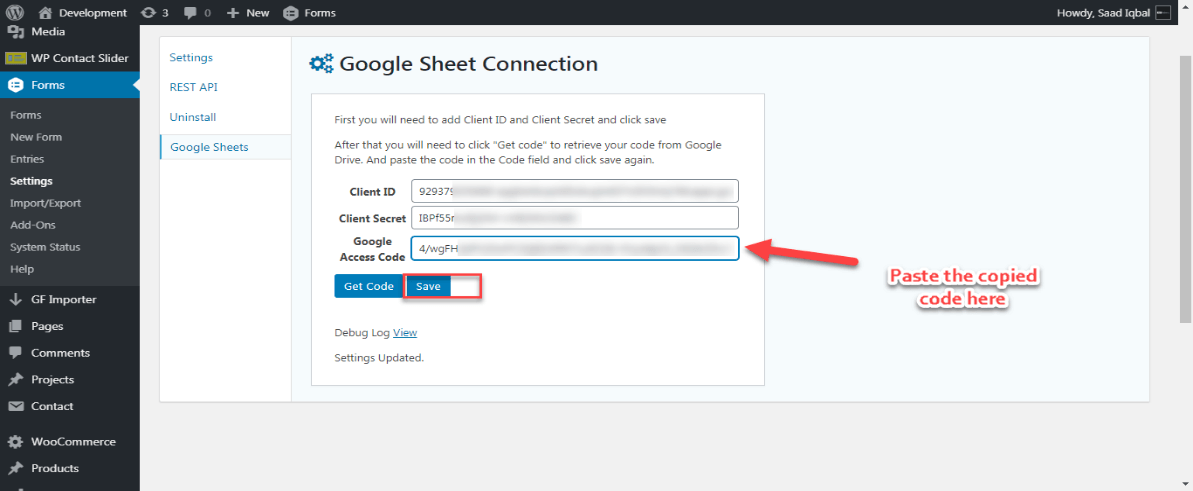
![]() You must paste the code in the “Google Access Code” field bar on the subsequent screen.
You must paste the code in the “Google Access Code” field bar on the subsequent screen.
![]() Scroll down to the middle and click on the ‘save’ button.
Scroll down to the middle and click on the ‘save’ button.
Once you’ve completed the above steps, your google account gets integrated with Google Spreadsheets & Gravity Forms.
2. Hands-on Practice: Easy Configuration
Step 1: Initial Step
The initial step after forms’ are created shows the settings against each form you can amalgamate only with a specific google sheet for one gravity form. You can enable or disable using google sheets for any particular form at any time.
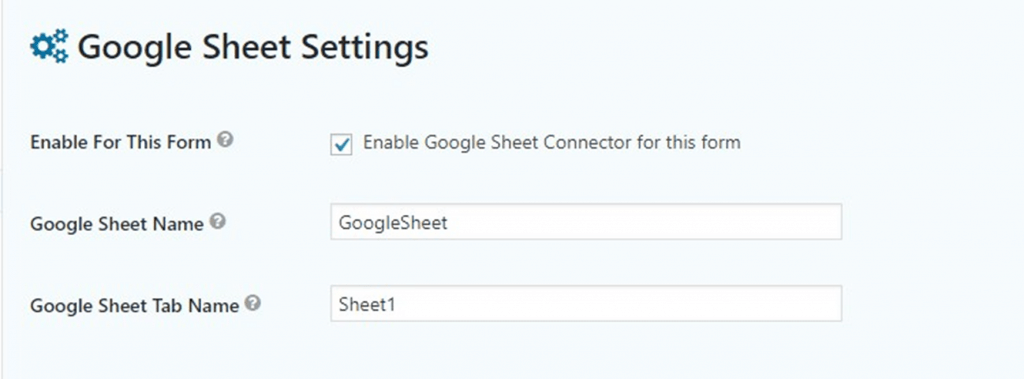
Step 2: Form Settings
If you want to create a form, you’ll need to set up any form integrated into a google sheet. The foremost step is that you need to permit a form connecting to a google sheet via clicking on “Enable for this form.” You’ll need to integrate the Google sheet name that you created with a specific email address used to receive a google access code, and the tab name of the sheet would be your sheet with several tabs to deliver one tab name to receive the data.
Step 3: Error Log
After you have followed up the settings, and identify any plugin not working correctly, see the error log.

Conclusion
We’ve discussed the overall process of how to integrate Gravity Forms and Google Spreadsheets with a streamlined approach. This article helps beginners who want to kickstart and start learning about Gravity Forms Google Spreadsheet add-ons.
Now users can manage any data associated with Gravity Forms within their own Google Spreadsheet.


