


Importing entries into Gravity Forms is crucial to streamline your WordPress form management process. Whether you are migrating from a different form plugin or consolidating data from various sources, the ability to import entries saves time and effort. With just a few clicks, you can seamlessly transfer large amounts of data into your Gravity Forms. This reduces the risk of errors and ensures data integrity.
Importing entries empowers you to efficiently handle data from different channels, such as CSV files or other form plugins, and consolidate it into a centralized system. By leveraging this feature, you can focus on analyzing data collection to drive business decisions and pique user experiences.
In this step-by-step guide, we will walk you through the process of importing entries into Gravity Forms, helping you streamline your form management workflow.
How to Install Gravity Forms
Gravity Forms is a powerful and versatile WordPress plugin that enables you to create and manage custom forms on your website. Follow these simple steps to install Gravity Forms and start creating dynamic forms in no time.
Step 1: Purchase Gravity Forms License
Visit the official Gravity Forms website and choose the license that best suits your needs. Select the desired license type (Basic, Pro, or Elite) and proceed with the purchase process. Once you have completed the payment, you will receive an email containing the download link and your license key.
Step 2: Download the Plugin
Access your Gravity Forms account, locate the download link for the plugin, and click on it to initiate the download. Save the plugin file to your computer.
Step 3: Install the Plugin
Log in to your WordPress admin dashboard. From the left-hand menu, navigate to “Plugins” and click “Add New.” On the next screen, click the “Upload Plugin” button appearing at the top. Choose the Gravity Forms plugin file you downloaded and click “Install Now.”
Once the installation is complete, click the “Activate” button to activate the plugin.

Introduction to Gravity Form Import Entries
Gravity Forms Import Entries add-on is an official extension developed specifically for Gravity Forms users. This powerful tool conveniently lets you import many entries into your Gravity Forms. One of the key features of this add-on is the ability to update existing entries.
By mapping the fields in your CSV file to the corresponding Entry IDs, you can effortlessly import new entries while updating and modifying your existing ones. This functionality allows for efficient data management and ensures that your form entries are always up to date.
Requirements Of Gravity Form Import Entries
- Gravity Forms Plugin
- An SSL Certificate.
- WordPress 5.0 or above
- PHP 5.5 or above
- Import entries from the Gravity Form plugin or a CSV file.
Step By Step Guide: How to Install Gravity Form Import Entries
After downloading and unzipping the Gravity Forms plugin, you must install it on the WordPress site.
→ Sign in to the WP admin panel.
→ Click the “Plugins” menu given on the left side.
→ Select “Add New.”
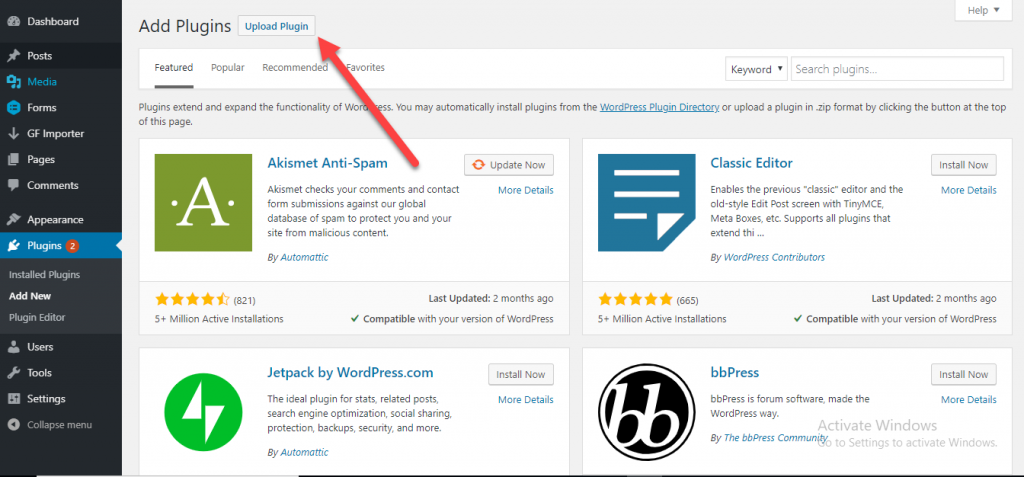
Click the Upload Plugin button given at the top.
Now, select “Choose file” that appears below.
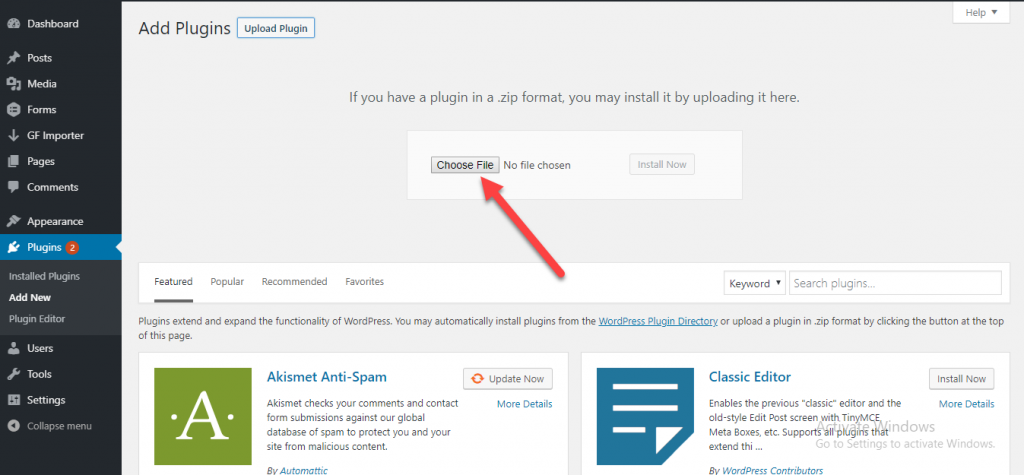
After finishing the uploading process of the zip file, click “Activate Plugin.”
That’s it. You can now see the GF importer tab in the WP panel.
Gravity Forms Import Entries – Settings
Access
To access the plugin, the administrator must navigate the dashboard panel menu and locate the GF Importer tab. As outlined below, the administrator will find settings and two distinct text boxes within this tab, each serving a specific function.
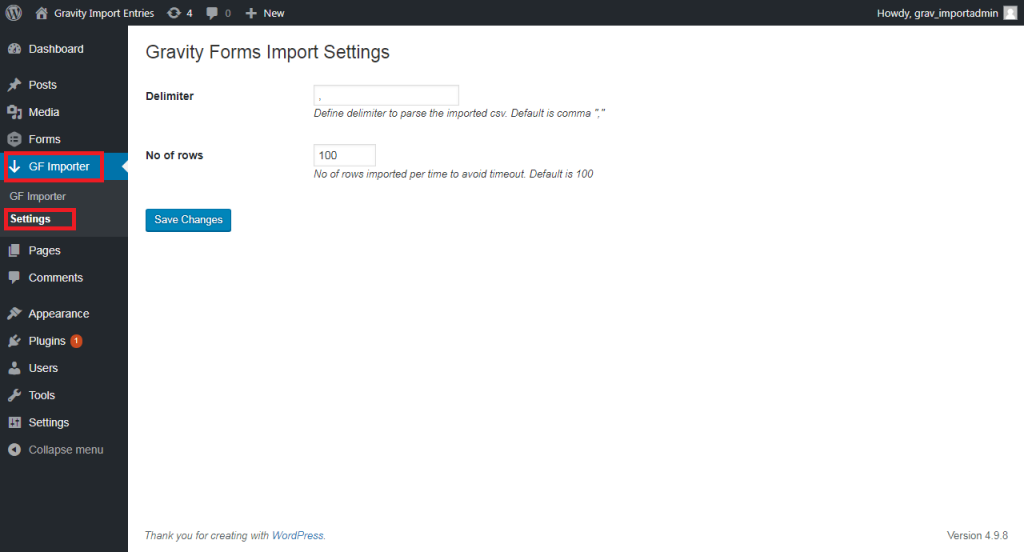
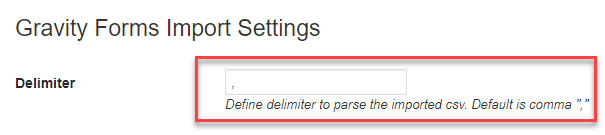
Delimiter
A delimiter refers to a series of characters that define the boundary between distinct and autonomous sections within plain text or other data streams. Within the context of gravity forms imports, delimiters are utilized to establish and break down the imported CSV file. By default, the comma is set as the separator for this process.
No of Rows
The “Gravity Forms Importer” plugin allows users to define the number of records fetched in each chunk when importing data from a CSV file. This feature is implemented to prevent timeouts during the import process.
The CSV file is divided into smaller, manageable chunks, and each chunk is processed individually to ensure smooth and uninterrupted importing of data. Users can optimize the import process and avoid potential timeouts by specifying the desired number of records per chunk.

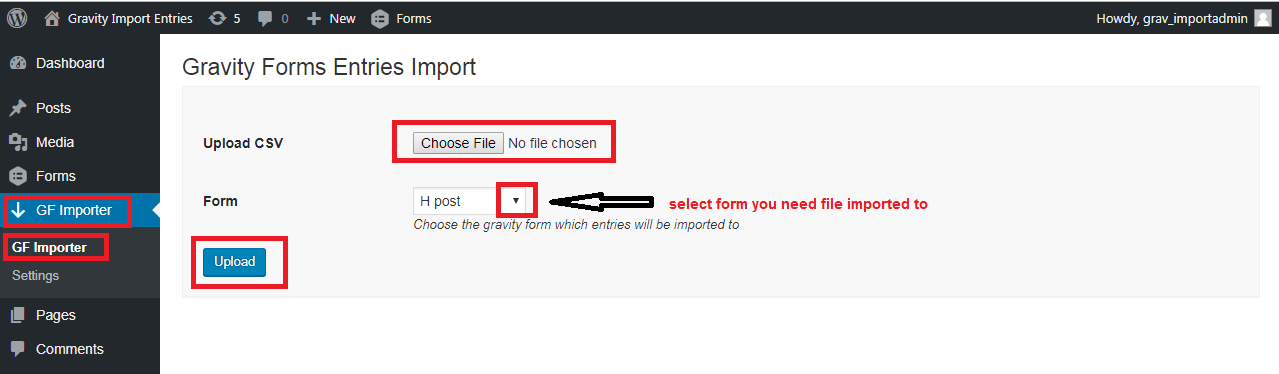
How to Import Gravity Forms Import Entries CSV File
- Navigate to the GF Importer tab.
- Select “Choose file” to upload a CSV file or export from “Gravity Form.”
- It is possible to choose the gravity form to import entries.
- Click ”Upload.”
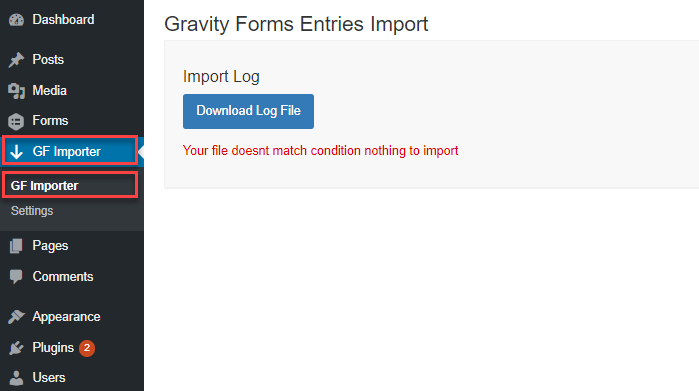
How to Download CSV Error File’s Import Errors
Do not worry; the system will automatically add records containing mistakes or created issues during import to a separate file. The administrator only needs to fix the mistakes before re-importing them.
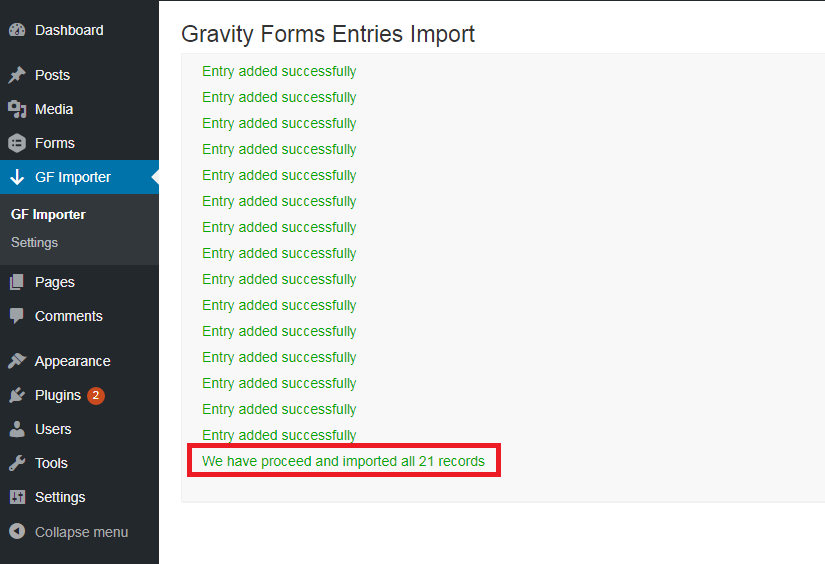
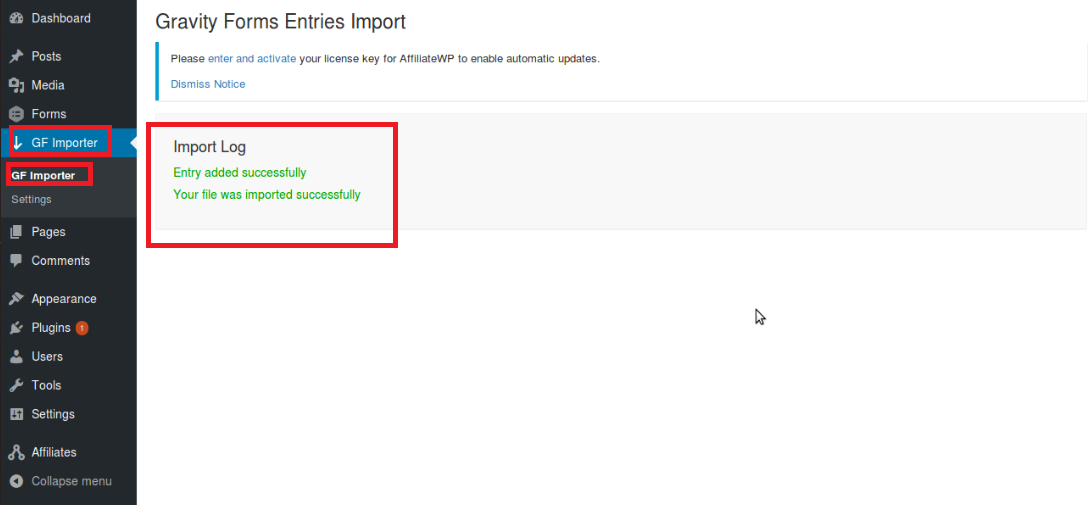
How to See Imported Rows
Navigate to GF Importer, where it is possible to see the number of records inserted at the end of the import status list.
How to Update Imported Entries
To update entries, follow these steps:
- Begin by checking the “update entries” checkbox.
- Next, select the entries you wish to upload by choosing the appropriate option from the drop-down list.
By selecting an option from the drop-down menu, you establish a mapping between the chosen field and an Entry ID. This enables the GF Importer to retrieve records from the CSV file, starting from the specified entry.
Mapping CSV File and Fields
For the Gravity Form importer to extract data from the CSV file to the form fields, the administrator must ensure there are enough form fields in the form (as many as there are in the CSV file).

Final Thoughts
Importing entries into Gravity Forms can be a time-saving and efficient way to manage large data sets or migrate information from other sources. Following this step-by-step guide, you can confidently import entries into Gravity Forms, streamlining your form management process. Remember to properly prepare your entry data, install the Import Entries add-on, map your fields accurately, and configure import options to meet your requirements. With Import Entries Gravity Forms, you can organize your form data.


