Managing data efficiently in WordPress can be a game-changer for your workflow related to online booking. And for that, Importing Gravity Forms entries and attaching them to email notifications can be a game-changer for your workflow. In this short guide, we’ll focus on two key aspects of managing import entries using the Gravity Forms Import Entries plugin:
Part 1: Automatically Importing Gravity Forms Entries
Part 2: Attaching Gravity Forms Entries to Email Notifications
Step 1: Installation and Setup
- Install the GF Entries Importer plugin through your WordPress Admin panel.
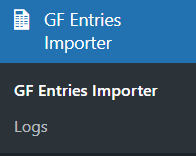
- Navigate to WordPress Admin Dashboard → GF Entries Importer.
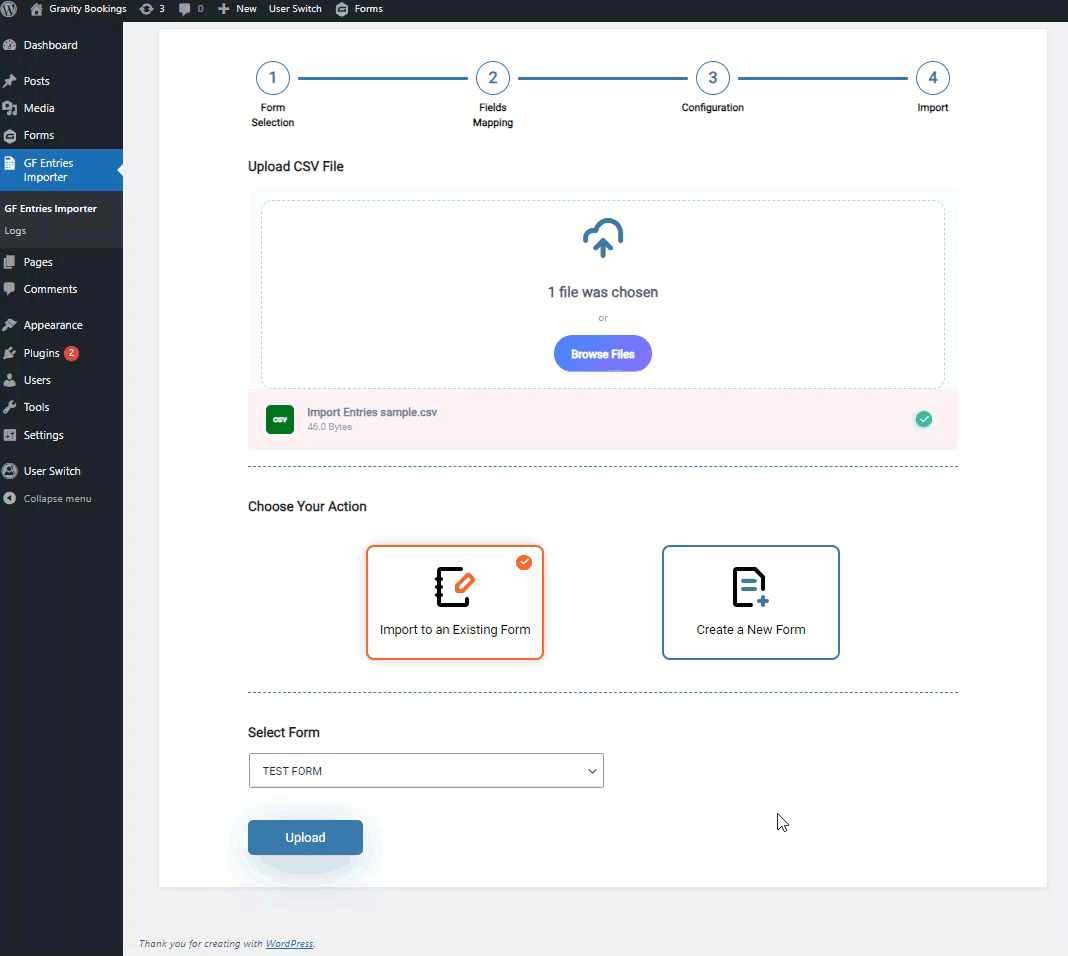
Step 2: Uploading Your CSV File
- Click the “Browse Files” button to select your CSV file.
- Once uploaded, the CSV file name is displayed on the page.
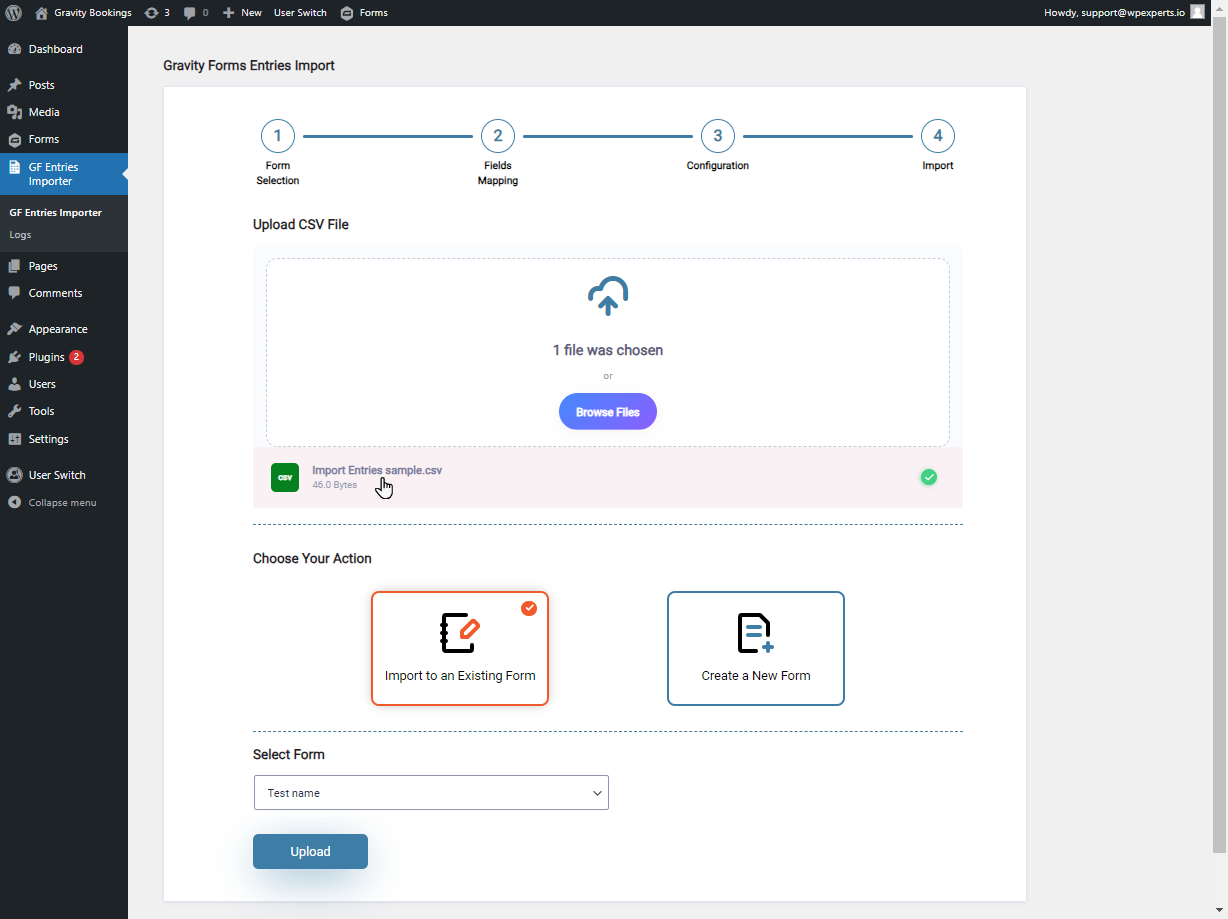
Step 3: Choosing Your Import Method
Here, you have two options:
- Import to an Existing Form: Select a predefined form from the dropdown.
- Create a New Form: Enter a name for your new form.
Click the “Upload” button after making your choice.
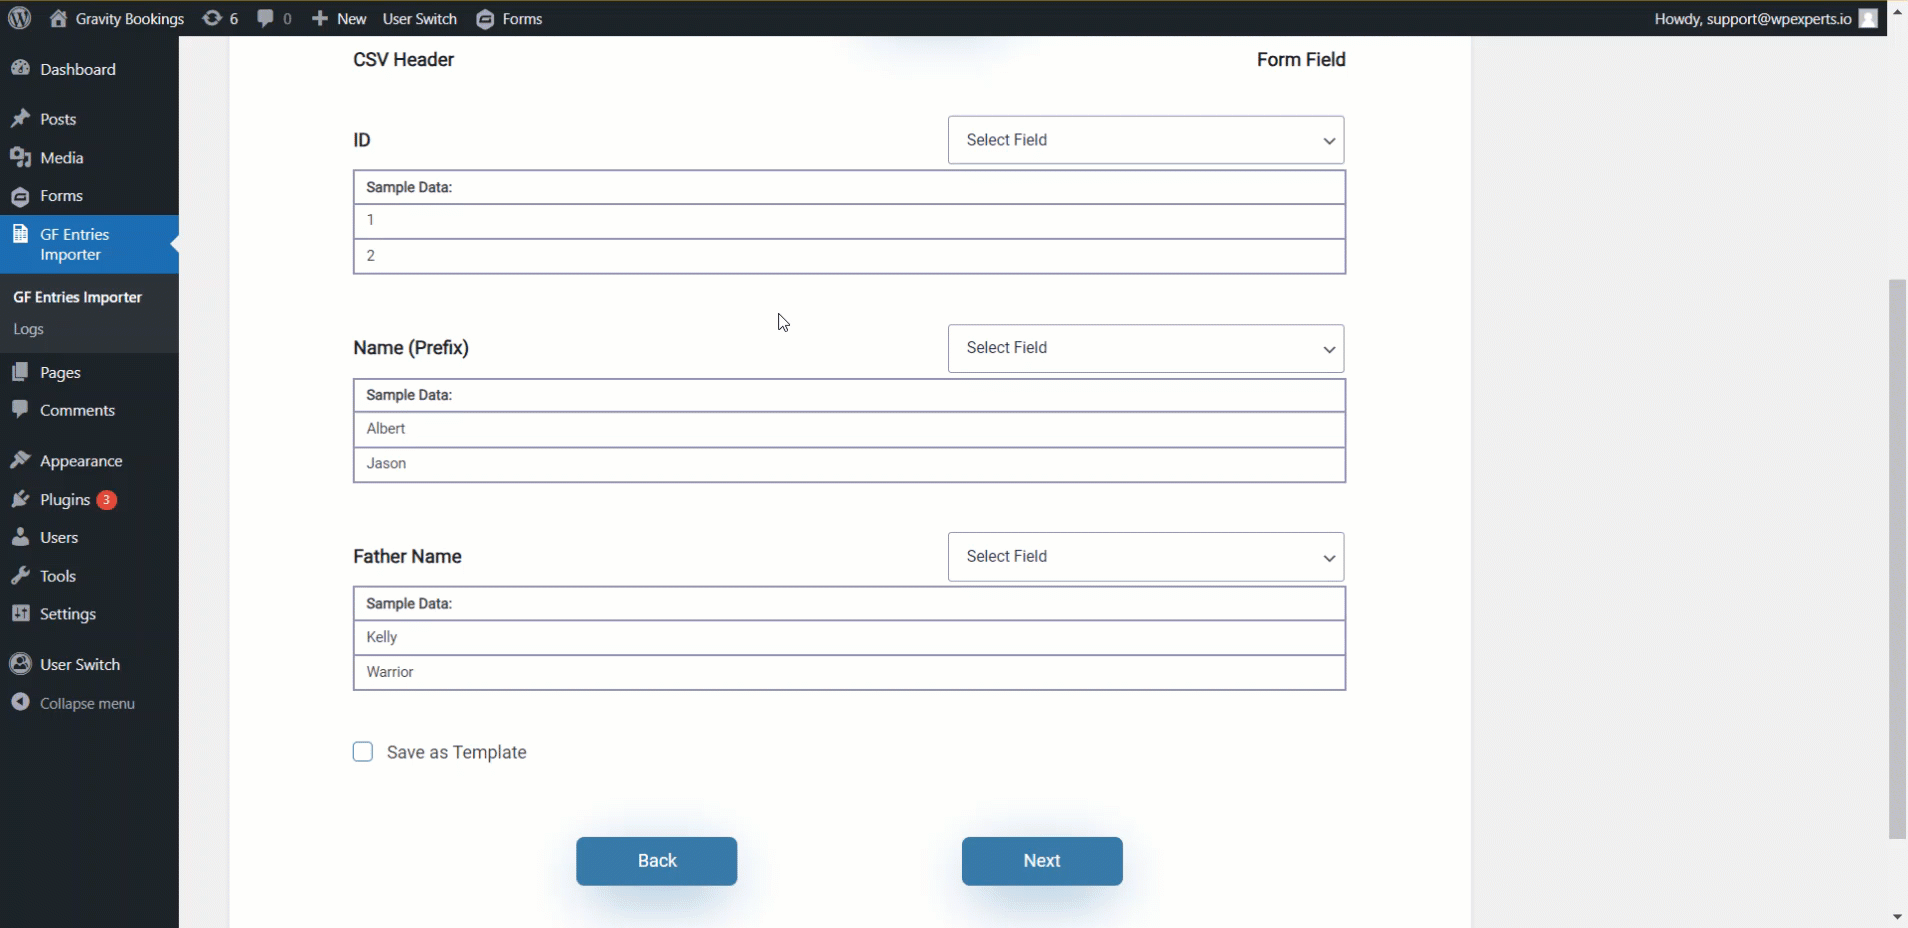
Step 4: Field Mapping
- On the field mapping page, match your CSV headers with form fields.
- Use dropdowns to adjust the mapping if needed.
- You can add new fields by selecting “Add New Form Field” from the dropdown.
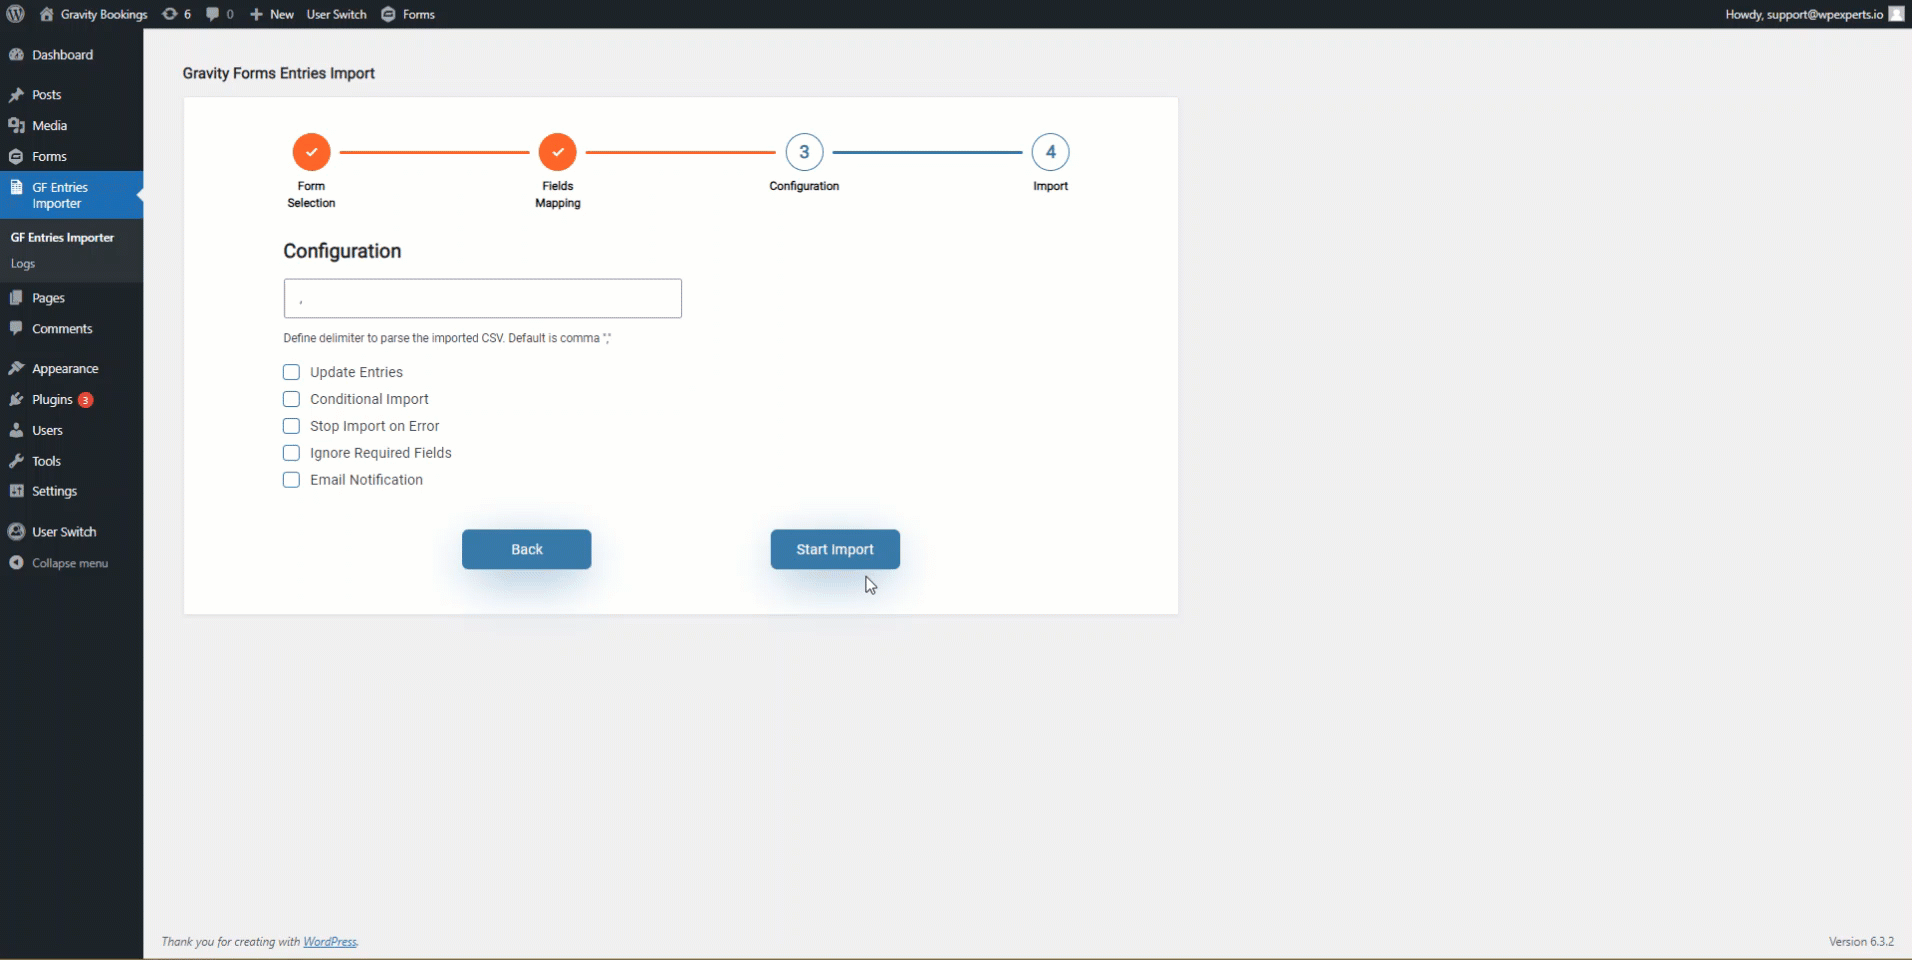
Step 5: Configuration for Automatic Import
To set up automatic importing, focus on these options:
- Update Entries: Check this box to update existing entries.
- Conditional Import: Use this to set specific conditions for importing data.
- Ignore required fields: Enable this if your CSV might be missing data for required fields.
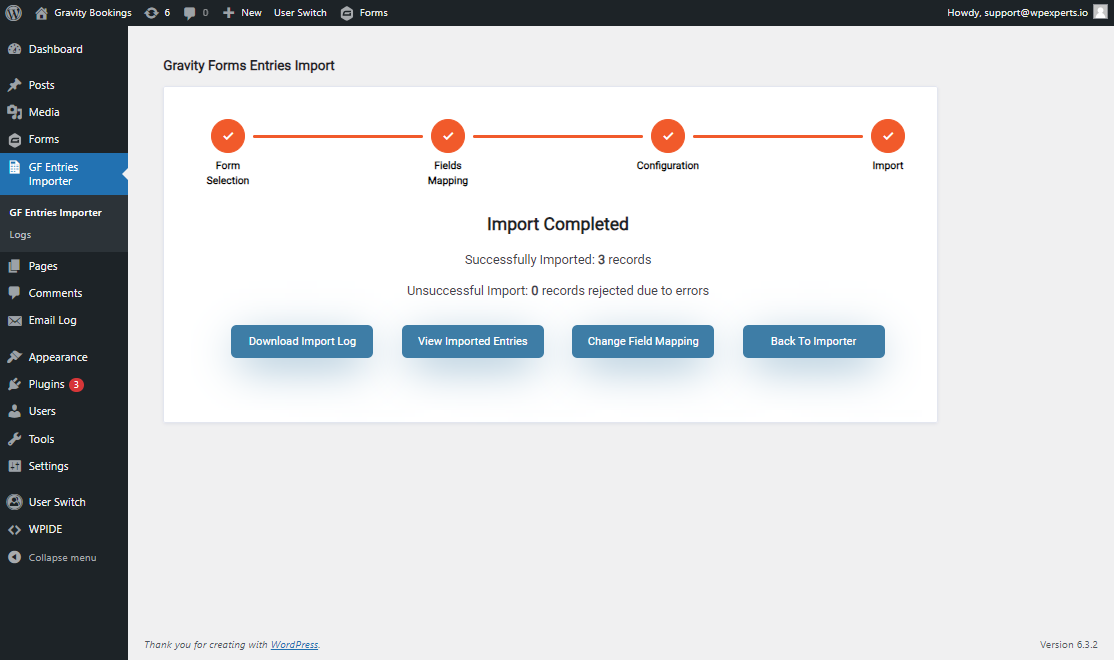
Step 6: Start the Import
- Click the “Start Import” button to begin the process. A progress bar will show the import status.
How to Attach Email Notifications with Gravity Forms Import Entries
The GF Entries Import Entries plugin allows you to attach imported entries to email notifications. Here’s how to set it up:
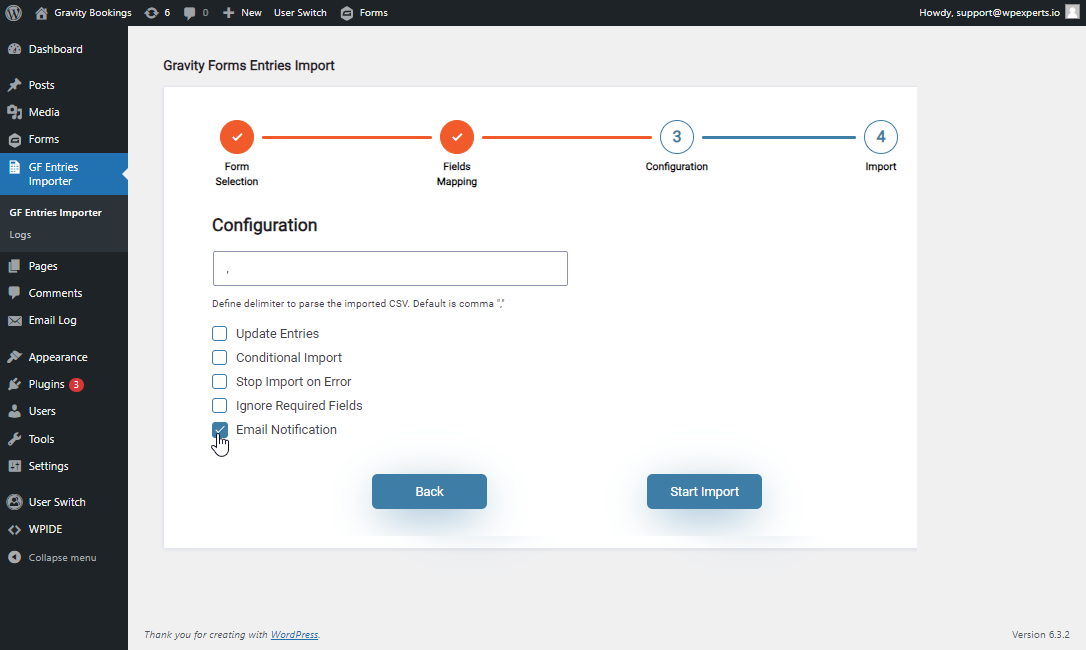
Step 1: Enable Email Notifications
- On the Configuration page, locate the “Email Notification” checkbox.
- Check this box to enable email notifications for your imports.
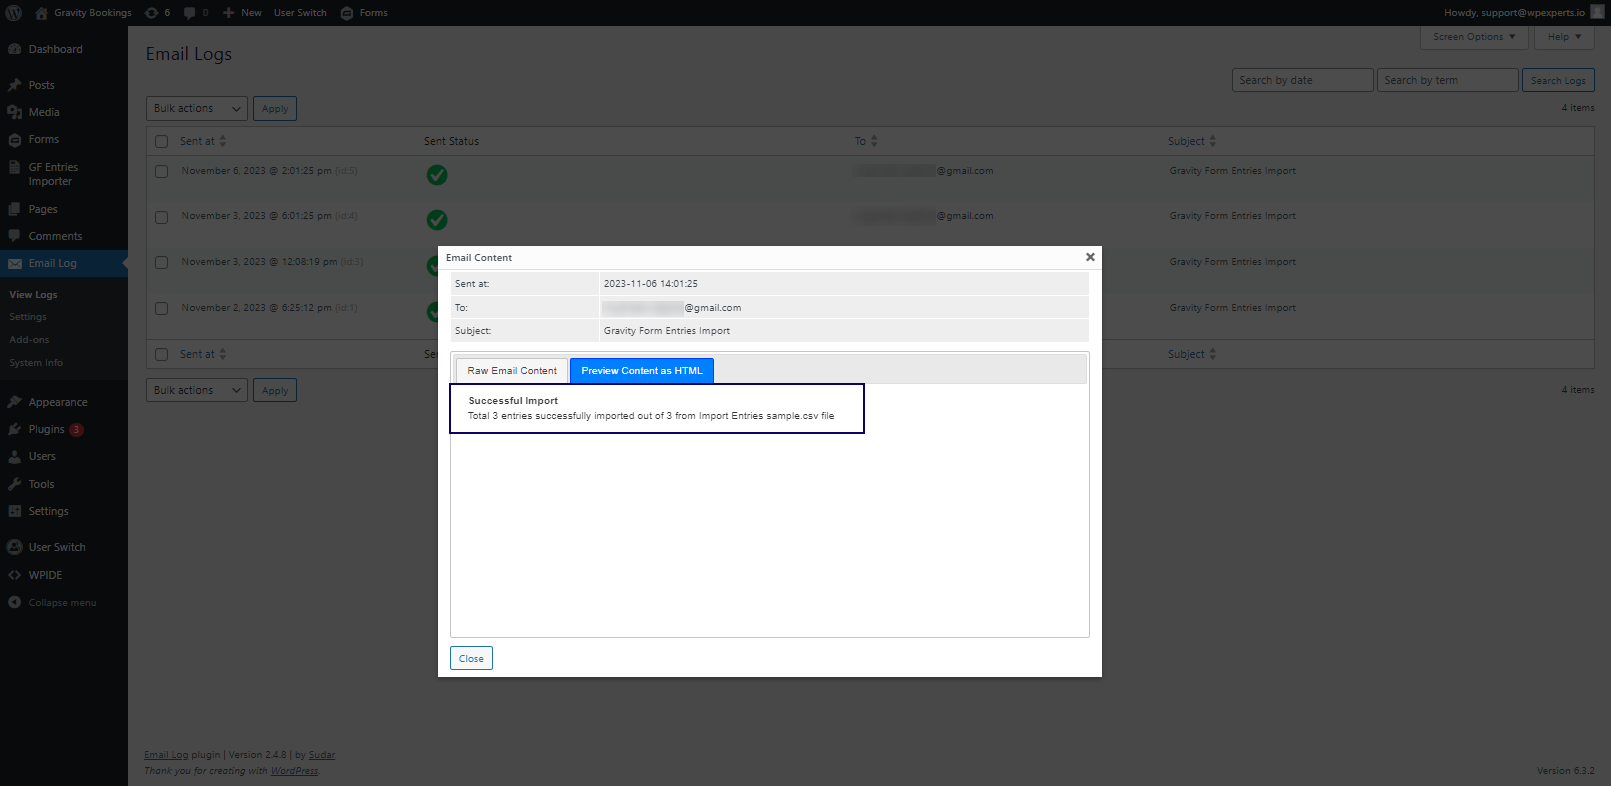
Step 2: Import and Notification Process
- After configuring your import settings and enabling email notifications, click “Start Import.”
- Once the import is complete, the system administrator will automatically send an email notification.
Step 3: Viewing Imported Entries
To view your imported entries:
- Go to Gravity Forms → Entries in your WordPress dashboard.
- You’ll find your newly imported entries listed here.
Final Words
By following these steps, you can efficiently automate the process of importing Gravity Forms entries and have them attached to email notifications. This streamlined approach saves time and ensures you’re promptly notified of new data imports. Remember, the key to successful automatic imports lies in the proper configuration. Set up your import and notification settings correctly, and you’ll significantly improve your data management process.