Like most businesses, you likely wish to enable online payment processing on your WordPress site. Although products like Shopify, WooCommerce, BigCommerce, and others in this class have their purposes, many websites don’t require a full-fledged e-commerce shopping cart application to execute online transactions.

Making payment forms is easy for carrying out transactions online using Gravity Forms and the appropriate merchant integration. These quick, light forms improve your clients’ overall purchasing journey.
In this blog post, we’ll discuss our payment gateway integrations and guide you in selecting the best one.
Payment Gateway Add-ons for Gravity Forms
Gravity Forms value accessibility. Thus, Gravity Forms connects with some well-liked and renowned online payment gateways.
These are your choices:
- Stripe
- PayPal Checkout
- Mollie
- Authorize.net
- 2Checkout
- Square
Payment systems like Stripe or PayPal stand out from the competition because they enable businesses to start receiving payments immediately. They don’t need complicated programs, and setting them up is simple. After registering, you have ten minutes to receive payments.
As a popular gateway that collaborates with several banks or other monetary institutions worldwide, Authorize.net is a healthy option. This gateway would probably be necessary, for instance, if you wanted payment processing via your nearby bank.
Which Payment Gateway Add-on You Should Choose
The payment integration system you choose to employ to take online payments affects the merchant integration you pick. Install the appropriate merchant plugin as soon as your payment system is operational.
So, how will you know which payment gateway add-on is best for you? That is dependent on your objectives and business needs. But it would be helpful if you thought about the following things when picking the payment gateway:
-
Seamless Setup
Consider Stripe or PayPal if you want a simple setup. Without speaking to an alive person, everything may be integrated within minutes. They provide a variety of self-service customer assistance tools.
-
Security
Pick 2Checkout or Stripe if security is a concern. These platforms include robust mechanisms for fraud protection and detection. They use AI-based algorithms to find possible fraud schemes before they even happen.
Radar, a fraud detection tool from Stripe, is quite robust. It has customizable capabilities, so you may define restrictions for transactions that make you uneasy in addition to automatically detecting fraud (when the delivery and billing addresses are in different countries, for instance, “Block all transactions”).
-
Rapport
PayPal, as a payment integration system, focuses on serving customers. The majority of people have PayPal accounts for online payments and money transfers between family members or buddies. This indicates that consumers see it as a reputable payment gateway.
-
Development
You should select Stripe for your payment processing if you intend to insert miscellaneous tools or create your own personal one. Stripe is considered a developer-oriented payment gateway. It features solid documentation and a robust API.
How to Setup Payment Gateway Integration System in Gravity Forms
Follow these instructions to configure your payment add-on after selecting your payment processor.
1st Step: Gravity Forms Installation
Install the standard plugin called Gravity Forms.
2nd Step: Install the Relevant Add-On
Now you will have to install an add-on appropriate for your website. Here, we are taking the example of Square for Gravity Forms – an ultimate and user-friendly merchant integration add-on.
What is Square for Gravity Forms?
Square users can use the Secured Square Payment Gateway to make payments from their Square accounts using gravity forms. Add Square as a payment option to the form you just made with the Gravity Forms plugin right away.
Users can make payments using a credit card, which will be processed through their Square account. Whether it is a simple one-time purchase or an ongoing recurring payment, it doesn’t matter. Additionally, the Form ID sent through transaction notes is visible alongside your transaction in your Square dashboard.
Requirements for Square Forms Add-on
- Square Account
- Gravity Forms (you have already installed them in the 1st step)
Step 3: Install Square for Gravity Forms Add-on
- Download the zip file of Square for Gravity Forms.
- Go to Plugins > Add New > Upload Plugin.

- Now, click Choose File > Choose Square for Gravity Forms zip file > Upload.
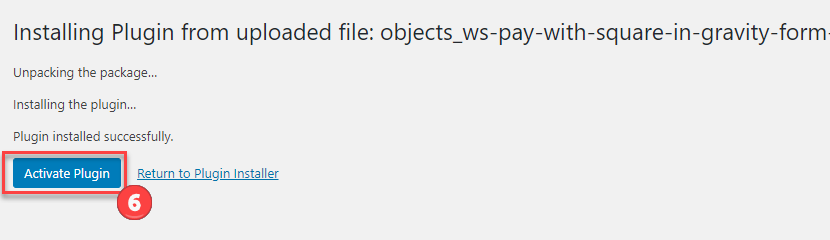
- Click on the “Install Now” button.

- Click on the “Activate Plugin” button.
- Here, select the “Installed Plugins” tab and then “Activate License.”
- You will get your License key from the Freemius account.

- Now put in your License Key and click the “Agree & Activate” License.
4th Step: Develop a fresh Gravity Form
Click the “New Form” button to create a new Gravity form beneath the Forms on the dashboard’s left side. Give it a distinctive name so you can make it prominent from other forms.
5th Step: Create Form Fields
Gravity Creates Users can use the Secured Square Payment Gateway to make payments from their online forms using Square. Add the Square payment option right away to the form you just built using the Gravity Forms plugin. Users can pay with a credit card, which will be processed through their Square account, whether it’s a one-time purchase or a payment that will be made over and over again.
Also, the Form ID sent through transaction notes is shown on your Square dashboard next to the transaction.
6th Step: Create Your Form Feed
Every form requires its own feed to provide information about form submissions to your add-on or the payment processor. By selecting the add-on’s name under “Settings” (next to the form’s title), you can configure your feed for all forms separately.
When you arrive at feed settings, take the following actions:
- Give a name to your feed for identification purposes. It will be invisible to everyone.
- Pick your type of transaction, either subscriptions or items and services.
Depending on the kind of transaction you just selected, options will appear. Totalize the form now. If you sell transactions, you’ll have more chances to control the trial period, setup fee, payment trial, and recurring periods.
- Configure the billing information to see if each option matches the form field that has information.
- Click on the “update” button to save every setting.
7th Step: Embed Your Form on the Page
Go to the WP page to see your payment. You have two methods to insert the form:
- Paste the Gravity Forms shortcode for your form into the Shortcode Block you just added. This is how the shortcode appears:
[gravityform id=# title=false description=false]
- Keep the meta title and meta description marked as ‘true’ if you have to show them on the Page. Keep “#” instead of the form’s ID number on the form list.
8th Step: Payment Form Testing
Your final destination is to submit the form for payment. This is a crucial step in the procedure.
The most accessible way to ensure that your payment form is functional is to use it to carry out a legitimate transaction. Use your credit card to buy something for yourself. You may have to pay a small fee for the transaction testing, depending on the pricing guidelines of your payment processor. If your payment processor levies a% fee, make the smallest possible purchase.
Final Words
The payment gateway is an essential aspect of Gravity Forms. You need to have a proper understanding of different payment gateway add-ons to integrate into your website. Among the available options, Square for Gravity Forms is a seamless one due to its user-friendliness and ease of integration. Hopefully, this article will help you install and use Square for Gravity Forms in an effortless manner.