

1.Pay with Square in Gravity Forms
Gravity Forms Square lets users to pay from their gravity form using Secured Square payment gateway. Instantly, add the Square payment option into your form created through the Gravity Form plugin. Whether it is a one-time simple payment users will be able to pay via Credit Card which will process through your Square account. Also, you can view your transaction in your Square dashboard along with the Form ID sent through transaction notes.
2.FEATURES
- Square Simple Payment.
- Email Notification.
- Send Transaction Notes.
- Create Multiple Forms with Multiple Square accounts.
- Sandbox supported for a test run.
- View Transactions in Square.
- Item Sales Reporting in Square.
- Secure Payment Transactions.
- Forced SCA Testing.
3.REQUIREMENTS
- Gravity Forms.
- Square Account.
4.INSTALLATION
- Download the Square for Gravity Forms plugin zip file.
- Go to Plugins ???? Add New ???? Upload Plugin.
- Click Choose File ???? Select Square for Gravity Forms zip file ???? Upload.
- Click Install Now.
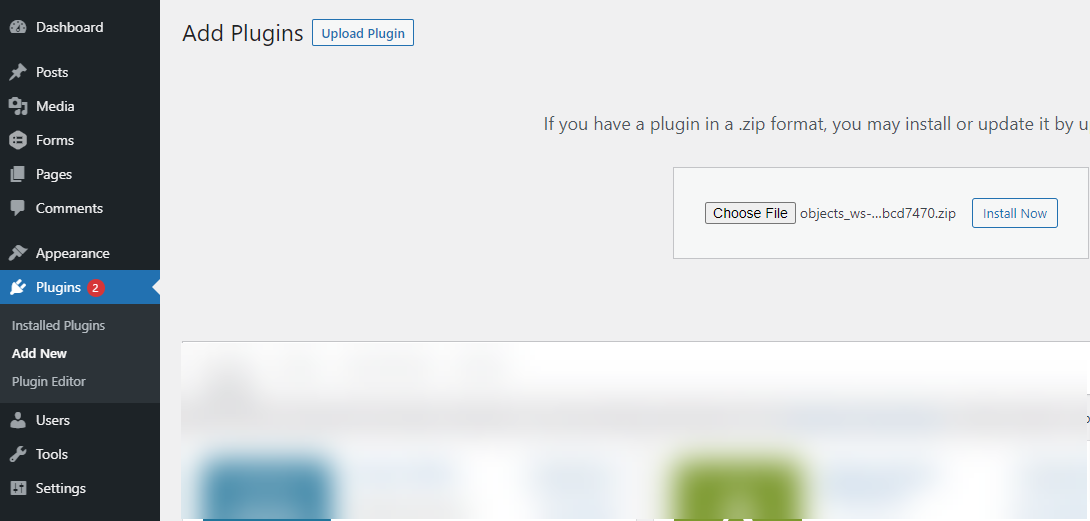
- After the plugin is installed successfully ,click Activate Plugin.
5.SQUARE SETTINGS
- Go to Forms ???? Add New.
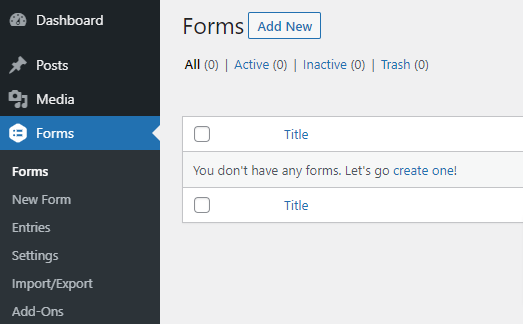
- Enter Form Title & Description.
- Click Create Form.

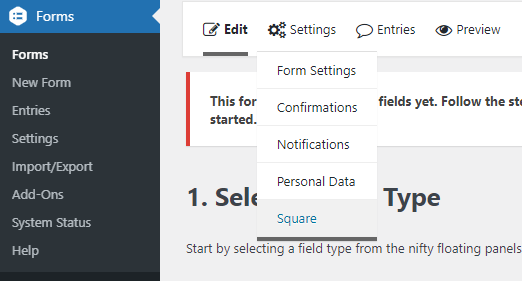
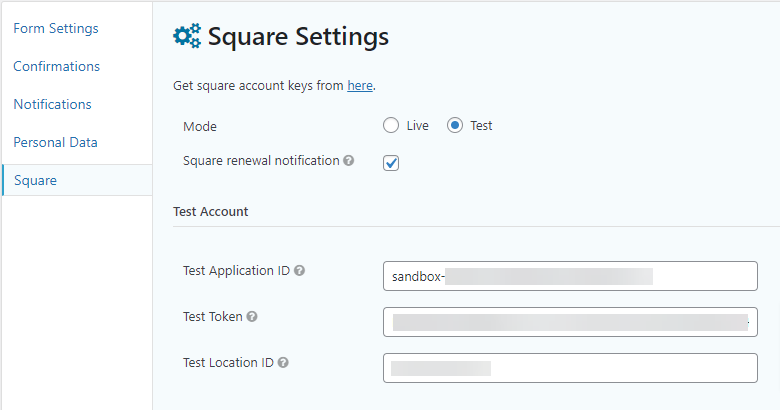
- Go to Settings ???? Square.
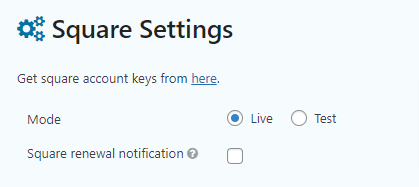
- Select either Live Mode or Test Mode.
- Enable Square renewal notification option.
- If renewal notification is enabled, then admin will receive email regarding access OAuth expires, fails or renewed.
6.TEST MODE
- To get started Square account is required.
- Go to Square Developer: https://developer.squareup.com/apps
- Open or Create New Application.
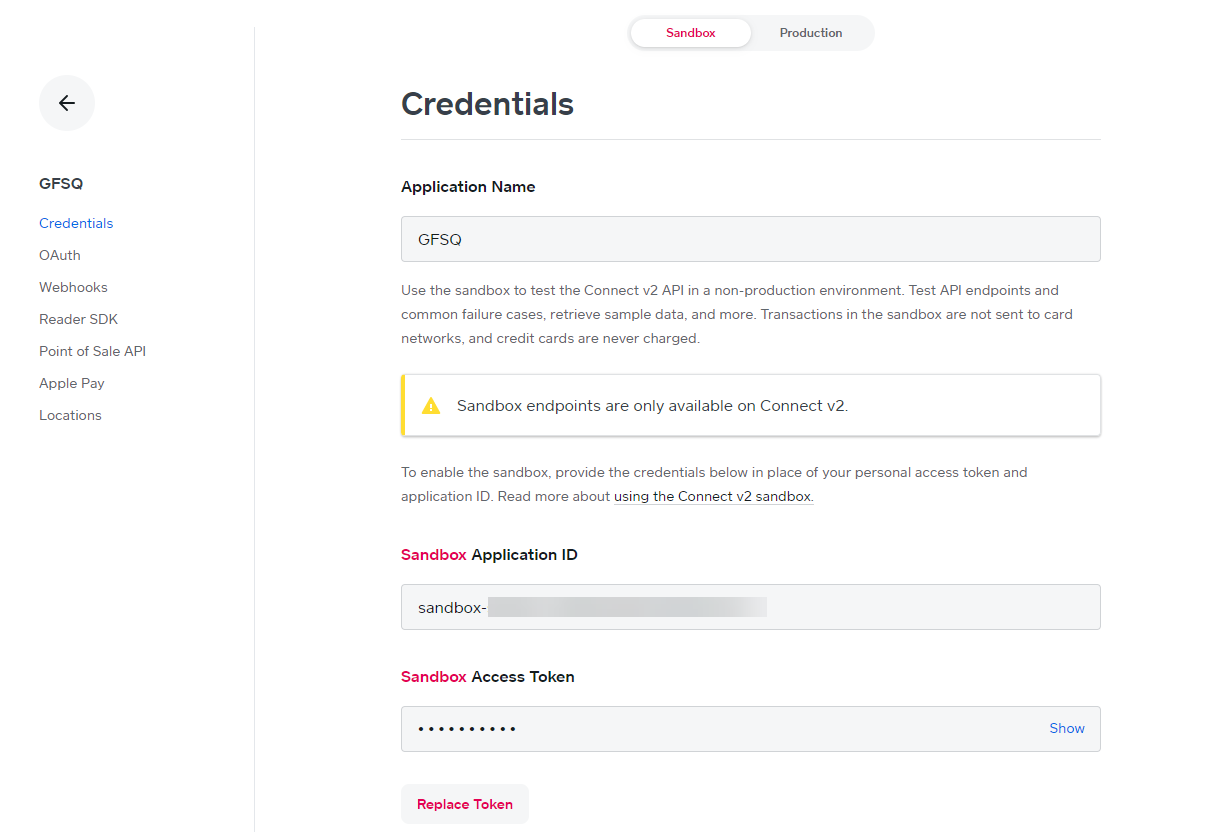
- You’ll find your Application ID & Access Token. Along with the Location ID. Make sure Sandbox mode is enabled.
- Get your Application ID and Access Token.
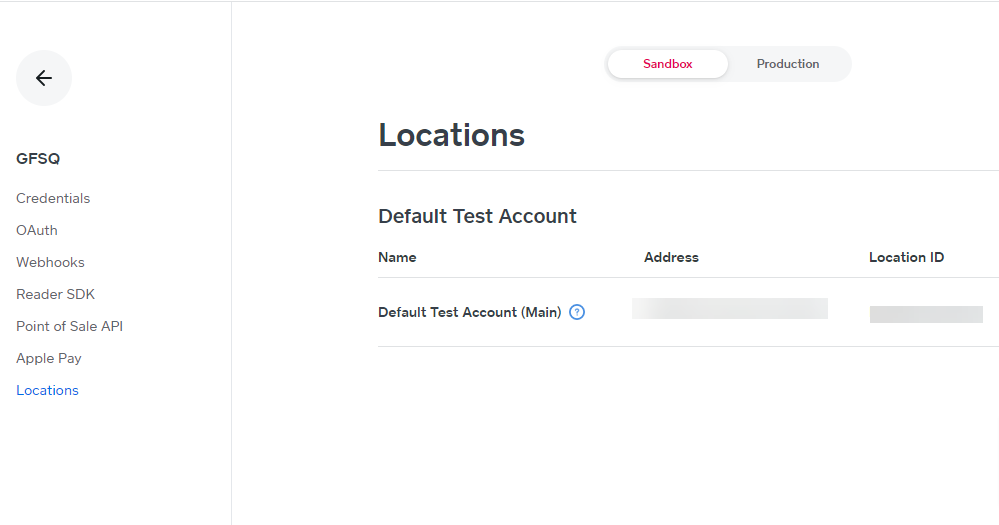
- Go to Locations to get Location ID.
- Now get back to your WordPress setup and Go to Square settings.
- Enable Test Mode.
- Enter Application ID and Access Token.
- Enter Location ID.
- Update Square Settings.
7.LIVE MODE
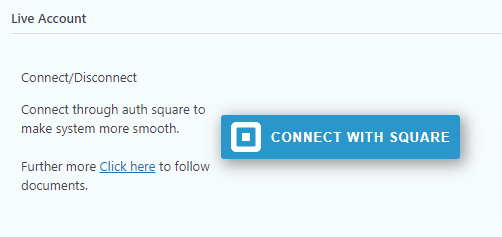
- Go to Forms Settings ???? Square.
- Click CONNECT WITH SQUARE.
- You’ll be redirected to Square Website
- Login with your Square account.
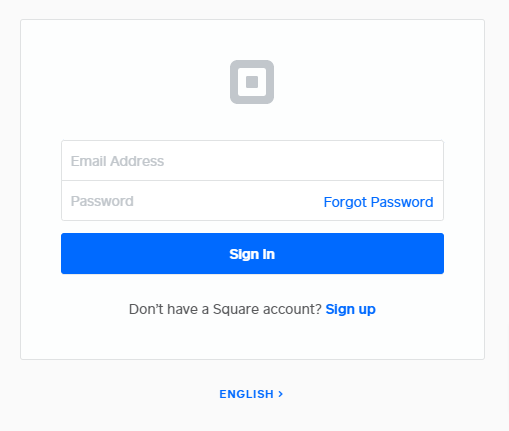
- Authentication Message will appear.
- Click Redirect Me.

- Select Location
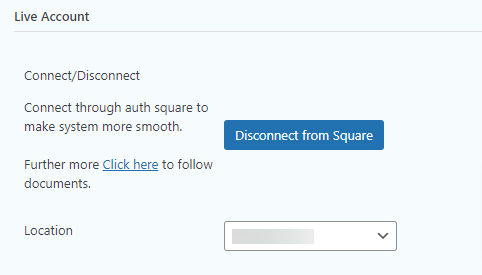
- Update Square Settings.
8.SQUARE CC FIELD
- Go to edit form.
- Click to Add Product Field & Square CC from Pricing Fields Box.

- Enter Field Label and Description.
- Enter Card Labels.
- Update Form.

9. Transaction Notes
- You can also send form fields in transaction notes.
- Go to Forms Settings ???? Square.
- Select the form fields you want to be sent.
- Update Square Settings.

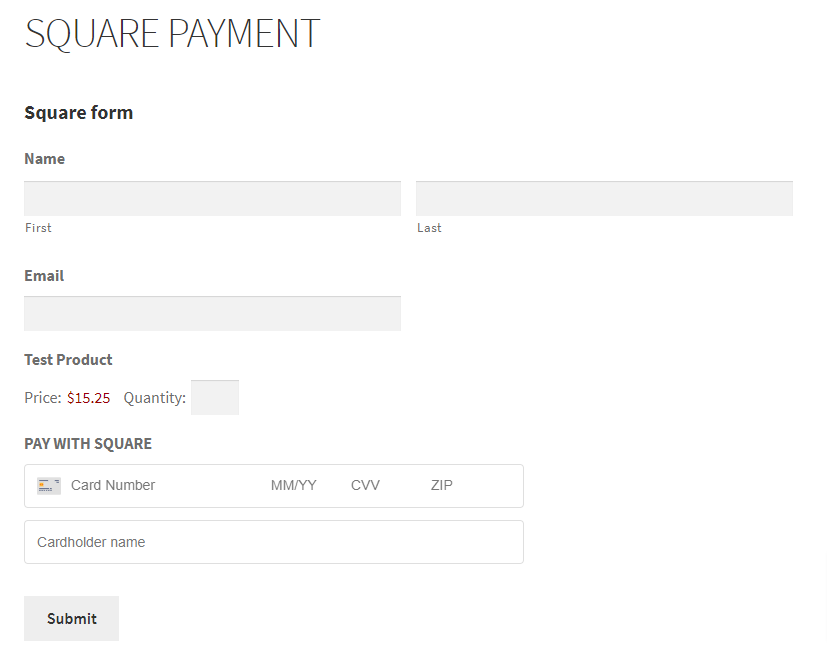
Front End example form:
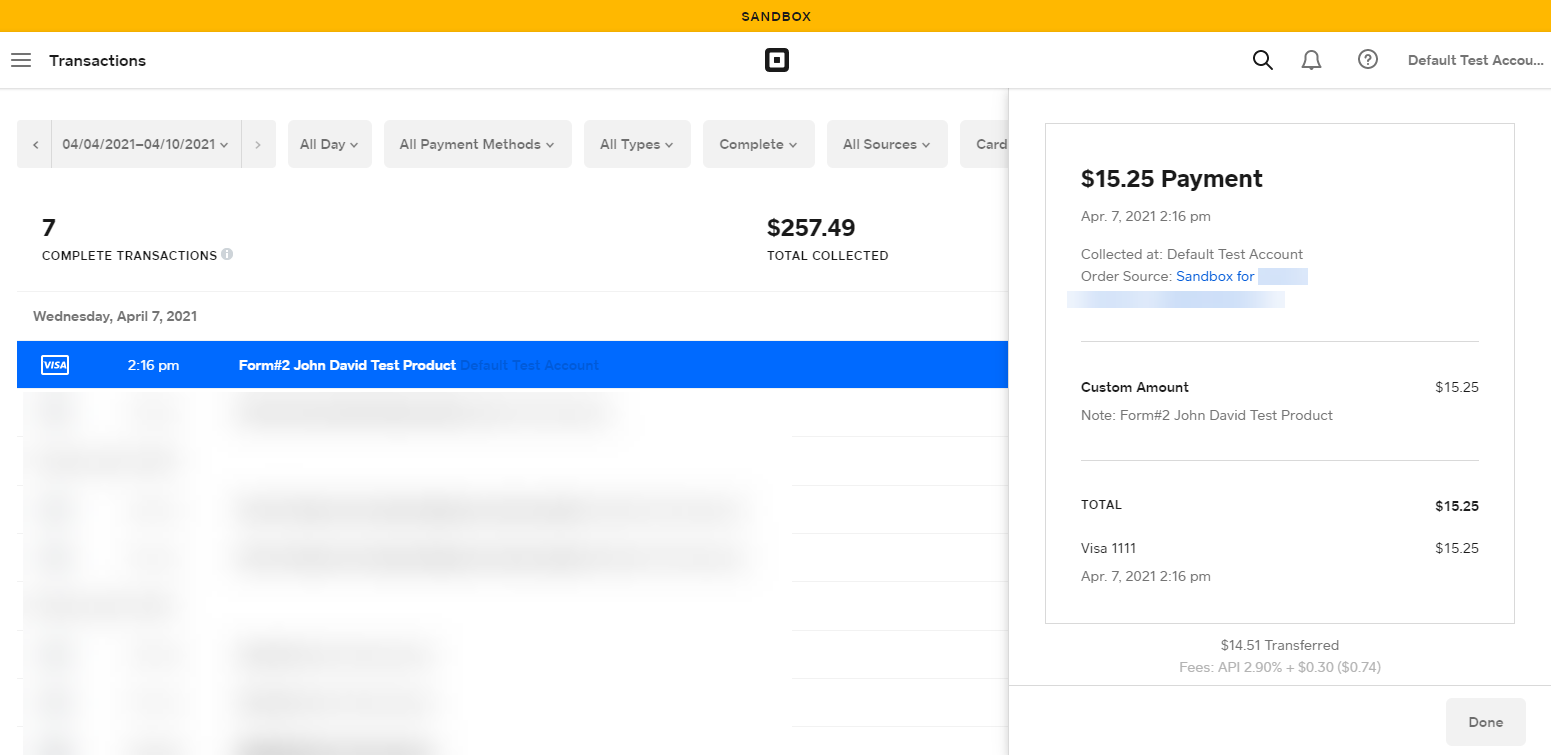
Transaction in Square with transaction note:
Help Guide Powered by Documentor