

1.INTRODUCTION
Google SpreadSheet In Gravity Forms is a Gravity Form Add-on that helps you to send Gravity Forms data on Google Spreadsheet. Once the user submits the form, connect each gravity form with its own Google Spreadsheet to manage data. You can link all Gravity forms to individual Google Spreadsheets.
2.ADDON FEATURES
- Send your Gravity Forms Data to Google Spreadsheet after submission of forms on your site by the user.
- Each Gravity form has its own separate Google Spreadsheet
- Once users submit forms, all data will be added to the selected Sheet as a new row for each field. Also select fields in the backend which you want to sync on the Spreadsheet.
- All data will be listed horizontally on a sheet.
3. HOW TO GET CLIENT ID AND CLIENT SECRET ID FROM GOOGLE DEVELOPERS CONSOLE
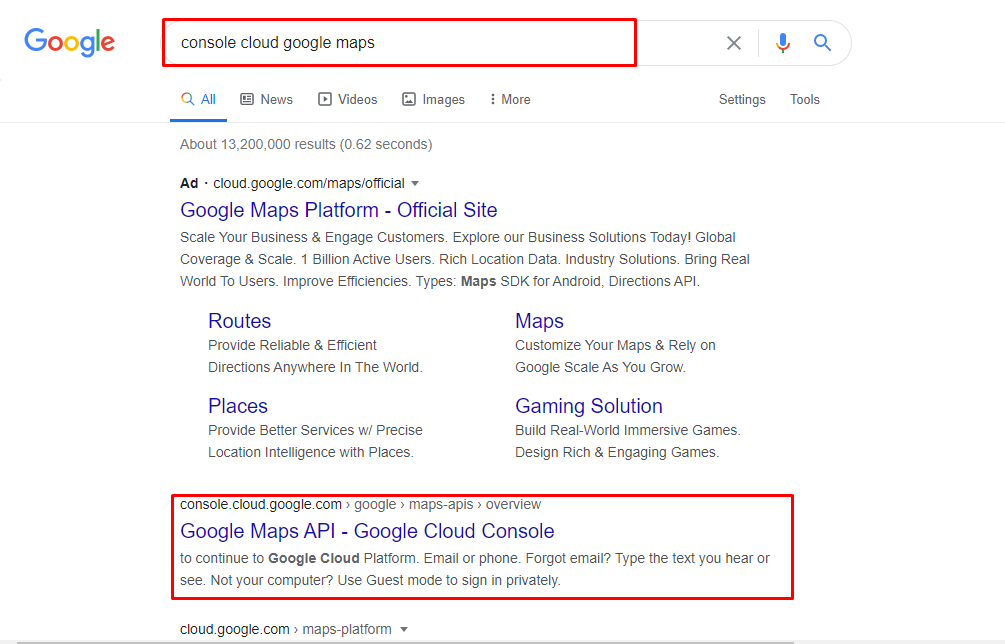
- Go to console.cloud.google.com
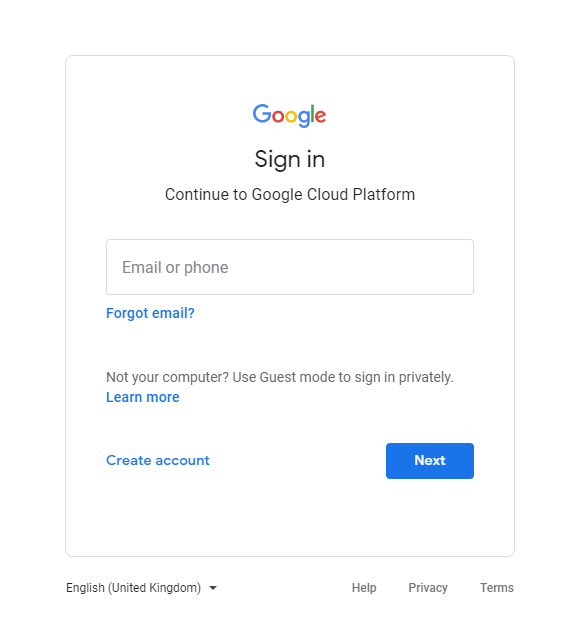
- Log in with your Google account.
- After logging in, Select a Project or create a new project.
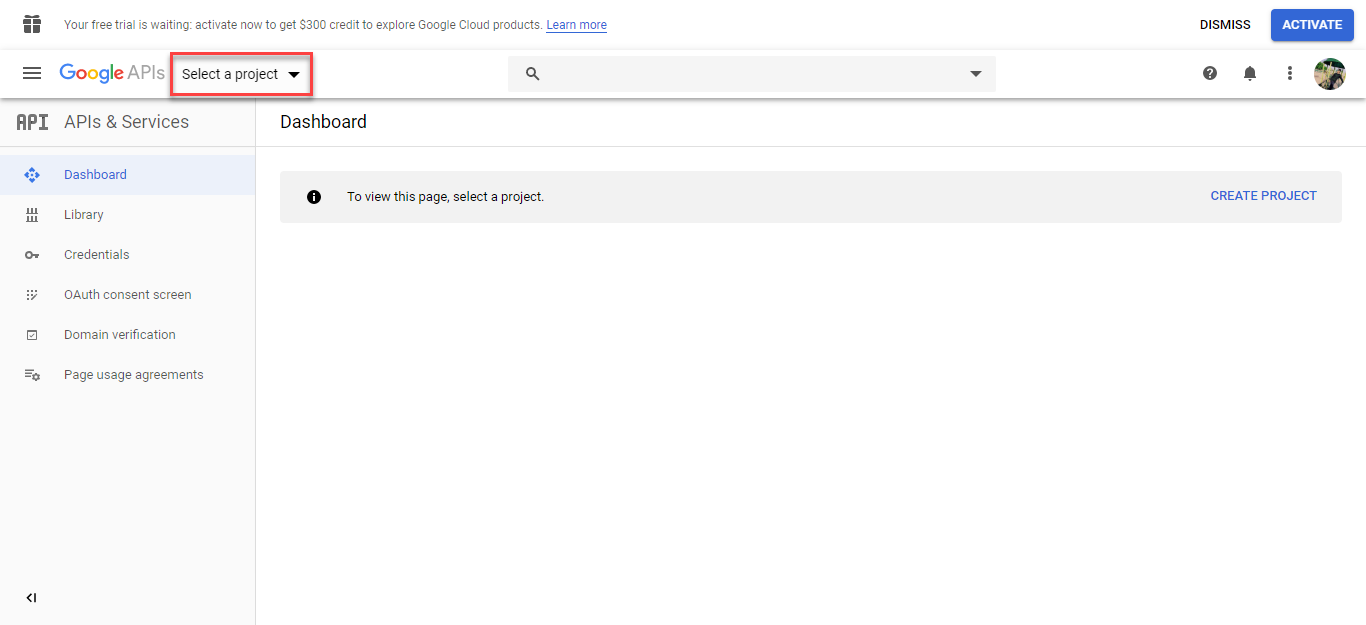
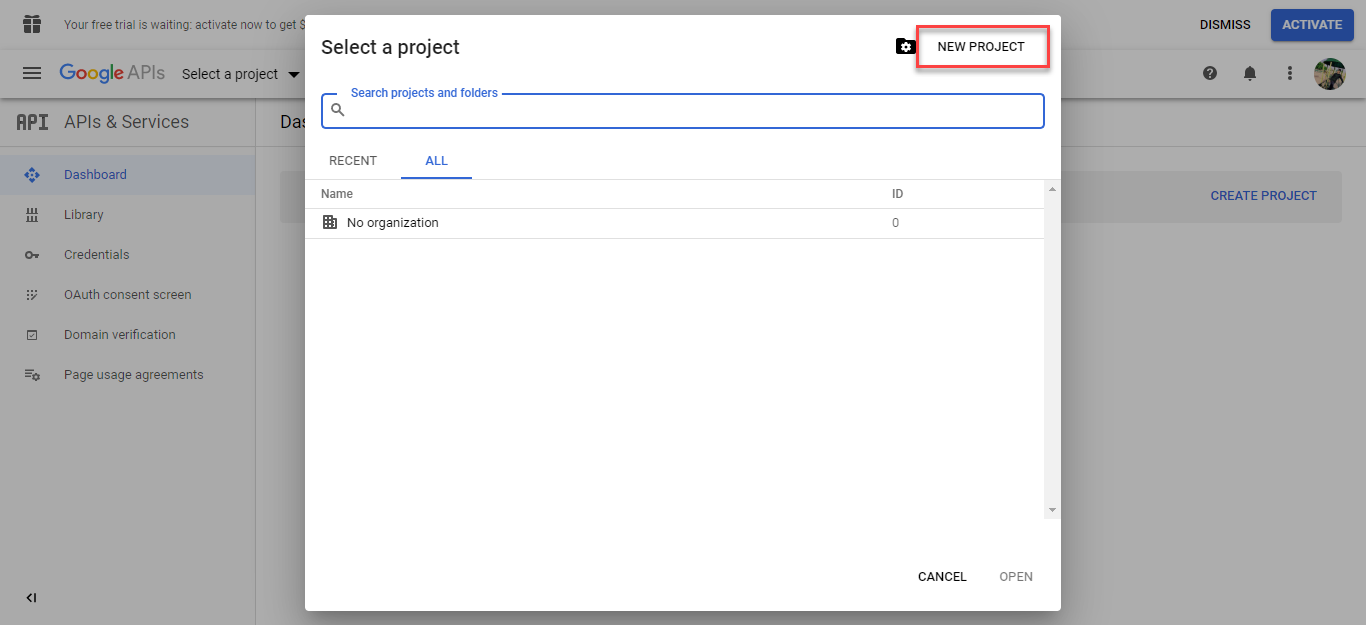
- Click on the option “Select a project”, after which a window will pop up. Then, click on the “New Project” option or select an existing project if it exists.
- Add your project name.
- Browse your location OR choose the option, “No Organization”.
- Click on the “Create” button.

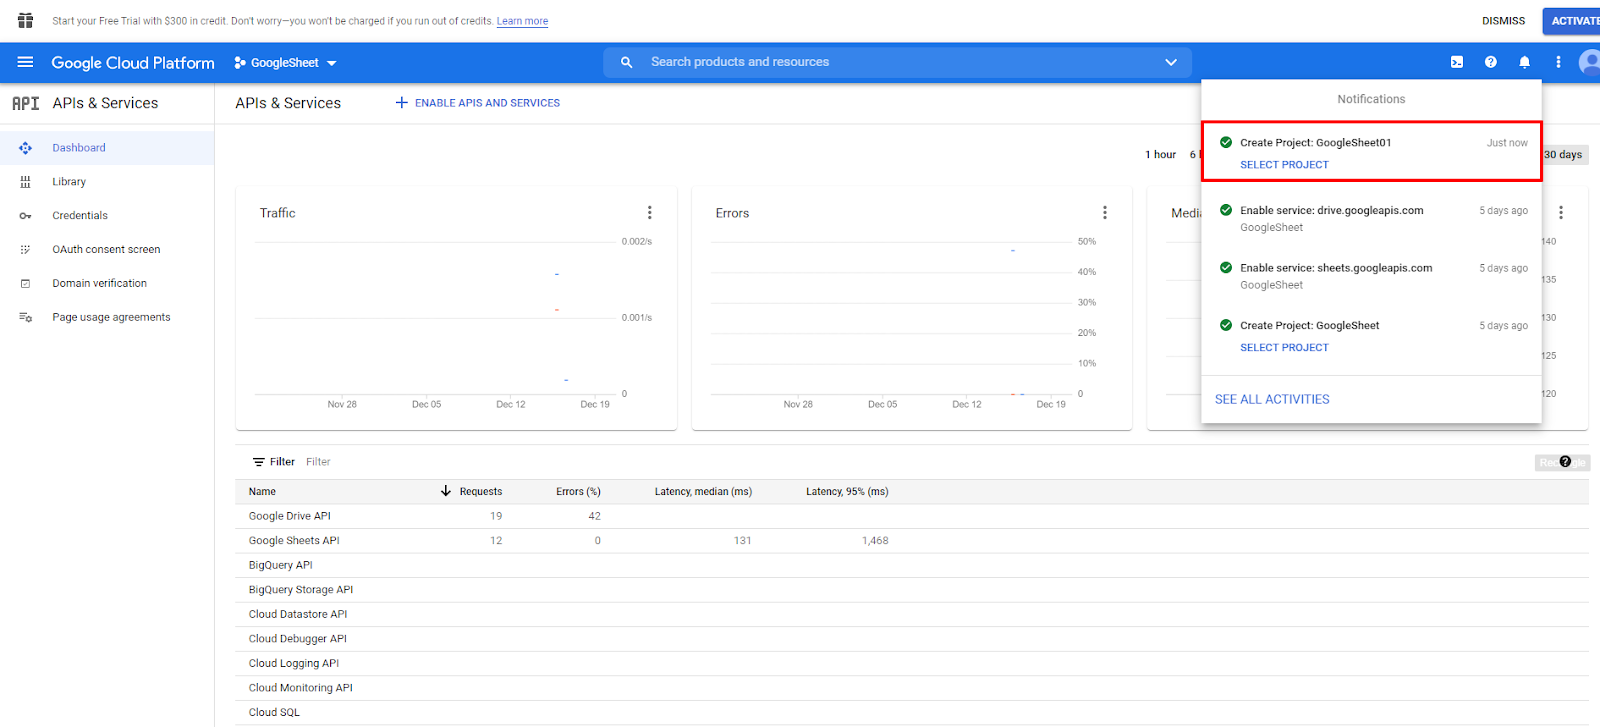
- After creating a new project click on the notification bell icon and select your created project.
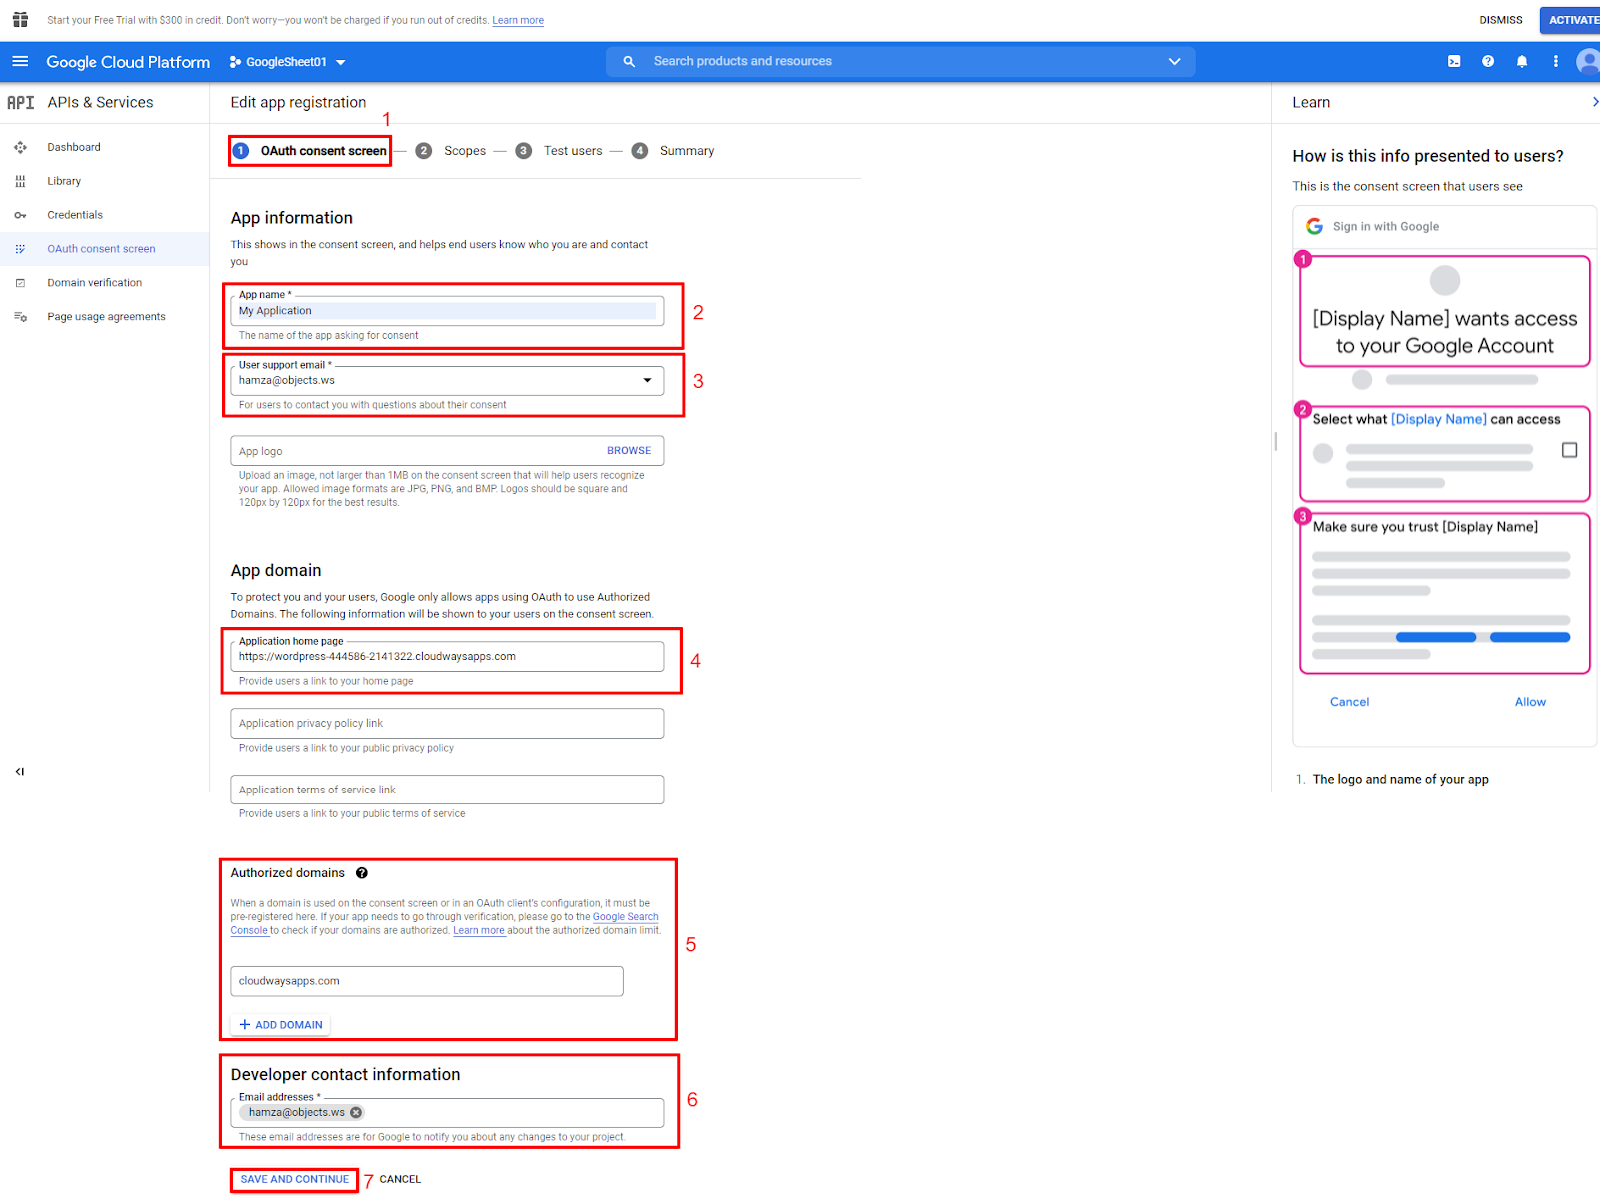
- Navigate to the left and click on “Oauth Consent Screen”.

- Select the “External” radio button.
- Click on the “Create” button.

- Add an “Application Name” in the field.
- Add an email address “User support email” in the field.
- Add a Website URL “Application home page” in the field.
- Add “Authorized Domains”.
- Add an email address “Developer contact information” in the field.
- Click on the “Save and continue” button.
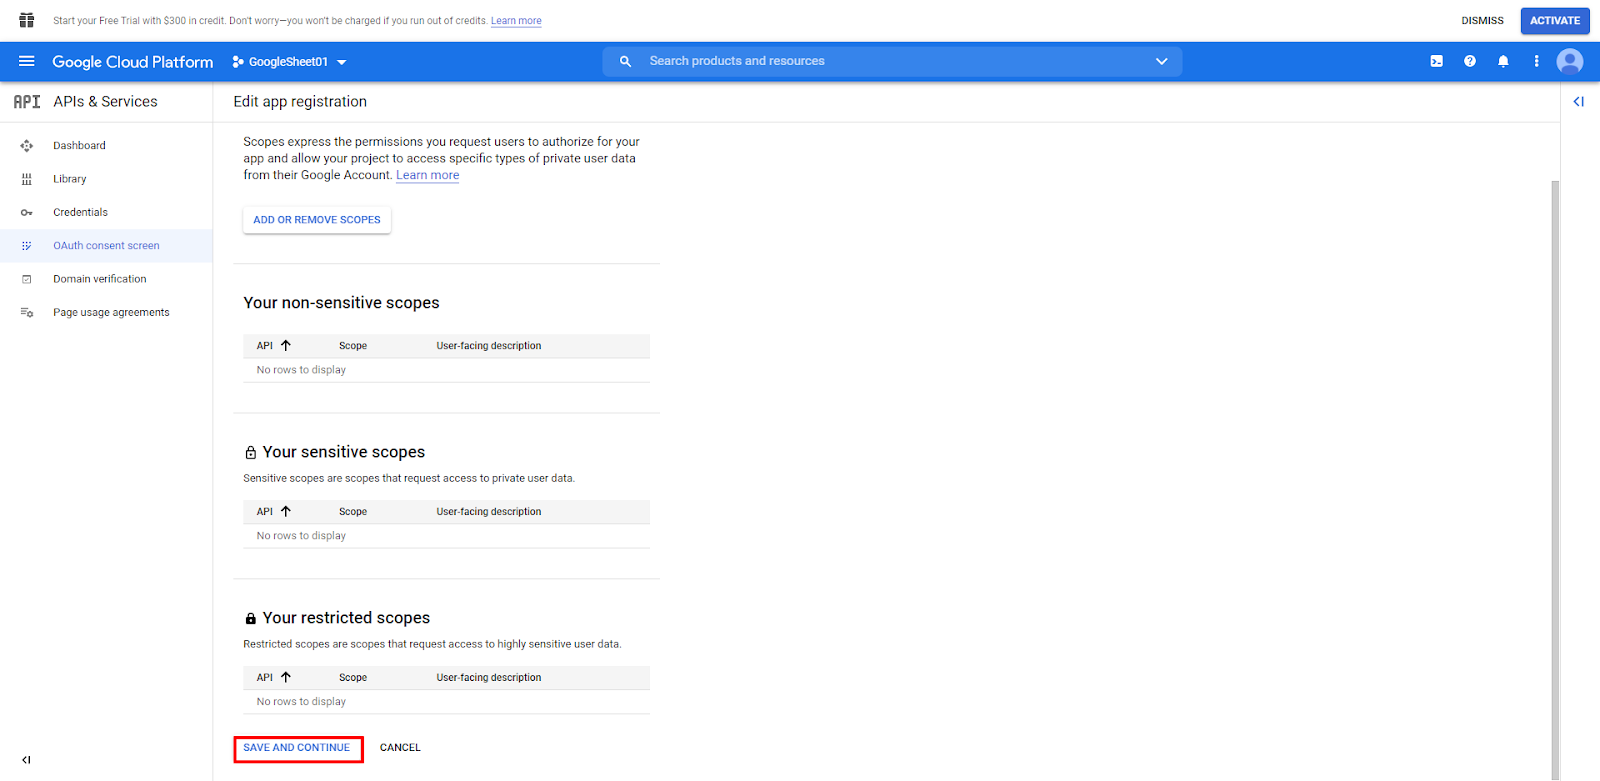
- Click on the “Save and Continue” button.
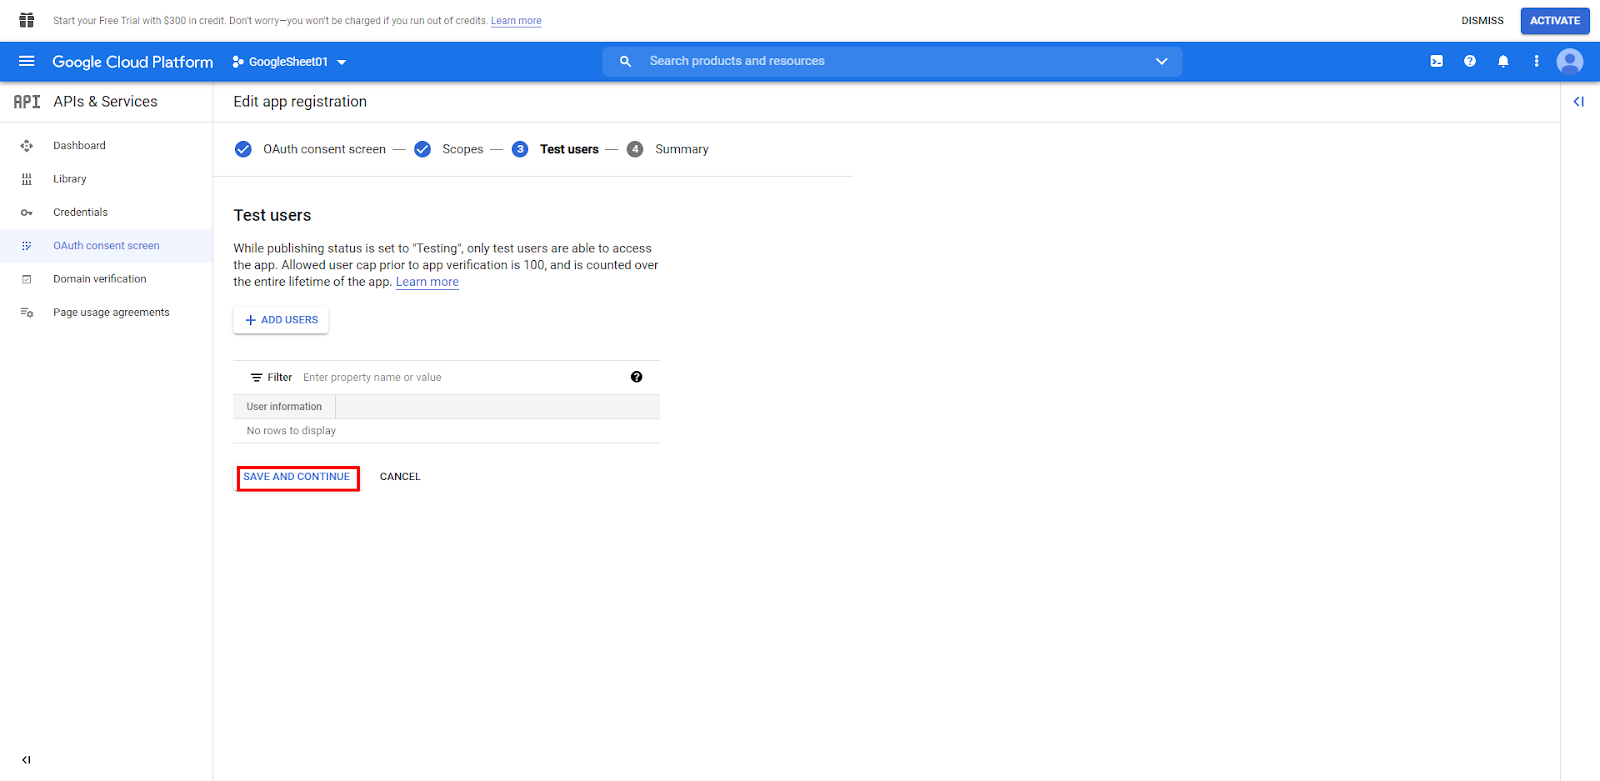
- Click on the “Save and Continue” button.
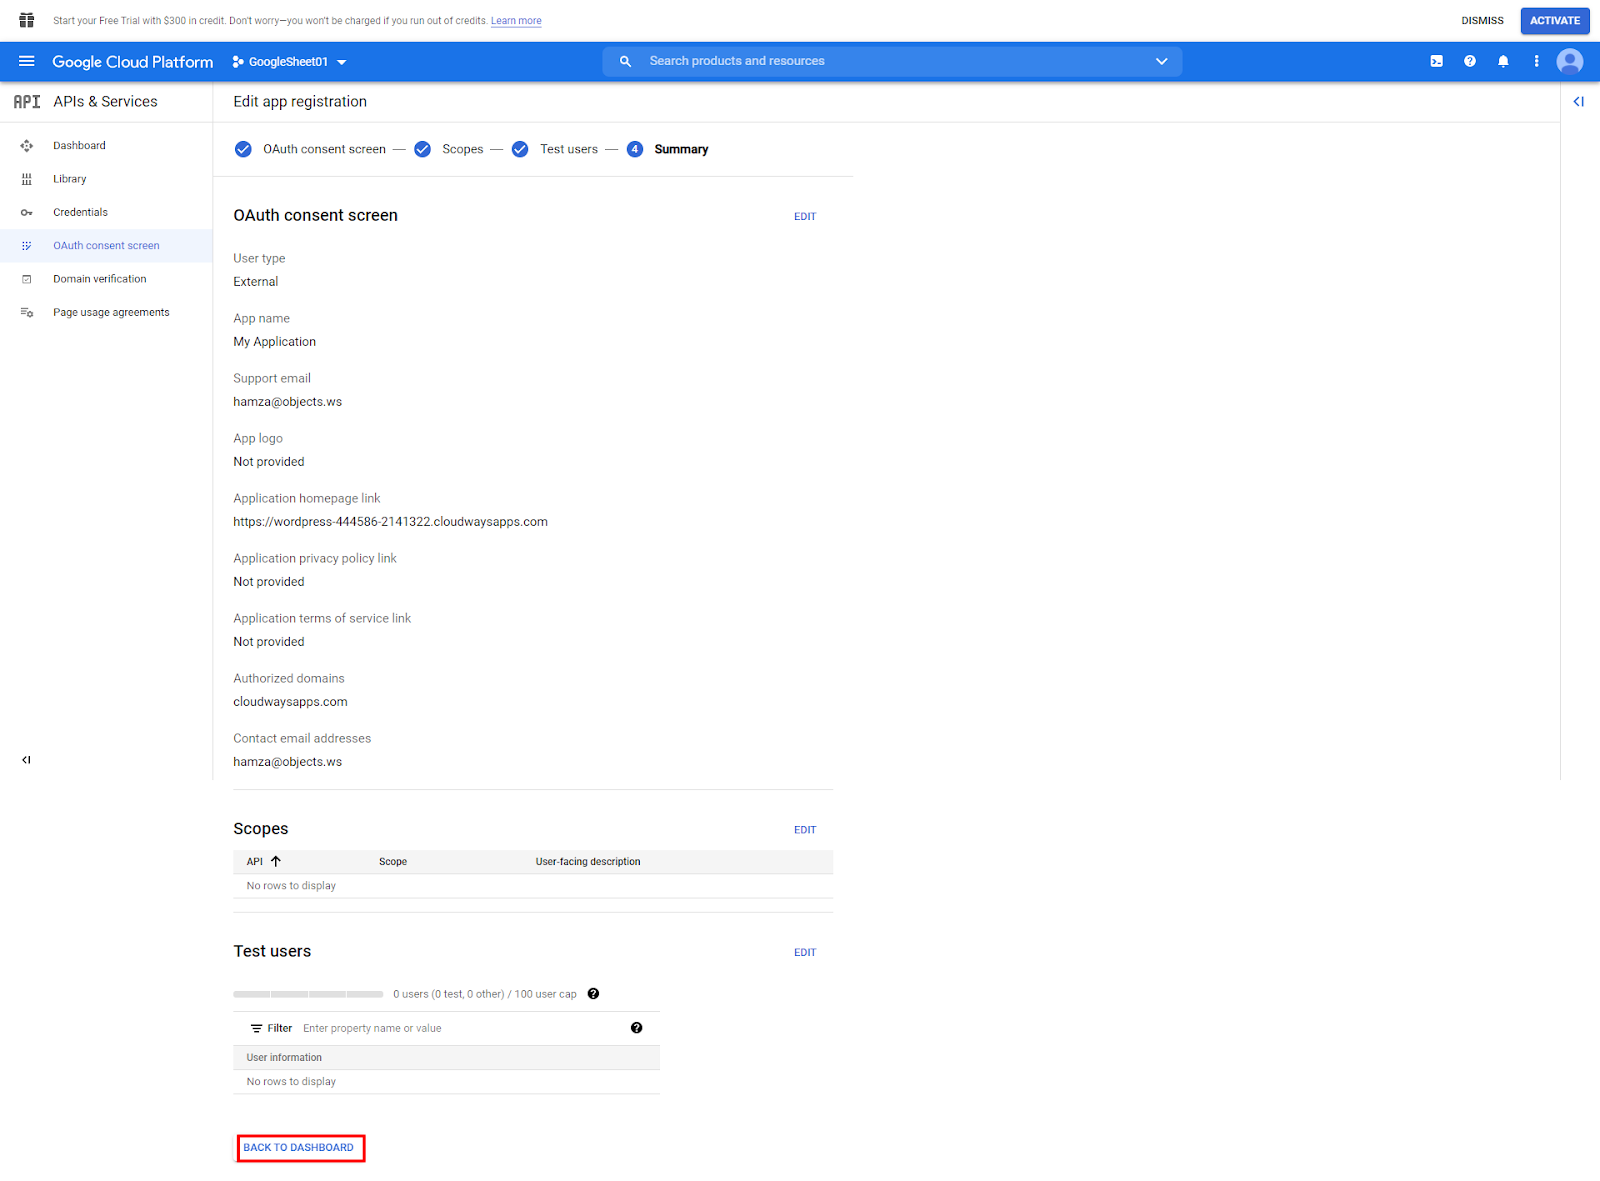
- Click on the “Back to dashboard” button.
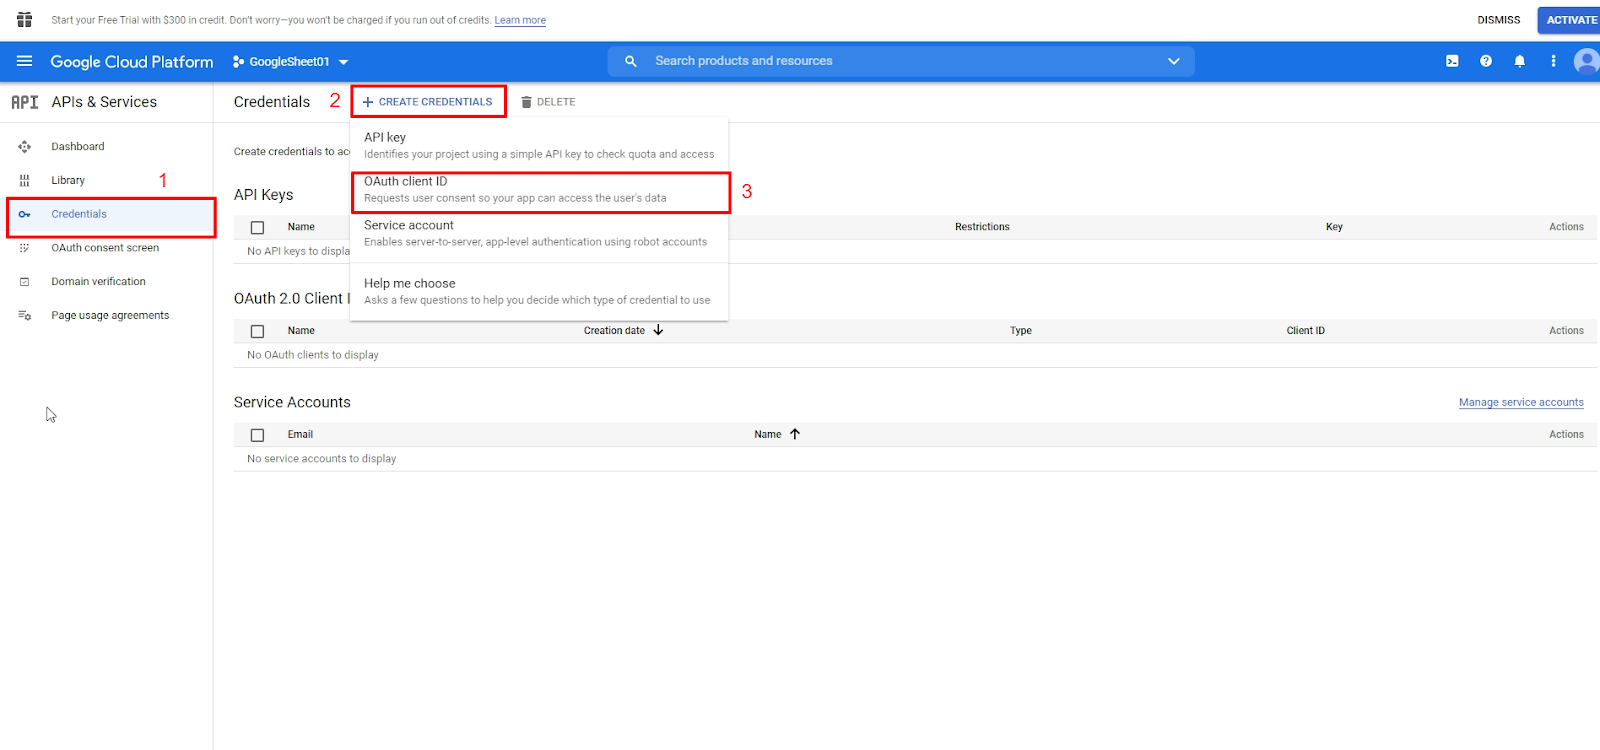
- Navigate through the menu on the left and click on “Credentials”.
- Click on the “Create Credentials” button.
- Select “Oauth Client Id” from the dropdown menu.
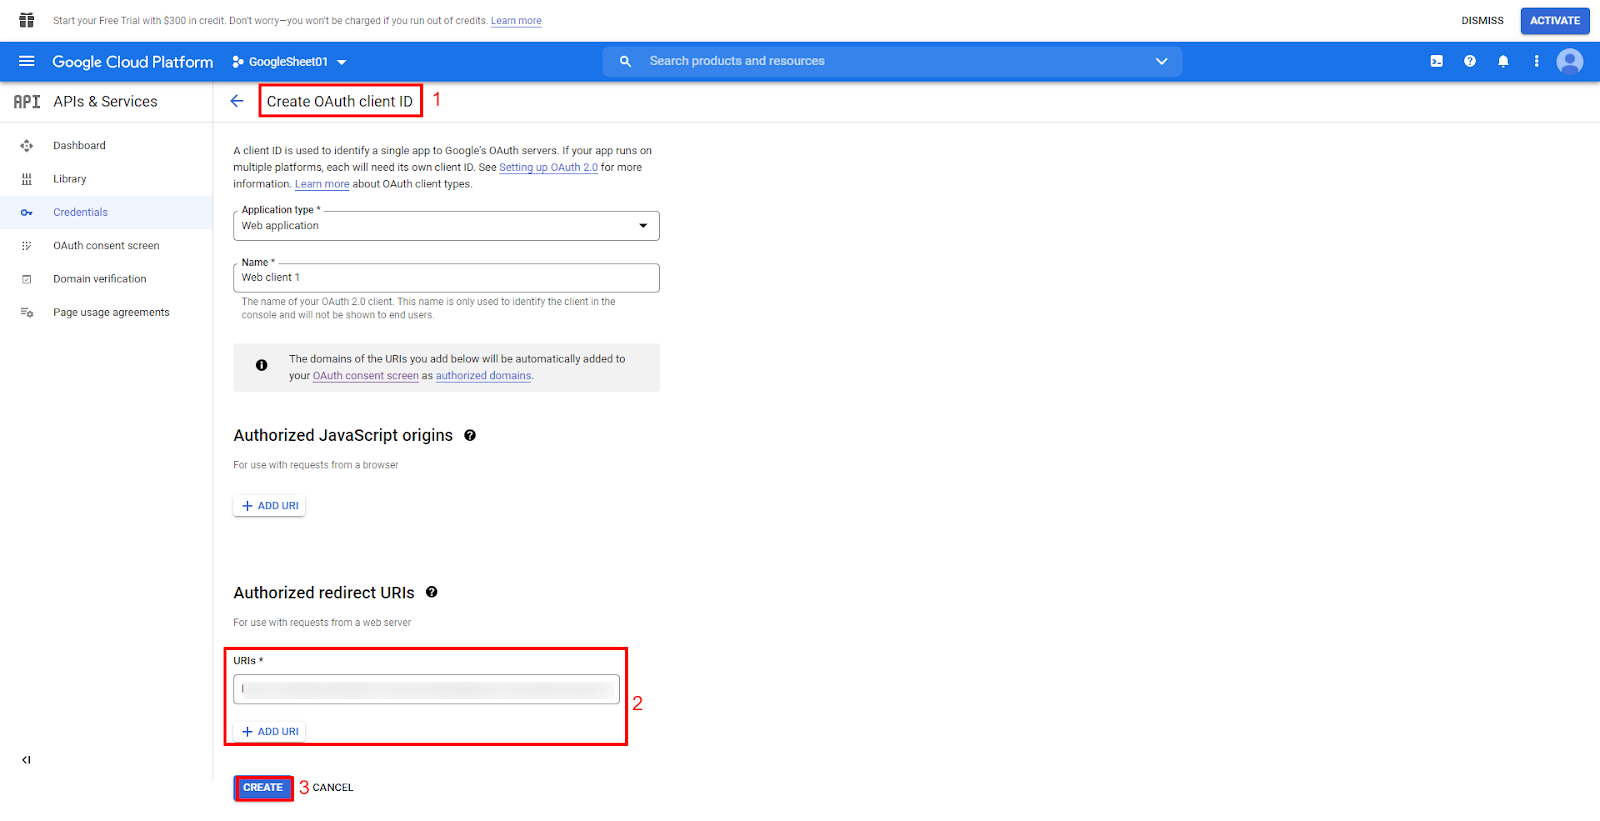
- Select the “Web Application“ from the Application type dropdown.
- You can get the redirect URL from the WordPress Admin Dashboard -> Forms -> Settings -> Google Sheets and then copy the URL shown in the below screenshot.

- Paste an “Authorized redirect URLs” in this field.
- Click on the “Create” button.
- Copy “Your Client ID”.
- Copy “Your Client Secret”.

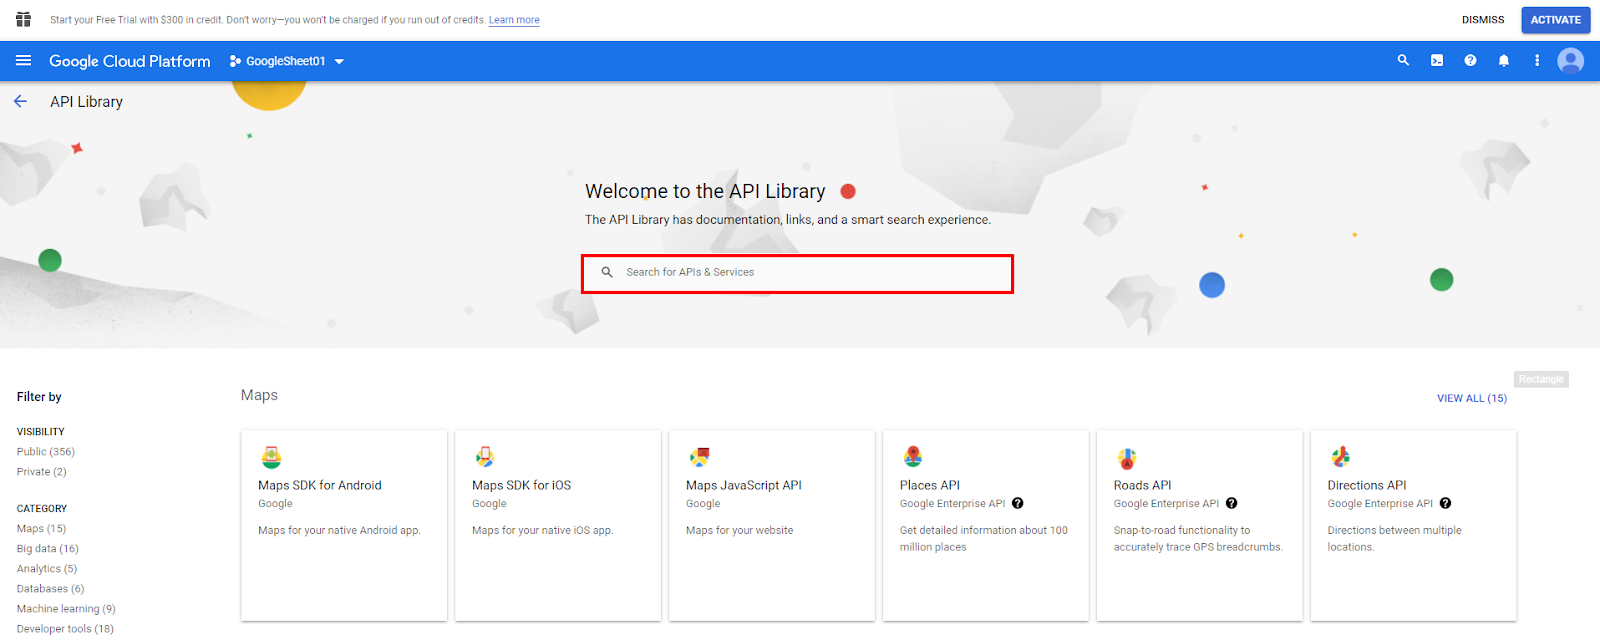
- Navigate to the “Library” in the sidebar.
- Search for “Google Sheets API” and “Google Drive API” one by one and Enable both libraries.
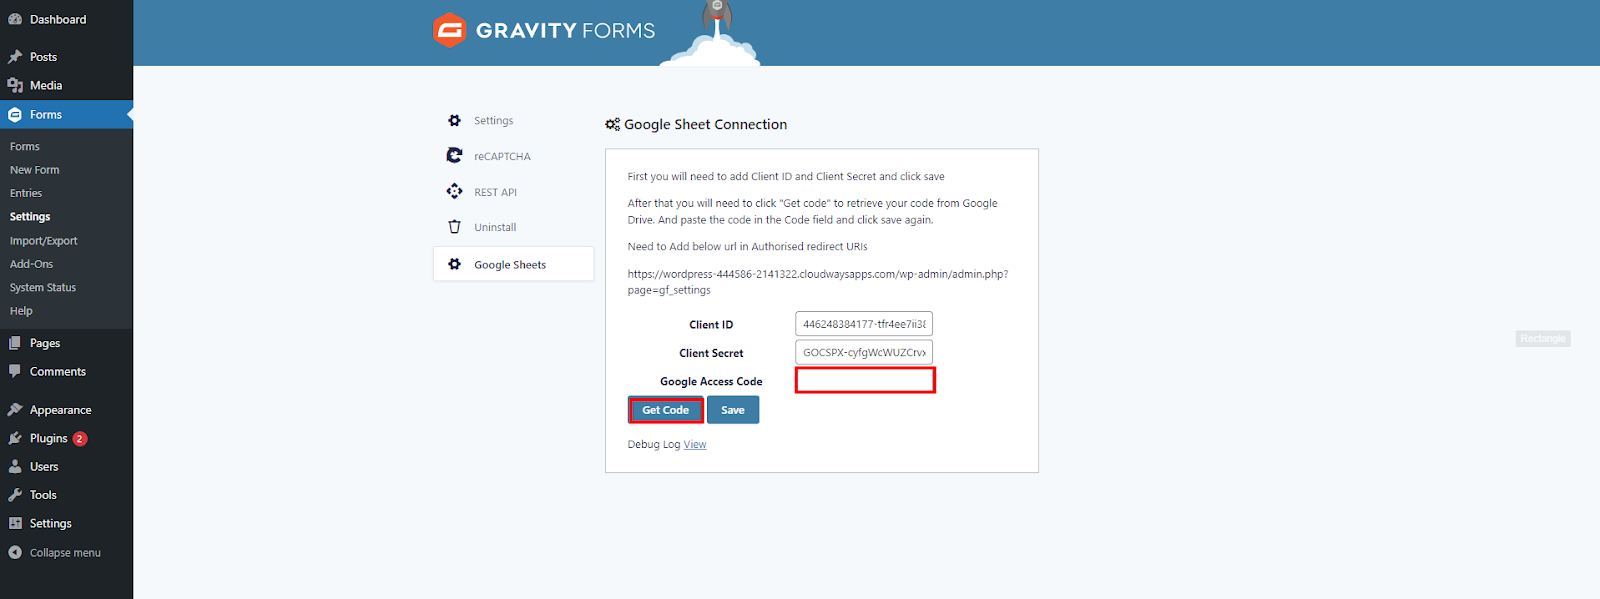
- Navigate to the “Forms” menu in the Admin Dashboard and click on “Settings”.
- On the left, go to “Google Sheets”.

- Paste “Client ID” and “Client Secret ID” in their respective fields.
- Click on the “Save” button.
Note: The Google Access Code field will remain disabled until you paste the Client ID & Client Secret ID.

- Click on the “Get Code” button.
- You will be redirected to the Google sign-in.
- Choose your Google account to connect with the “Gravity Form with Google Sheet Connector”.
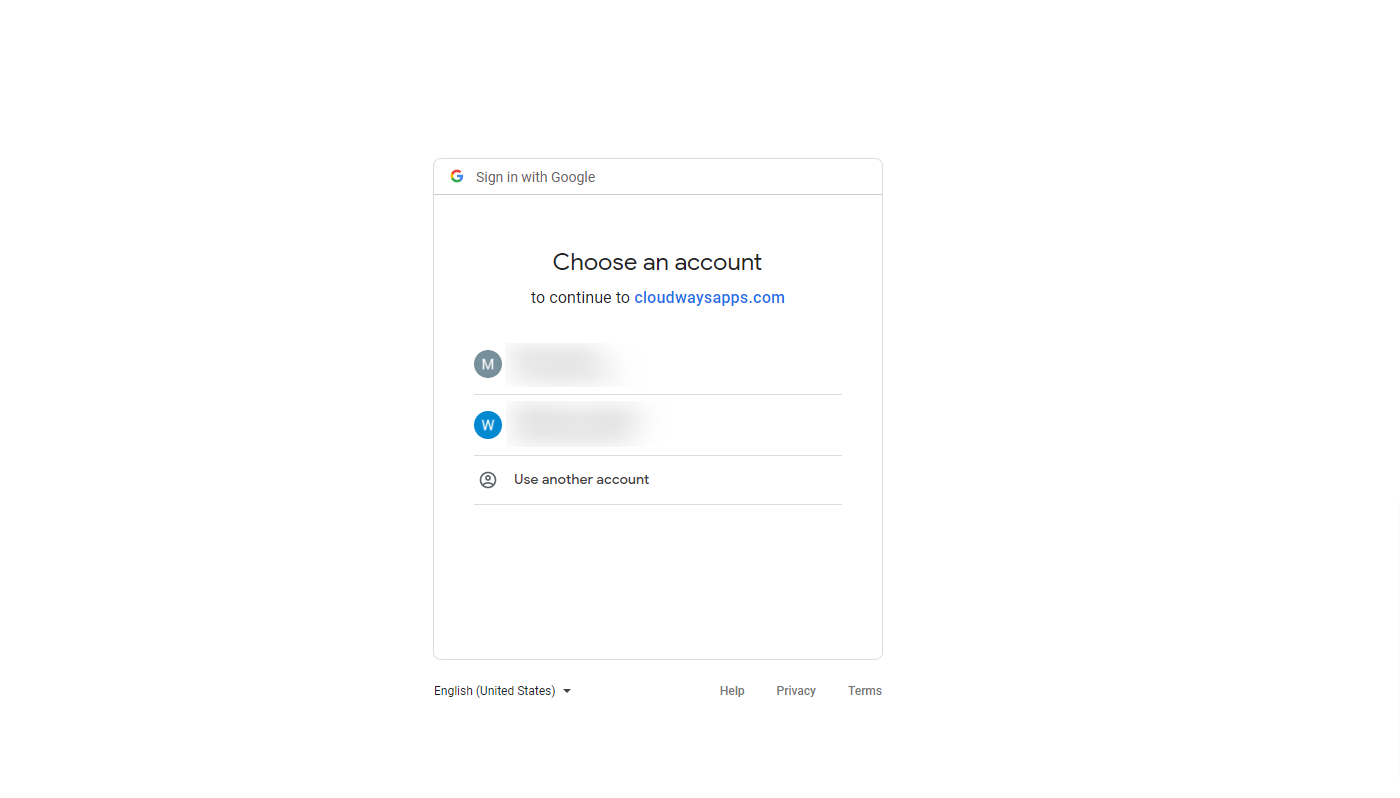
- Click on the “Allow” button.

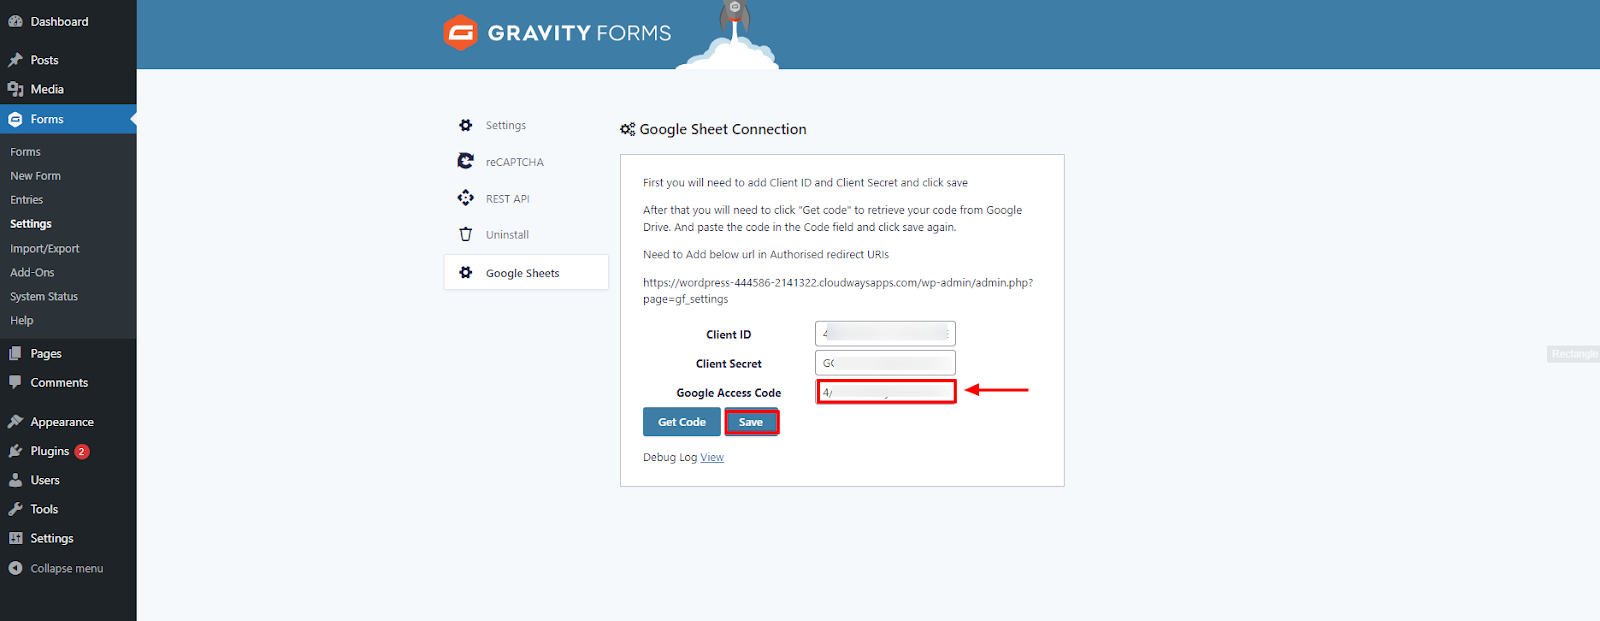
- The “Google Access Code” will automatically generate in the field.
- Click on the “Save” button.
GRAVITY FORM WITH GOOGLE SPREADSHEET CONNECTOR IS CONNECTED TO YOUR GOOGLE ACCOUNT.
4.HOW TO USE PLUGIN
Note: Google Sheet column name must NOT have space or Special characters.
Catch up with Easy Configuration in a few steps:
Step 1: Once you create forms it shows settings against each form you can integrate only one google sheet for one gravity form you can enable disable using google sheets for any form at any time.
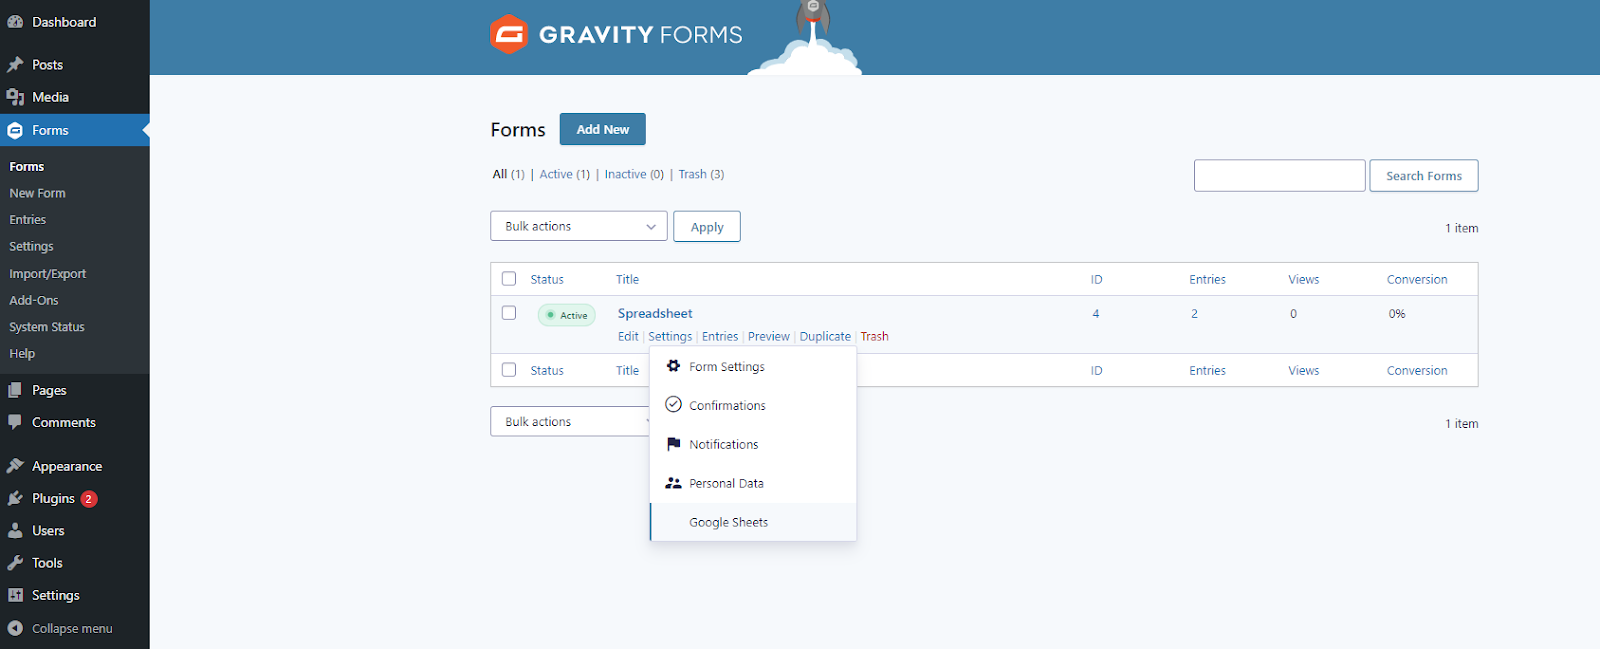
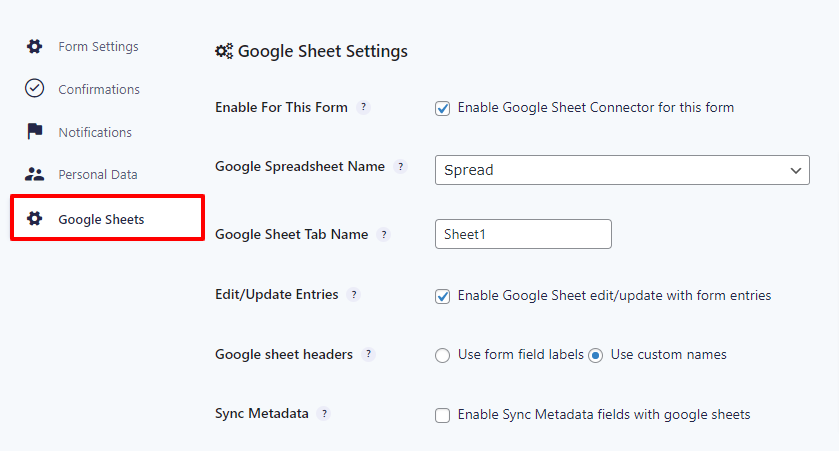
Step 2: Form Settings:
After creating a form you need to associate your form with your Google Sheet.
- Navigate to your Form.
- Go to the Settings -> Google Sheets.

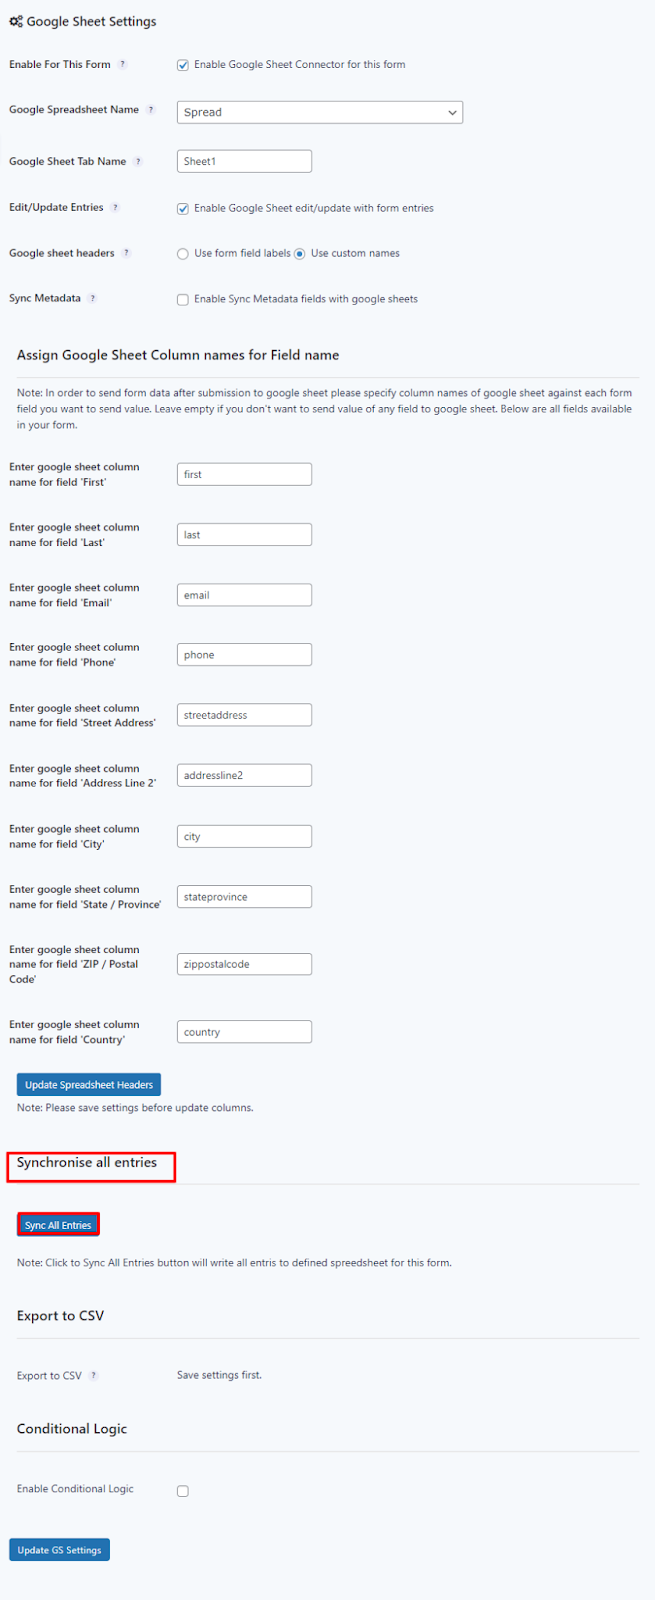
- Checkmark “Enable Google Sheet Connector for this form”.
- Provide “Google Spreadsheet Name” you created with the same email address.
- Provide “Google Sheet Tab Name”.
Note: Google Spreadsheet might contain multiple Tabs, Provide the Tab Name from which you want your data to access.
Step 3: Form Fields to Google Sheet Columns Names Connection.
- Select “Use custom names”
At this stage you will see below this section many fields, all are dynamic according to your form as you created in Gravity forms. All fields will be shown with labels against the text field to place the name of the google sheet column, export any form field to that google sheet column. It’s up to you whether you want to export whole form fields to google sheet or only a few fields.
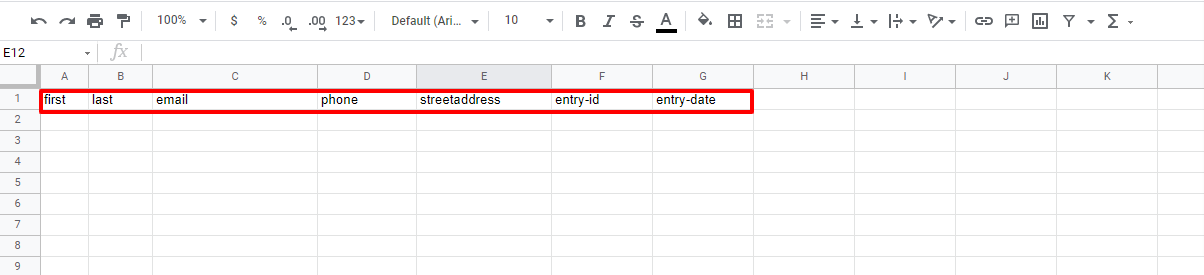
- Enter Header names.
- Click on Update GS Settings button.
- Click on Update Spreadsheet Headers.
Note: Google sheet column names must NOT have any space in between and also not contain special characters.

Google Sheets will sync all the headers of your respective form.

- Select the “Use form field labels” radio button.
- Click on the “Update GS Settings” button.
- Click on “Sync All Entries” button.
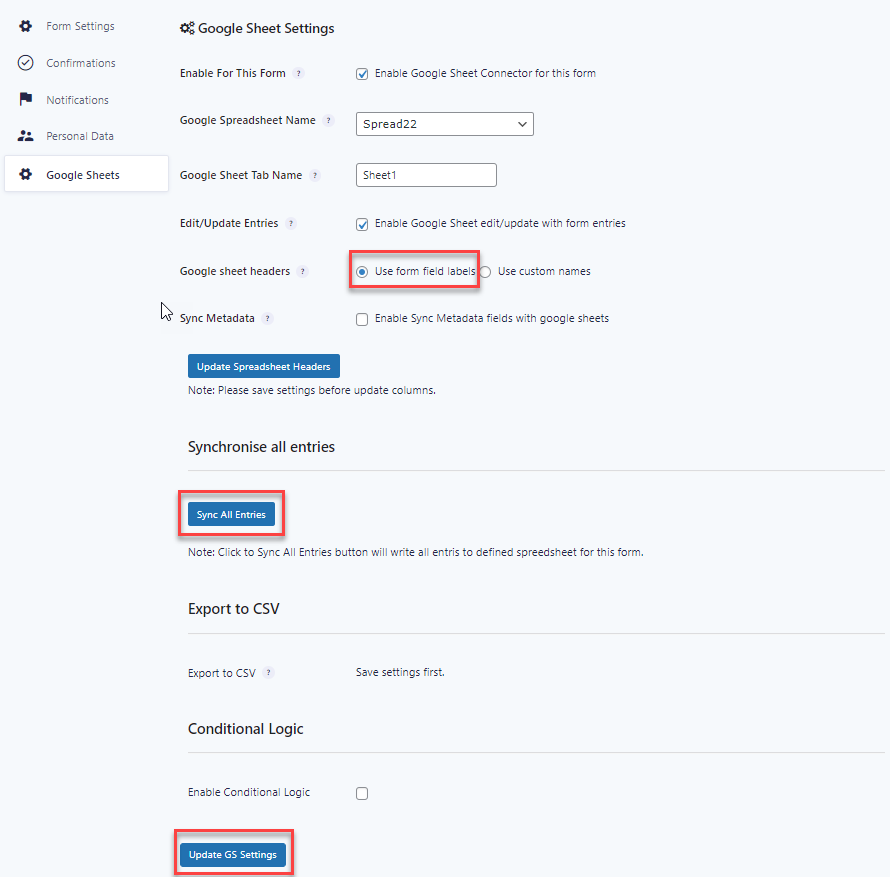
- Automatically sync Headers and field entries.
- Select the “Enable Sync Metadata fields with google sheets”.
- You can check to enable the fields you want to sync like Entry id, Entry Date, etc.
- Enter your custom header name in this field.
- Click on the “Update GS Settings” button.
- Click on “Update Spreadsheet Headers”.
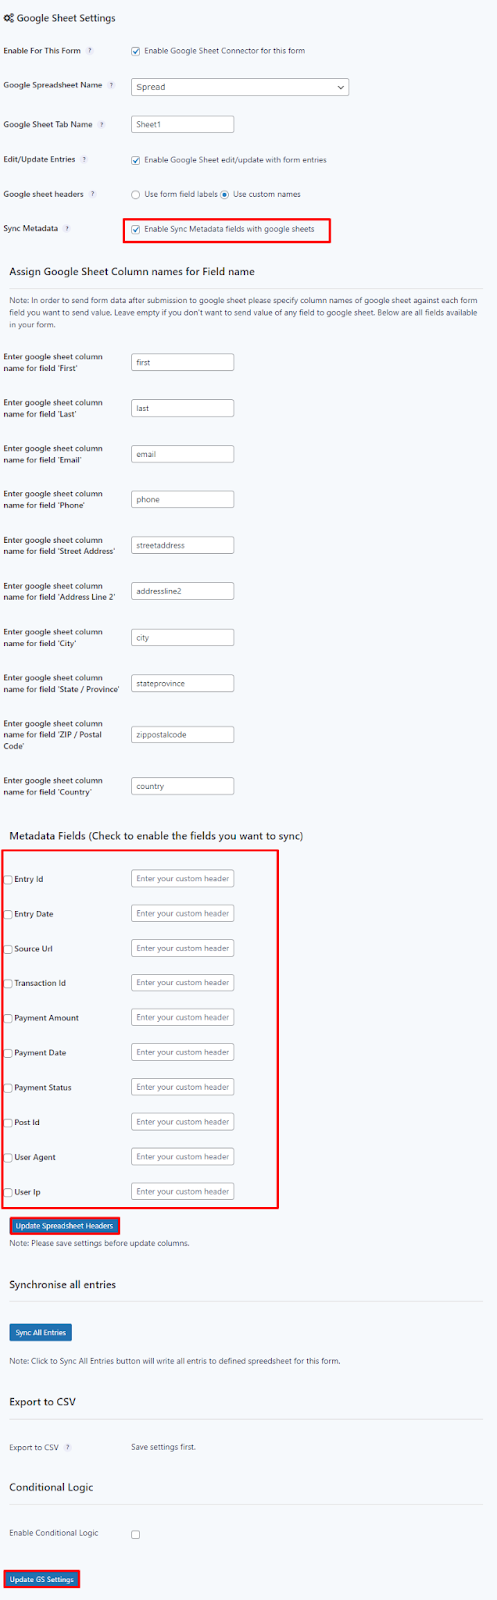
- All your headers will sync in respective SpreadSheet.
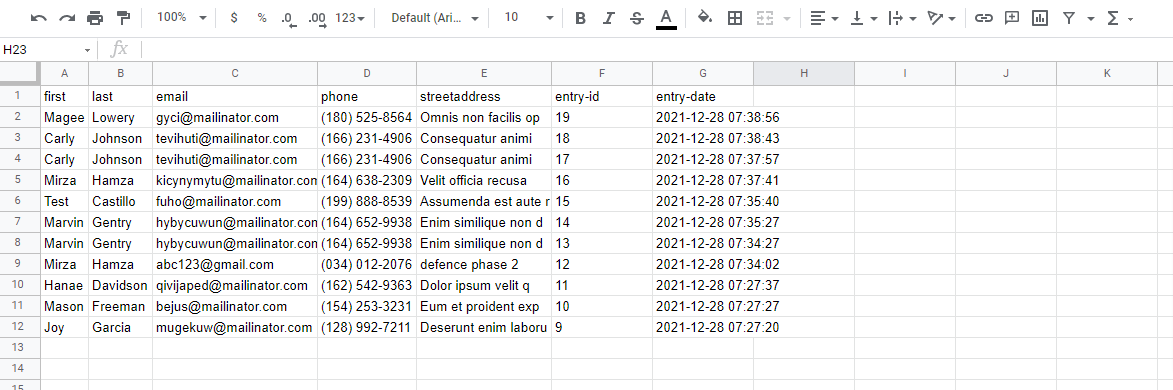
- Click on the “Sync all entries” button.
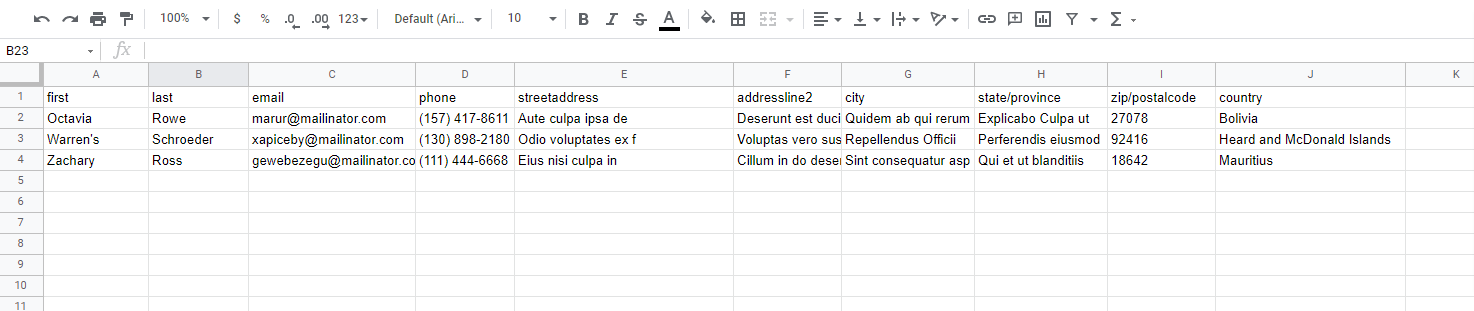
- When you sync, Google Sheets will sync all the entries of your respective form.
- You can see the spreadsheet to sync all the fields.
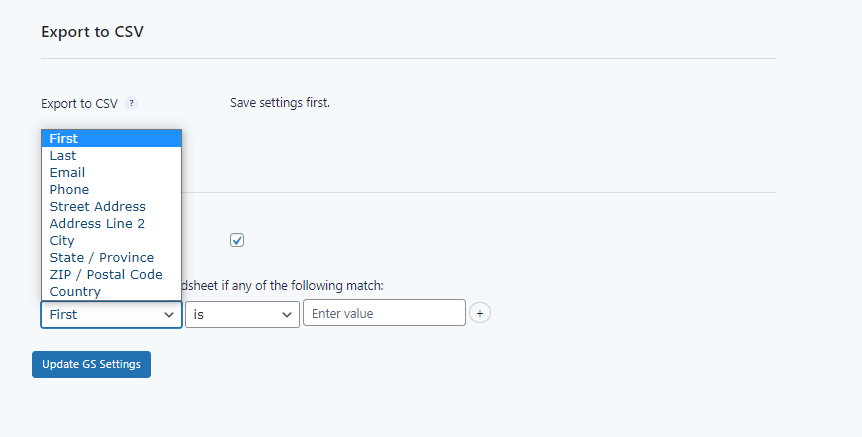
- You can “Enable Conditional logic”
- If you can set the conditional login and then submit the form.
- Click on the “Update GS Settings” button.
Step 4: Sync all fields.
Follow this step to sync all the fields.
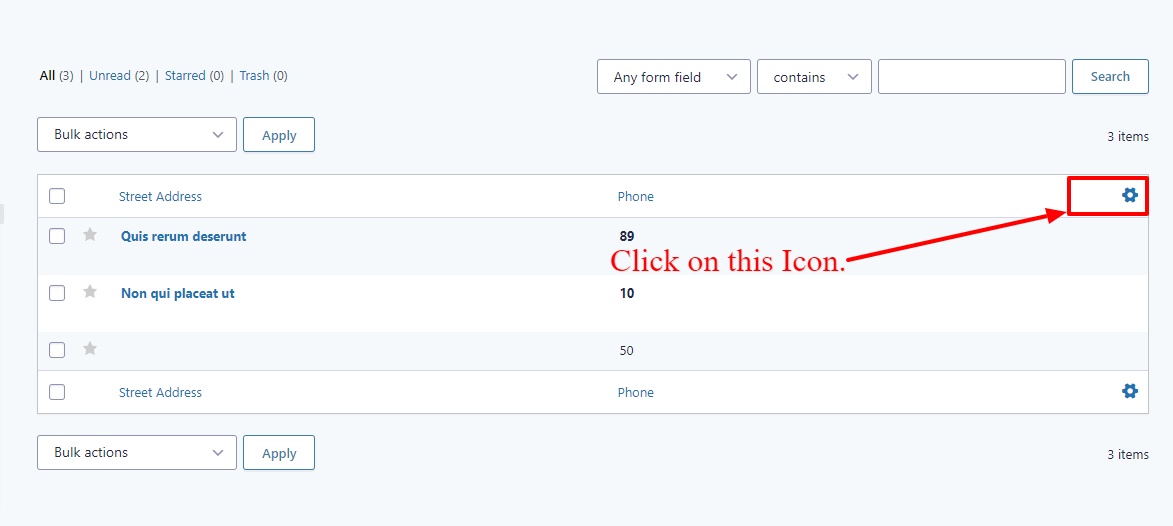
- Open the respective form and go to entries and click on the Settings icon.
- Drag your inactive fields from the inactive column and drop them into the active columns.
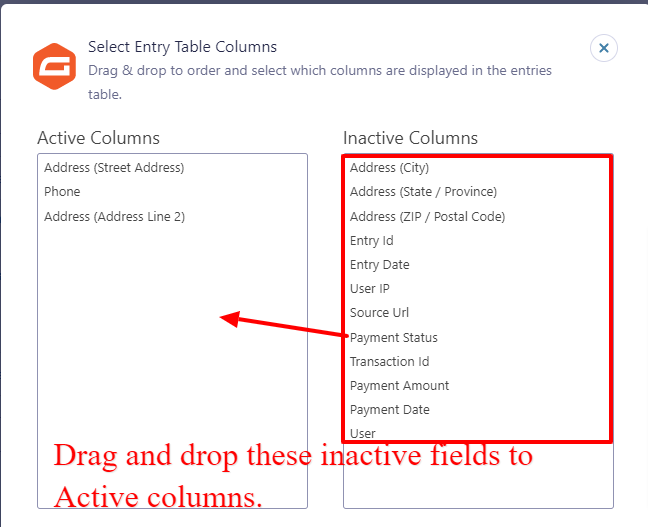
- After doing that hit the save button.
- Go to spreadsheet settings and update the sheet headers again.
Step 5: Error Log: After following the settings if you find out the plugin is not working properly then view the log for errors.
